Evaluating Basement Floor Paint Options for Concrete Slabs
Explore the best basement floor paint options for concrete slabs. Compare epoxy, acrylic, and polyurethane coatings for durability and moisture resistance.

The Moisture Test: Prerequisite for Any Painted Basement Floor
Before evaluating specific basement floor paint options, you must quantify the moisture vapor transmission rate (MVTR) of your concrete slab. Basements are subterranean, meaning the concrete is in constant contact with surrounding soil. If hydrostatic pressure or capillary action forces moisture upward, any non-breathable film-forming paint will blister and delaminate within months.
Professional contractors rely on the ASTM F1869 calcium chloride test or the ASTM F2170 relative humidity probe test. For DIY applications, the ASTM D4263 plastic sheet test provides a baseline. Tape a 16x16 inch square of 4-mil clear polyethylene tightly to the concrete and leave it for 72 hours. If condensation forms under the plastic or the concrete darkens, your slab has a high MVTR. Standard epoxies require an MVTR of less than 3 to 5 lbs per 1,000 square feet per 24 hours. If your slab exceeds this, you must either use a breathable coating or apply a specialized moisture-mitigating epoxy primer before the topcoat.
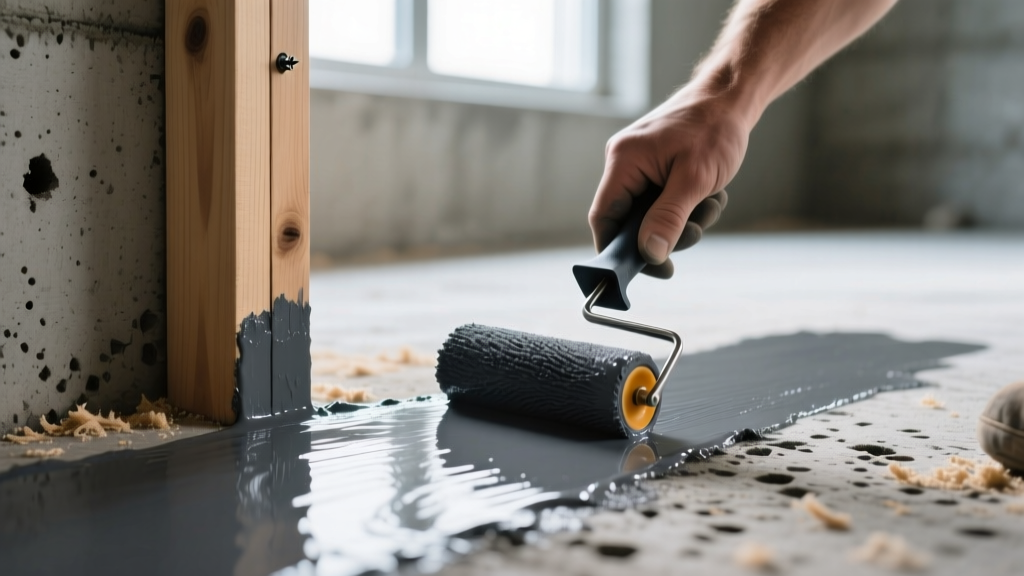
Comparing the Top Basement Floor Paint Options
The term 'paint' is often used colloquially to describe any liquid-applied floor coating. However, the chemical composition dictates the performance, lifespan, and cost. Here is a technical breakdown of the primary coatings used on basement slabs.
100% Solid Epoxy (The Heavy-Duty Standard)
True 100% solids epoxy consists of a bisphenol-A resin and a polyamine hardener that chemically crosslinks without releasing volatile organic compounds (VOCs) or water during the cure. Unlike the water-based epoxy kits sold in big-box stores—which contain up to 50% water and shrink significantly as they dry—100% solids epoxy maintains its wet-film thickness. It builds a durable, 10-mil to 16-mil thick shell that resists impact, chemicals, and heavy foot traffic.
- Material Cost: $1.80 to $2.50 per square foot.
- Cure Time: 12 to 24 hours for foot traffic; 7 days for full chemical cure.
- Limitation: Zero UV stability (will amber if exposed to direct sunlight from walk-out basement doors) and zero flexibility (will crack if the substrate shifts).
Polyaspartic and Aliphatic Polyurea (The Flexible Upgrade)
Polyaspartic coatings are advanced derivatives of polyurethane. They are highly valued in basement applications because they offer superior flexibility compared to epoxy, allowing them to bridge existing hairline cracks (up to 1/16th of an inch) without telegraphing through the surface. They are also UV-stable and cure rapidly, even in the cooler, damp ambient temperatures typical of basements (down to 35°F).
- Material Cost: $3.00 to $4.50 per square foot.
- Cure Time: 4 to 6 hours for foot traffic.
- Limitation: Extremely fast pot life (15-30 minutes), making DIY application highly stressful and prone to lap marks if not mixed and rolled efficiently.
Breathable Acrylic and Silicate Stains (The Damp-Slab Solution)
If your basement floor fails the moisture test and installing a subfloor or applying a moisture-blocking primer is out of budget, breathable acrylics or penetrating silicate stains are your only viable options. These products do not form a surface film; instead, they penetrate the concrete pores and react chemically to densify the surface while allowing moisture vapor to escape. While they will not provide the high-gloss, seamless look of epoxy, they eliminate the risk of peeling and dusting.
- Material Cost: $0.60 to $1.10 per square foot.
- Cure Time: 2 to 4 hours.
- Limitation: Low abrasion resistance; requires reapplication every 3 to 5 years in high-traffic zones.
Coating Comparison Matrix
| Coating Type | Cost / Sq Ft | MVTR Tolerance | Surface Profile Needed | Best Application Scenario |
|---|---|---|---|---|
| 100% Solid Epoxy | $1.80 - $2.50 | Low (< 5 lbs) | CSP-2 to CSP-3 | Dry slabs, workshops, heavy storage |
| Polyaspartic | $3.00 - $4.50 | Low to Medium | CSP-2 to CSP-3 | Finished living spaces, cracked slabs |
| Water-Based Epoxy | $0.80 - $1.20 | Low (< 3 lbs) | CSP-1 to CSP-2 | Light-duty storage, low-budget dry slabs |
| Acrylic / Silicate | $0.60 - $1.10 | High (Breathable) | CSP-1 (Clean) | Damp slabs, utility rooms, laundry areas |
Critical Failure Modes: Why Basement Floor Paint Peels
New concrete or slabs with active water intrusion often suffer from efflorescence—a white, powdery deposit of alkaline salts left behind when water evaporates. If you apply epoxy over efflorescence, the salts will crystallize beneath the coating, creating immense localized pressure that shatters the bond. Always test the concrete pH; it must be below 9.0 before applying any film-forming basement floor paint options.
Beyond moisture, improper surface preparation is the leading cause of coating failure. Concrete is naturally smooth and porous at a microscopic level. According to the International Concrete Repair Institute (ICRI), coatings require a specific Concrete Surface Profile (CSP) to achieve mechanical adhesion. Most epoxies require a CSP-2 or CSP-3, which feels like 80-grit sandpaper.
Many DIY guides recommend acid etching with muriatic acid to achieve this profile. However, acid etching is highly inconsistent in basement environments where ventilation is poor and slab densities vary. Furthermore, if the acid is not thoroughly neutralized and rinsed, residual salts will compromise the primer. Mechanical preparation using a diamond grinder is the industry standard for reliable adhesion.
Step-by-Step Application Framework for Maximum Adhesion
To ensure your chosen coating bonds permanently to the substrate, follow this mechanical preparation and application sequence:
- Diamond Grinding: Rent a walk-behind planetary grinder equipped with 16-grit or 30-grit metal-bonded diamond segments. Run the grinder over the entire slab in overlapping passes to remove laitance, old adhesives, and open the pores to a CSP-2 profile.
- HEPA Vacuuming: Concrete dust is microscopic and acts as a bond-breaker. Use a shroud-equipped grinder connected to a HEPA-filter vacuum, followed by a thorough sweeping and damp-mopping of the entire space.
- Radon Testing Consideration: Sealing a basement floor with an impermeable epoxy can alter the pathways for soil gases. If you live in a high-radon zone, test your basement air quality before encapsulation. The Environmental Protection Agency (EPA) notes that sealing major entry routes is a component of radon mitigation, but a sealed floor can sometimes increase pressure differentials if an active depressurization system is not in place.
- Primer Application: Apply a low-viscosity, moisture-tolerant epoxy primer. This penetrates deep into the concrete capillaries, creating an anchor pattern for the topcoat. Use a squeegee to force the primer into the pores, then back-roll with a 3/8-inch nap roller.
- Topcoat and Broadcast: Once the primer is tack-free (usually 8-12 hours), apply your 100% solids epoxy or polyaspartic topcoat. For slip resistance—critical in basements that may experience condensation or tracked-in rain—broadcast 20-mesh aluminum oxide or quartz sand into the wet coating at a rate of 1 lb per 100 square feet.
Expert Verdict: Which Option Should You Choose?
Selecting the right coating depends entirely on your slab's moisture profile and the intended use of the space. If your basement serves as a finished living area, home gym, or workshop and passes the calcium chloride moisture test, a 100% solid epoxy system topped with a urethane clear coat provides the best balance of durability, chemical resistance, and aesthetic depth. The material cost of roughly $2.00 per square foot makes it a highly cost-effective alternative to luxury vinyl plank or ceramic tile, which require extensive leveling and underlayment.
If your slab is prone to seasonal dampness, or if you are finishing a basement in a high-water-table region without an exterior French drain system, abandon film-forming epoxies entirely. Opt for a penetrating silicate densifier and acrylic stain. As outlined in the EPA's guidelines on moisture control, managing vapor transmission without trapping it is essential to preventing sub-surface mold and structural degradation. Breathable stains protect the concrete from dusting and staining while allowing the slab to function as a natural vapor equalizer.
Written by
Marcus ChenMarcus Chen is a licensed structural engineer (PE) and building materials analyst with over 12 years of experience across residential, commercial, and industrial construction. He holds a Master of Science in Civil Engineering from UC Berkeley and spent six years at Thornton Tomasetti before transitioning to independent consulting and technical writing. Marcus specializes in material selection for seismic-prone regions, concrete reinforcement strategies, and lifecycle cost analysis. His work has been cited by the American Concrete Institute (ACI) and the Structural Engineers Association of California (SEAOC). When he is not on a job site or at his desk, you will find him hiking the Sierra Nevada or restoring a 1920s craftsman bungalow in Oakland, CA.
More from Marcus Chen
View all
Construction Cost
How Much Did the Eiffel Tower Cost to Build?
How much did the Eiffel Tower cost to build in 1889? We adjust for inflation and compare its budget to modern skyscraper construction.
Aug 4, 2026

Fire Resistance
What Is a Fire Resistant Material? Testing & Certification Guide
Discover what is a fire resistant material through ASTM and UL testing. Learn how fire ratings, certifications, and assemblies work in construction.
Aug 4, 2026

Construction Cost
How Much Did the Burj Khalifa Cost to Build?
How much did the Burj Khalifa cost to build? We break down the $1.5B project and extract 5 money-saving strategies for your next build.
Jul 30, 2026