How to Install a Floor Safe in Hardwood and Concrete Floors
Learn the exact procedures to install a floor safe in concrete slabs and hardwood floors, including framing, anchoring, and concealment techniques.
Pre-Installation Planning and Safe Selection
Integrating a floor safe into your existing or new flooring requires precise spatial planning and an understanding of structural load paths. Unlike freestanding gun safes, an in-floor safe relies on the surrounding substrate for physical security and fire resistance. Before cutting into any substrate, verify the safe’s exterior dimensions and flange width. Standard residential floor safes range from 10x10x10 inches to 14x14x14 inches, but the mounting flange typically adds 1.5 to 2 inches to the required cutout width.
For fire protection, ensure the safe carries a verified UL 72 Class 125 fire rating. This certification guarantees the interior temperature will not exceed 125°F when exposed to 1,700°F exterior temperatures for a specified duration, which is critical for protecting digital media and paper documents.
Procedure 1: Installing in a Concrete Slab
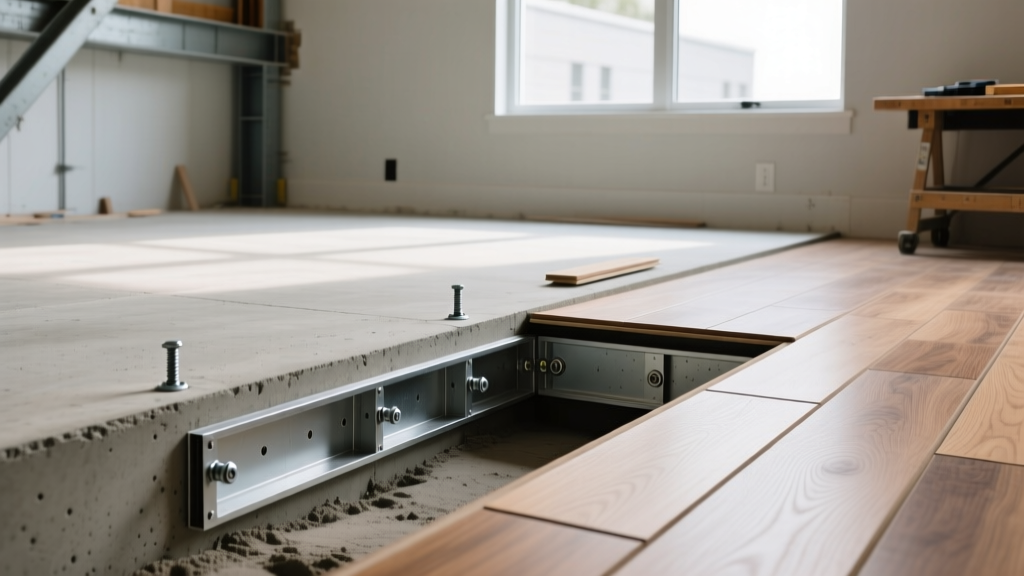
Concrete slab installations offer the highest level of physical security but require heavy demolition and precise moisture mitigation. This procedure applies to both new construction pours and retrofitting existing slabs.
Step 1: Subsurface Scanning and Layout
Never cut into a concrete slab without scanning it first. Use a ground-penetrating radar (GPR) or a high-end multi-scanner to locate post-tension cables, rebar, and embedded radiant heating lines. Cutting a post-tension cable can cause catastrophic structural failure and severe injury. Mark the cutout area using a chalk line, adding a 1/2-inch clearance gap on all sides of the safe body for grouting.
Step 2: Cutting and Demolition
Use a gas-powered or heavy-duty electric concrete saw with a 14-inch diamond blade to score the perimeter to a depth of at least 4 inches. This ensures a clean, straight edge that will align perfectly with the safe’s flange. Switch to a rotary hammer with a chisel bit to break out the interior concrete. Remove all debris and vacuum the pit thoroughly. The pit depth must exceed the safe’s body depth by at least 2 inches to allow for a gravel base and concrete grout.
Step 3: Moisture Mitigation and Anchoring
Concrete continuously wicks moisture from the soil. If you drop a steel safe directly into the dirt, the interior will succumb to rust and mold within months.
- Line the bottom and sides of the pit with a 6-mil polyethylene vapor barrier.
- Add a 2-inch layer of crushed gravel for drainage.
- Coat the exterior body of the safe (excluding the door and locking mechanism) with a heavy-duty asphalt-based foundation sealer or marine-grade epoxy.
Lower the safe into the pit. Use 1/2-inch stainless steel wedge anchors, drilling through the pre-punched holes in the safe’s bottom flange directly into the concrete sub-base. Tighten the anchors to 60 ft-lbs of torque. Finally, pour a non-shrink structural grout into the 1/2-inch perimeter gap, troweling it flush with the surrounding slab.
Procedure 2: Installing in Wood Joist and Hardwood Floors
Installing a floor safe in a wood-framed floor system (typically over a crawlspace or basement) requires structural reinforcement to handle the concentrated dead load, which can exceed 300 lbs when the safe is fully loaded.
Step 1: Joist Framing and Subfloor Cutting
From the crawlspace below, locate the floor joists. You will need to frame a header system similar to a staircase or skylight opening.
- Install double trimmer joists on the sides of the opening to support the cut ends of the floor joists.
- Use galvanized joist hangers rated for the specific lumber dimensions (e.g., 2x10 or 2x12) to secure the headers to the main carrying beams.
- Cut the plywood or OSB subfloor from above using a circular saw set to the exact depth of the subfloor to avoid damaging underlying wiring or plumbing.
Step 2: Scribing Hardwood Around the Flange
For a concealed installation, the safe’s top flange must sit exactly 3/4-inch below the finished subfloor (assuming 3/4-inch solid hardwood flooring).
- Bolt the safe to the newly installed wooden header frame using 3/8-inch structural lag screws and fender washers.
- When laying the hardwood, scribe the end cuts of the floorboards to fit tightly against the steel flange. Leave a 1/8-inch expansion gap between the wood and the steel, and fill it with a color-matched elastomeric wood floor caulk to accommodate seasonal wood movement without buckling.
Cost, Time, and Substrate Matrix
The complexity of installation varies wildly depending on the substrate. Below is a breakdown of expected costs and timelines for 2026 residential retrofits.
| Substrate Type | Primary Tools Required | Estimated Labor Time | Average Professional Cost (Excluding Safe) |
|---|---|---|---|
| New Concrete Pour | Forms, rebar ties, level | 2–4 hours (pre-pour) | $150 – $300 |
| Existing Concrete Slab | Concrete saw, rotary hammer, GPR scanner | 8–12 hours | $800 – $1,500 |
| Wood Joist / Subfloor | Reciprocating saw, drill, framing lumber | 6–10 hours | $600 – $1,200 |
| Hardwood Concealment | Table saw, jigsaw, floor nailer | 4–6 hours | $400 – $800 |
Concealment Strategies and Flooring Transitions
A floor safe is only effective if its location remains hidden. The method of concealment depends heavily on your chosen flooring material.
The Custom Trapdoor Method (Hardwood & Tile)
For hardwood floors, fabricate a custom "trapdoor" using the exact same batch of hardwood used in the room. Mount the trapdoor using hidden Soss barrel hinges and a magnetic catch. Cut the rug pad and carpet or hardwood to fit inside the door frame. When closed, the grain pattern and seam widths will perfectly match the surrounding floor, rendering the safe virtually invisible to casual observation.
The Flush-Mount Cover Method (Concrete & Tile)
If installing in a concrete slab in a garage or basement where tile or epoxy flooring is used, utilize a heavy-gauge steel flush-mount cover plate. The cover plate drops into the safe's recessed lip and sits perfectly level with the surrounding floor. You can then apply an epoxy flake coating or lay large-format porcelain tile directly over the cover plate, using a flexible urethane grout at the perimeter seam to prevent cracking when the plate is lifted.
Critical Mistakes That Compromise Security
Avoid these common installation errors that degrade both the security of the safe and the integrity of your flooring:
- Ignoring Flange Depth: If the flange sits even 1/16-inch above the subfloor, your hardwood or tile will not lay flat, creating a tripping hazard and a visible ridge that broadcasts the safe's location.
- Using Drywall Screws for Anchoring: Never use drywall or deck screws to anchor a safe to wood framing. They lack the shear strength to resist prying attacks. Always use structural lag screws or through-bolts.
- Failing to Support the Safe in Wood Floors: If the safe is merely resting on the subfloor without being bolted to the structural joist headers, an intruder can easily pry up the surrounding floorboards and lift the entire safe out of the house to open it off-site.
- Neglecting the Dust Seal: Concrete cutting generates microscopic silica dust that will infiltrate the safe's dial and locking bolts if the door is not tightly sealed with plastic wrap and tape during the installation process.
By adhering to these structural framing, moisture mitigation, and precise flooring transition protocols, your floor safe will remain a secure, hidden, and structurally integrated component of your home's architecture.