Tiling a Kitchen Backsplash Ideas for Heavy Cooking Scenarios
Match tiling a kitchen backsplash ideas to your cooking style. Explore material specs, adhesive failures, and grout choices for high-heat and small spaces.
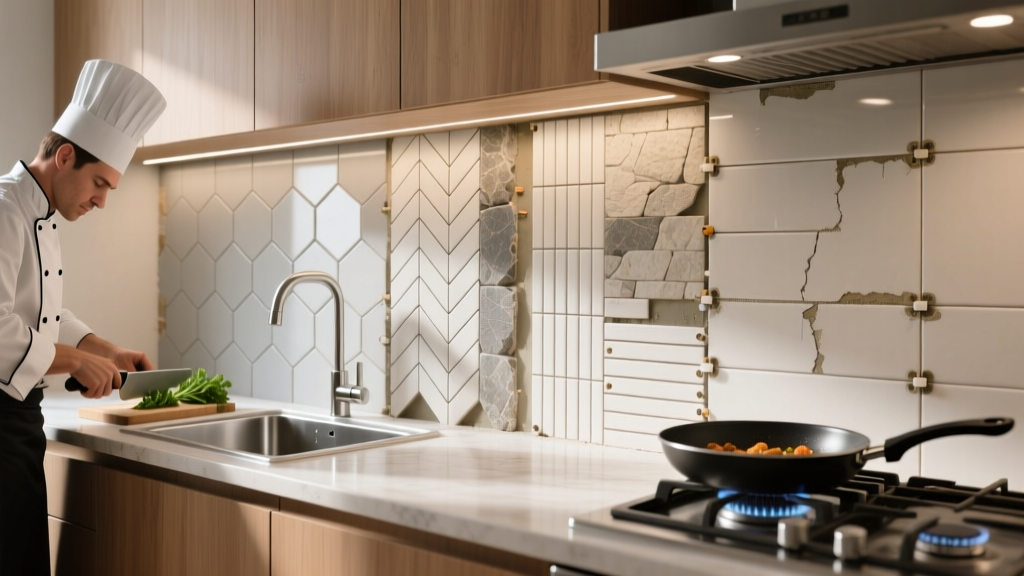
The Application-Fit Framework: Beyond Aesthetics
When browsing tiling a kitchen backsplash ideas, most homeowners and designers focus exclusively on color palettes and pattern trends. However, a kitchen backsplash is a high-performance splash zone subjected to thermal shock, aerosolized grease, acidic splatters, and aggressive cleaning chemicals. Selecting a tile based purely on visual appeal without considering the application environment is the leading cause of premature grout staining, tile delamination, and surface etching.
To ensure longevity, we must map specific tile materials, adhesives, and grout systems to distinct cooking scenarios. This guide breaks down the technical requirements for three common kitchen profiles, providing exact material specifications and installation protocols that align with current 2026 industry standards.
Critical Warning: The Mastic Trap
Never use Type 1 organic mastic adhesive behind a stove or range. Mastic remains water-soluble and is highly sensitive to heat. Steam from boiling pots and ambient heat from gas or induction cooktops can re-emulsify the adhesive, causing tiles to slowly slide or pop off the wall. Always use an ANSI A118.4 polymer-modified thinset mortar (such as LATICRETE 254 Platinum or Custom Building Products MegaLite) for any backsplash installation, regardless of the tile material.
Scenario 1: The Heavy Sear & Sauté Chef (High-Heat & Grease Zones)
For kitchens where high-BTU gas ranges are used daily, the backsplash faces extreme thermal cycling and heavy aerosolized grease. The primary goal here is zero porosity and high thermal shock resistance.
Material Match: Glazed Porcelain & High-Fired Ceramic
Natural stones like marble, travertine, and unglazed terracotta are disastrous in heavy cooking zones. Marble will etch immediately upon contact with tomato sauce or lemon juice due to its calcium carbonate composition, while unglazed terracotta acts as a sponge for cooking oils, leading to permanent dark spotting.
- Ideal Specification: Glazed porcelain tile with a water absorption rate of less than 0.5% (per ASTM C373 testing). The glass-like glaze creates an impermeable barrier against grease.
- Specific Product Example: Daltile's Slate-look glazed porcelain or Fireclay Tile's glazed ceramic field tiles. Both offer a wipeable, non-porous surface that withstands aggressive degreasers.
- Format Strategy: Opt for large-format tiles (e.g., 12x24 inches) or continuous thin porcelain panels. Fewer grout lines mean fewer places for carbonized grease to accumulate.
The Grout Imperative
Standard cementitious grout is highly porous. In a heavy cooking zone, you must specify a high-performance urethane or epoxy grout. Products like Custom Building Products Prism Urethane Grout offer built-in stain resistance without the need for annual sealing, maintaining color consistency even when scrubbed with heavy-duty kitchen cleaners.
Scenario 2: Compact Galley & Low-Light Spaces (Optical Maximization)
In small galley kitchens or spaces lacking natural fenestration, the backsplash must perform a secondary architectural function: manipulating light and visual depth. The application-fit here prioritizes reflectivity and scale.
Material Match: High-Gloss & Beveled Edge Tiles
Matte and honed finishes absorb light, making tight spaces feel cavernous. High-gloss finishes bounce under-cabinet LED lighting across the room, effectively doubling the perceived ambient lumens.
- Ideal Specification: High-gloss glazed ceramic or glass tile. Zellige-style tiles (handcrafted Moroccan clay tiles with intentional surface variations) are exceptionally effective here, as their uneven surface creates dynamic, multi-directional light refraction.
- Scale & Layout: Avoid standard 3x6 horizontal brick patterns, which visually widen but lower the ceiling. Instead, utilize a 4x16 inch tile in a vertical stack bond. This draws the eye upward, emphasizing ceiling height and reducing the visual 'noise' of offset grout lines.
Pro-Tip: Glass Tile Scratch Prevention
If utilizing glass tile to maximize light reflection, never use sanded grout. The silica sand aggregate will permanently scratch the glass surface during tooling. You must use a premium unsanded cementitious grout (ANSI A118.11) or a non-abrasive urethane grout for joints 1/8-inch or smaller. Consult the National Tile Contractors Association (NTCA) reference manual for exact trowel and grout pairing specifications.
Scenario 3: High-ROI Rental & Budget Flips (Cost-to-Durability Ratio)
For investment properties, Airbnb flips, or budget-conscious renovations, the goal is to achieve a high-end aesthetic with minimal material and labor costs, while ensuring the installation survives tenant abuse.
Material Match: Classic Subway with Premium Upgrades
While peel-and-stick vinyl tiles are tempting for ultra-low budgets, they fail the durability test near heat sources and significantly lower property appraisal values. The optimal strategy is to use inexpensive base tiles but upgrade the installation materials.
- The Base Tile: Standard 3x6 inch white ceramic subway tile (e.g., Daltile Restore series). Material cost is typically under $4.00 per square foot.
- The Upgrade: Pair the cheap tile with a premium, pre-sealed polymer-modified thinset and a high-end urethane grout in a contrasting color (like charcoal or navy). The expensive grout elevates the visual design and prevents the most common tenant complaint: stained, mildewed grout lines.
- Labor Savings: Standard ceramic subway tiles require no special wet saws; they can be scored and snapped with a basic manual tile cutter, drastically reducing installation time and contractor labor rates.
Adhesive & Grout Selection Matrix
Matching the correct chemical setting material to your tile type is where most DIY installations fail. Use this matrix to ensure structural integrity.
| Tile Material | Required Adhesive (Thinset) | Required Grout Type | Key Failure Mode to Avoid |
|---|---|---|---|
| Glazed Porcelain | ANSI A118.4 Polymer-Modified | Urethane or Epoxy | Using unmodified thinset (poor bond to low-porosity body) |
| Glass Mosaic | ANSI A118.4 (White color only) | Unsanded or Urethane | Gray thinset altering glass color; sanded grout scratching |
| Natural Marble | ANSI A118.15 (Premium White) | Urethane (Stain-proof) | Moisture trapping causing shadowing; acidic grout etching |
| Ceramic Subway | ANSI A118.4 or A118.1 | Sanded or Urethane | Mastic re-emulsifying behind stovetop heat zones |
Common Installation Failure Modes & Edge Cases
Even with the perfect tile selected for your cooking scenario, improper detailing will ruin the application. The Tile Council of North America (TCNA) handbook outlines several critical edge cases that must be addressed during installation:
- The Countertop Expansion Joint: Never hard-grout the joint where the backsplash meets the countertop. Houses settle and countertops expand with temperature changes. If this joint is filled with rigid cement grout, it will crack within months. This 1/8-inch gap must be filled with a 100% silicone or ASTM C920 color-matched sealant to allow for dynamic movement.
- Backer Board Transitions: If your backsplash transitions from standard drywall to cement backer board behind a wet zone or heavy range, the seam must be taped and mortared with alkali-resistant fiberglass mesh tape. Standard drywall paper tape will degrade when exposed to thinset alkalinity and moisture.
- Under-Cabinet Lighting Interference: If installing LED tape lighting under cabinets, highly reflective glass or polished tiles will mirror the individual LED diodes, creating a harsh, dotted glare. When pairing high-gloss tiles with under-cabinet lighting, specify an LED channel with a frosted polycarbonate diffuser to create a continuous ribbon of light.
Final Synthesis: Designing for the Reality of the Kitchen
The most successful kitchen renovations treat the backsplash as an integrated component of the cooking ecosystem rather than a standalone decorative element. By evaluating your specific thermal loads, cleaning habits, and spatial constraints, you can narrow down the vast sea of design options into a highly targeted selection of materials. Whether you require the impermeable defense of glazed porcelain for high-heat searing, the light-bending properties of vertical glass for a compact galley, or the cost-to-durability ratio of upgraded subway ceramics for a rental, matching the material science to the application guarantees a space that is as resilient as it is beautiful.