How Proper Laminate Floor Installation Maximizes Durability and Lifespan
Discover how precise laminate floor installation techniques, from subfloor prep to expansion gaps, directly dictate your floor's 20-year durability.
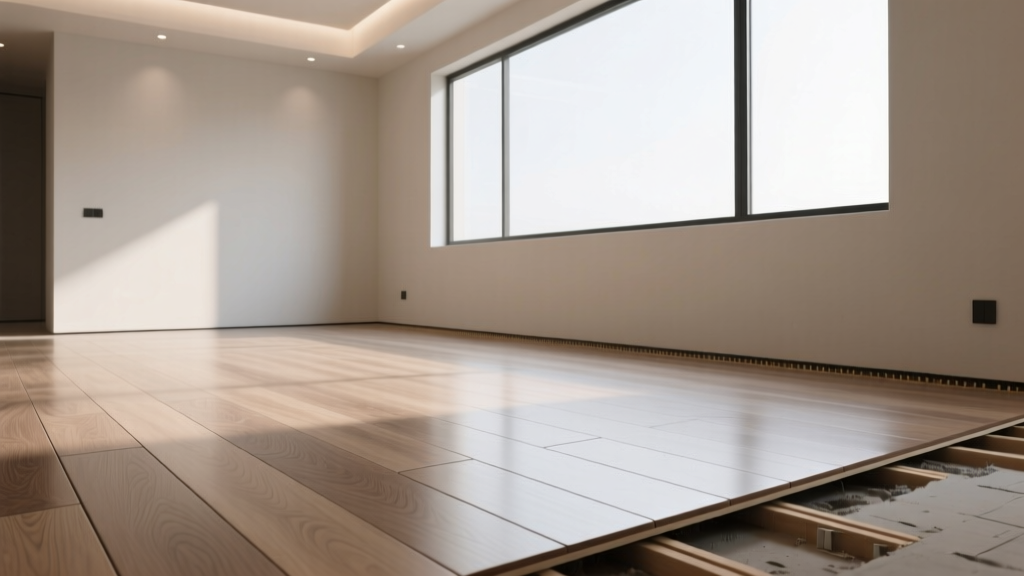
The Direct Link Between Installation Precision and Laminate Longevity
The lifespan of laminate flooring is rarely determined by the product's factory specifications alone. While the Abrasion Class (AC) rating under the EN 13329 standard dictates surface wear resistance, the structural integrity of the High-Density Fiberboard (HDF) core is entirely dependent on the quality of the laminate floor installation. A premium AC4 commercial-grade laminate installed over an improperly prepped subfloor will experience joint failure, edge chipping, and core swelling within 3 to 5 years. Conversely, a standard AC3 residential laminate installed with meticulous attention to moisture barriers and expansion tolerances can easily achieve a 20- to 25-year functional lifespan.
Subfloor Preparation: The Foundation of a 20-Year Lifespan
Laminate flooring utilizes a floating installation method, meaning it is not adhered to the subfloor. This makes subfloor flatness the most critical variable in the installation process. The industry-standard tolerance requires the subfloor to be flat within 3/16 of an inch over a 10-foot radius.
Addressing Concrete and Wood Subfloors
- Concrete Subfloors: Must be fully cured (minimum 60 days). High spots must be ground down using a diamond cup wheel, while low spots require a Portland cement-based self-leveling underlayment (SLU) such as Henry 565 FloorPro. Avoid gypsum-based levelers in moisture-prone areas, as they degrade when exposed to alkaline moisture.
- Wood Subfloors (OSB/Plywood): Inspect for loose panels. Secure any deflection by driving 2-inch deck screws into the floor joists. Sand down swollen seams at the panel edges to prevent telegraphing through the laminate underlayment.
Moisture Mitigation and ASTM Testing Standards
Moisture is the ultimate enemy of the HDF core. Even waterproof surface laminates will fail if moisture wicks through the seams and compromises the core from below. According to the North American Laminate Flooring Association (NALFA), installers must perform quantitative moisture testing before laying the first plank.
| Test Method | Standard | Maximum Allowable Limit | Required Mitigation |
|---|---|---|---|
| Calcium Chloride (MVER) | ASTM F1869 | 3 lbs / 1,000 sq ft / 24 hrs | 6-mil polyethylene vapor barrier |
| Relative Humidity (RH) | ASTM F2170 | 75% RH (at 40% slab depth) | Epoxy moisture mitigation system |
| Wood Subfloor Moisture | Pin-type Meter | 12% MC (or within 2% of laminate) | Extended HVAC acclimation |
For comprehensive guidance on reading moisture meters and interpreting slab data, the Concrete Construction overview of ASTM F2170 provides essential protocols for preventing post-installation swelling.
Acclimation and Expansion Gaps: Preventing Structural Buckling
The HDF core is hygroscopic; it expands and contracts with ambient humidity changes. Skipping the acclimation phase or ignoring expansion gaps guarantees seasonal buckling (peaking) or severe gapping.
The Acclimation Protocol
Unbox the laminate and stack the planks in a crisscross pattern in the installation room. The room's HVAC system must be operational and set to normal living conditions (60°F–80°F, 35%–65% relative humidity) for a minimum of 48 to 72 hours prior to installation.
Calculating Expansion Gaps
A floating floor moves as a single monolithic sheet. The perimeter expansion gap must be maintained consistently. Use the following framework to determine your required gap width:
- Standard Rooms (Under 400 sq ft): 3/8-inch (10mm) gap at all walls, pipes, and fixed cabinets.
- Large Open Areas (400 - 1,000 sq ft): 1/2-inch (12mm) perimeter gap.
- Commercial/Extra-Large Spaces (Over 1,000 sq ft): 1/2-inch perimeter gap, plus a T-molding transition strip every 30 to 40 linear feet to break the floor into manageable floating zones.
Underlayment Selection: Impact Resistance and Joint Preservation
Underlayment is not merely a sound dampener; it is a shock absorber that protects the laminate's locking mechanism from impact fatigue. Using an underlayment that is too thick (over 3mm) will cause excessive vertical deflection, snapping the fragile HDF tongues. According to expert guides from Family Handyman, matching the underlayment density to the subfloor type is crucial for long-term durability.
| Underlayment Material | Thickness | Best Application | Lifespan Impact |
|---|---|---|---|
| Closed-Cell Polyethylene Foam | 2mm - 3mm | Standard wood subfloors | Good; resists compression set |
| Cork | 3mm - 6mm | Uneven concrete, high soundproofing needs | Excellent; natural antimicrobial, high density |
| Rubber (Recycled) | 2mm - 3mm | High-traffic commercial zones | Superior; prevents joint fatigue under heavy loads |
The Locking Mechanism: Assembly Techniques that Prevent Micro-Fractures
Modern laminate utilizes either Angle-Angle (Unilin) or Drop-Lock (Välinge) folding systems. The installation technique must match the system to avoid shaving the HDF locking profile.
- Never Force a Joint: If a plank does not seat flush with a light tap, stop. Disassemble and check for debris (sawdust, drywall compound) in the groove. Forcing a joint creates a micro-gap that will widen over time, allowing moisture ingress.
- Use the Right Tools: Use a heavy-duty rubber mallet and a solid composite tapping block. Avoid cheap plastic tapping blocks, which can shatter and damage the plank edge.
- Staggering Pattern: Maintain a minimum 6-inch stagger between end joints in adjacent rows. Randomize the stagger pattern (e.g., 6", 12", 18") to distribute structural stress evenly across the floating matrix. H-patterns or stair-step patterns create weak shear lines.
Real-World Failure Modes and Installation Fixes
When laminate fails prematurely, the root cause is almost always traceable to a specific installation error. Use this diagnostic framework to identify and prevent common issues:
Symptom: Peaking (Plank edges push upward)
Cause: Insufficient perimeter expansion gap. The floor has expanded and hit the wall, creating immense lateral compression.
Fix: Remove baseboards and shoe molding. Cut an additional 1/4 inch off the perimeter planks using an oscillating multi-tool. Reinstall molding to cover the new gap.
Symptom: Gapping (Planks pull apart, exposing the tongue)
Cause: Failure to acclimate the flooring, or installing in a room with humidity drops below 30% in winter. Can also be caused by heavy furniture pinning one side of the floating floor, preventing uniform movement.
Fix: Install a whole-home humidifier to maintain 35%-50% RH. Ensure heavy islands or pianos are placed on felt pads, or cut expansion gaps underneath the footprint of the heavy object.
Symptom: Edge Chipping and Squeaking
Cause: Subfloor unevenness exceeding the 3/16" over 10' tolerance. The floor flexes underfoot, grinding the locking joints together.
Fix: The floor must be disassembled to the affected area. The subfloor must be leveled with an SLU, and a higher-density underlayment (like cork) should be used upon reassembly.
Cost vs. Lifespan: ROI of Professional vs. DIY Installation
While laminate is heavily marketed as a DIY-friendly product, the margin for error regarding moisture and leveling is incredibly slim. Evaluating the 2026 pricing landscape reveals the true cost of installation quality.
- DIY Installation: Costs roughly $1.00 to $2.00 per square foot for underlayment, vapor barriers, and tool rental. However, DIY error rates regarding subfloor prep lead to an average functional lifespan of 8 to 12 years before joint degradation becomes visually apparent.
- Professional Installation: Certified installers charge between $2.50 and $4.50 per square foot for labor. This includes ASTM moisture testing, mechanical subfloor leveling, and precision cutting. A professionally installed laminate floor routinely achieves its maximum rated lifespan of 20 to 25 years.
When amortized over two decades, the upfront premium for professional subfloor preparation and precision locking assembly yields a significantly lower cost-per-year of ownership, making it the superior financial choice for long-term durability.