Mirror Floor Mirror Finish: The Ultimate Cleaning Playbook
Master the mirror floor mirror effect with our expert cleaning playbook. Learn exact pH levels, tools, and restoration steps for glass, epoxy, and concrete.
The Science of the Mirror Floor Mirror Effect
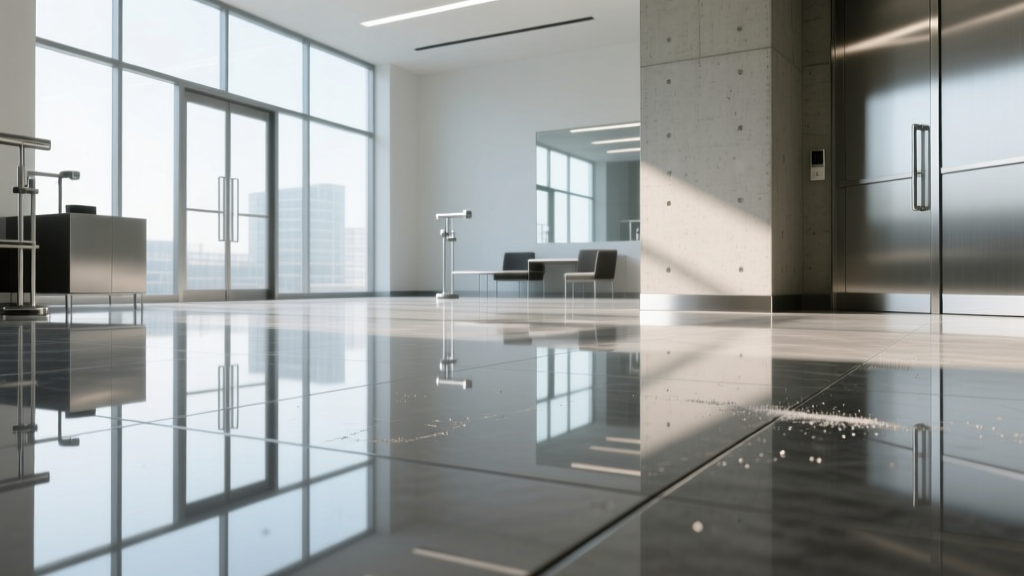
Achieving a true mirror floor mirror effect requires a surface roughness average (Ra) of less than 0.2 micrometers. At this microscopic level of smoothness, light scattering is virtually eliminated, creating an optical illusion of infinite depth that is highly prized in avant-garde retail, dance studios, and luxury residential foyers. However, maintaining this optical clarity is a battle against physics. Silica dust (Mohs hardness 7) is ubiquitous in outdoor dirt and will instantly micro-scratch high-gloss epoxy (Mohs 3-4) or tempered glass (Mohs 5.5) if dragged across the surface. This playbook details the exact chemical, mechanical, and procedural requirements to preserve flawless reflectivity across the three primary materials used to achieve this finish.
Material Breakdown: What Are You Actually Cleaning?
The maintenance protocol must be dictated by the substrate. Using an alkaline cleaner on polished concrete will etch the surface, while using an acidic cleaner on the same material will destroy the chemical densifier. Below is the technical matrix for the three materials capable of producing a mirror floor mirror reflection.
| Material Substrate | Mohs Hardness | Primary Vulnerability | Required pH Range |
|---|---|---|---|
| Tempered Low-Iron Glass (e.g., Starphire) | 5.5 | Hard water spotting, edge chipping | 5.5 - 8.0 |
| 100% Solids High-Build Epoxy (Nano-ceramic topcoat) | 3.5 - 4.5 | Micro-scratching, UV yellowing, alkaline etching | 7.0 - 8.0 (Strictly Neutral) |
| Mechanically Polished Concrete (3000-grit resin) | 6.0 - 7.0 | Alkaline etching, loss of densifier seal | 7.0 - 9.0 (Neutral to Mild Alkaline) |
The Daily Maintenance Protocol (Zero-Scratch Method)
Daily maintenance is not about removing heavy soil; it is about safely capturing and removing abrasive silica particles without dragging them across the finish. Cotton mops and standard string mops are strictly prohibited, as they trap grit within their fibers and act like sandpaper.
Step 1: Dry Particulate Extraction
- Tool Specification: Use a flat microfiber mop with a minimum weight of 450 GSM (grams per square meter). Split-fiber microfiber is mandatory, as the microscopic hooks lift dust rather than pushing it.
- Technique: Employ a continuous figure-eight overlapping stroke. Never lift the mop head off the floor during the sweep, as dropping it can trap and grind larger debris against the surface.
- Frequency: High-traffic commercial zones require this step every 4 hours. Residential zones require it once daily.
Step 2: Damp Mopping with Neutral Surfactants
When selecting cleaning agents, facility managers should prioritize products certified by the EPA Safer Choice program to ensure chemical compatibility with high-gloss sealers and indoor air quality standards. Dilute a neutral-pH (7.0 to 8.0) floor cleaner at exactly 2 ounces per gallon of distilled or reverse-osmosis filtered water. Tap water contains calcium and magnesium that will leave micro-deposits, dulling the mirror floor mirror illusion over time.
Never use ammonia-based glass cleaners or heavy-duty degreasers (pH 9+) on high-build epoxy or polished concrete. Alkaline solutions will chemically burn the nano-ceramic topcoats used in modern 2026 epoxy formulations, resulting in a permanent, cloudy haze that requires aggressive mechanical sanding to remove.
Deep Cleaning & Stain Removal Playbook
When the surface accumulates stubborn scuffs, rubber heel marks, or hard water deposits, a targeted deep-cleaning approach is required. The strategy shifts based on the substrate's chemical tolerance.
Tackling Hard Water and Mineral Deposits
On tempered glass and epoxy floors, mineral deposits from HVAC condensation or wet footwear will scatter light. Apply a mild acidic cleaner (pH 5.5), such as a diluted phosphoric acid solution, directly to the affected area. Allow a dwell time of exactly 90 seconds—no longer. Agitate gently with a white non-scratch melamine pad, then extract immediately with a wet vacuum. Rinse with distilled water to halt the acidic reaction.
Removing Rubber Scuff Marks
For black rubber scuffs on polished concrete, avoid chemical solvents. Instead, use a high-speed burnisher equipped with a natural hair pad operating at 1,500 RPM. The friction generates enough localized heat to soften the rubber transfer, allowing the pad to lift it without compromising the concrete's 3000-grit polish.
Restoring Optical Clarity: Buffing and Polishing
Despite perfect daily maintenance, micro-abrasions will eventually accumulate, reducing the surface's distinctness of image (DOI). Mechanical restoration is required to re-establish the mirror floor mirror effect.
- For High-Build Epoxy: Use an orbital floor machine (e.g., Oreck Orbiter or Clarke MA30) operating at a low 175 RPM. Attach a 28-inch white microfiber polishing pad and apply a high-solids, slip-resistant acrylic polish. The low RPM prevents friction-heat melting, which causes hazing.
- For Polished Concrete: Utilize diamond-impregnated maintenance pads (such as HTC Twister pads). Start with a red pad (400-grit equivalent) to remove embedded soil and light scratches, followed by a yellow pad (1500-grit) and finish with a green pad (3000-grit) to burnish the surface back to a mirror finish.
Cost & Time Investment Matrix
Budgeting for the maintenance of highly reflective floors requires accounting for specialized labor and distilled water logistics. The following matrix outlines the operational costs per 1,000 square feet for commercial facilities in 2026.
| Maintenance Tier | Estimated Time (per 1,000 sq ft) | Material & Equipment Cost | Frequency |
|---|---|---|---|
| Daily Zero-Scratch Protocol | 45 Minutes | $12.00 (Microfiber wear & neutral surfactant) | Daily |
| Deep Chemical Extraction | 2.5 Hours | $45.00 (Specialty pH solutions & distilled water) | Monthly |
| Mechanical Burnishing (Concrete) | 4.0 Hours | $110.00 (Diamond pad depreciation & fuel/power) | Bi-Annually |
| Epoxy Topcoat Re-application | 12.0 Hours (including cure) | $850.00 (Nano-ceramic polyaspartic clear coat) | Every 3-5 Years |
Frequently Asked Questions
Does a mirror finish violate slip-resistance codes?
A common misconception is that high-gloss floors are inherently slippery. According to OSHA's Walking-Working Surfaces guidelines, the visual reflectivity of a floor does not dictate its coefficient of friction (COF). A mechanically polished concrete floor can achieve a dynamic COF of >0.60 (highly slip-resistant) while maintaining a 3000-grit mirror finish, provided it is kept free of liquid films and waxes. However, highly polished epoxy and glass tiles can drop below the 0.42 COF threshold when wet, requiring the use of micro-grip anti-slip additives during the initial installation.
Can I use a robotic floor scrubber on a mirror epoxy floor?
Standard robotic scrubbers equipped with stiff bristle brushes or aggressive scrubbing pads will destroy an epoxy mirror finish within weeks. If automated cleaning is necessary, the machine must be fitted with soft, non-abrasive microfiber roller sleeves and programmed to use zero-suction squeegee blades to prevent streaking. Furthermore, the machine's cleaning solution tank must be flushed weekly to prevent bacterial growth, which can leave a dulling biofilm on high-gloss surfaces.
How do I repair a deep scratch in a mirror glass floor tile?
You cannot. Tempered low-iron glass tiles used for flooring are under immense internal tension. Attempting to sand or polish out a scratch deeper than 0.1 millimeters will compromise the structural integrity of the tempering, leading to spontaneous shattering. Deep scratches in mirror glass tiles require complete panel replacement. This is why preventative daily dust-mopping is non-negotiable for glass substrates.