Crawlspace Venting Installation: Flood Vents and Sealing Procedures
Master crawlspace venting installation with our 2026 guide. Learn procedures for hydrostatic flood vents, smart vents, and complete encapsulation sealing.
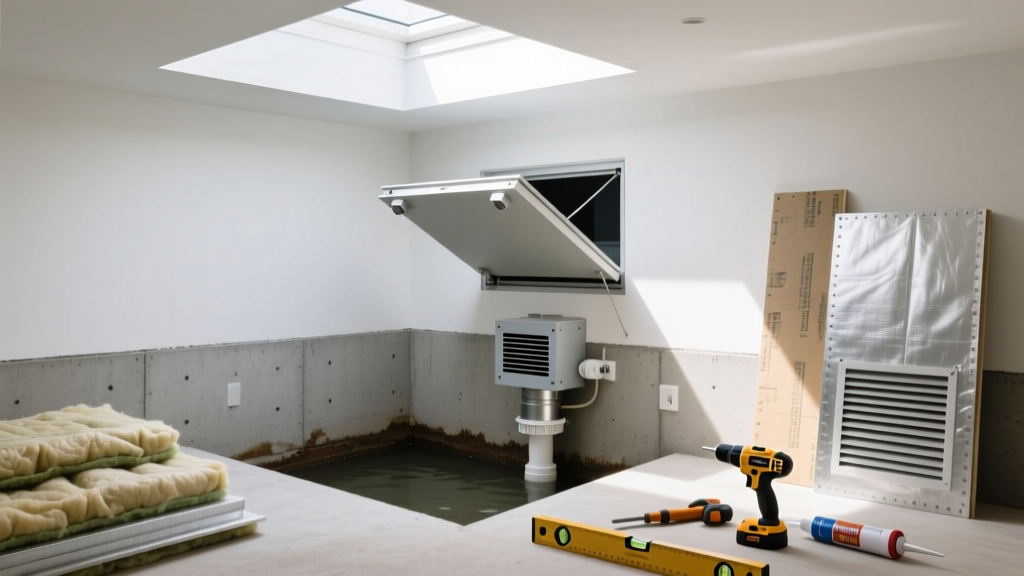
The Building Science Shift: Rethinking Foundation Airflow
Historically, building codes mandated passive crawlspace venting to allow cross-breeze moisture evaporation. Modern building science has proven that in most climate zones, passive venting actually introduces warm, humid summer air into cool subterranean spaces, causing catastrophic condensation on floor joists and HVAC ductwork. Today, crawlspace venting installation is strictly divided into two specialized procedures: installing hydrostatic flood vents for base flood elevation (BFE) compliance, and executing complete vent sealing for conditioned, encapsulated crawlspaces.
This guide details the exact installation procedures, material specifications, and code-compliant measurements required for modern foundation airflow management, referencing the International Residential Code (IRC) Section R408 and current FEMA floodplain guidelines.
Installing Hydrostatic Flood Vents for BFE Compliance
In flood-prone zones, enclosed foundation walls must allow the automatic entry and exit of floodwaters to prevent hydrostatic pressure from collapsing the structure. The FEMA Technical Bulletin 1 mandates strict performance criteria for these openings. Standard passive vent covers with insect screens do not qualify as engineered flood vents.
Step-by-Step Flood Vent Installation
- Calculate Required Net Free Area: The IRC and FEMA require a minimum of 1 square inch of net free opening for every 1 square foot of enclosed crawlspace area. For a 1,500 sq ft crawlspace, you need 1,500 sq inches of net free area.
- Determine Placement: Install a minimum of two openings on different exterior walls. The bottom of the flood vent opening must be no higher than 12 inches above the highest adjacent exterior grade.
- Core Drilling and Block Removal: For poured concrete foundations, use a wet core drill with an 8-inch diamond bit to create circular openings. For concrete masonry unit (CMU) block walls, use a masonry saw to score a 16x8 inch rectangle, then knock out the block faces and mortar joints with a hammer and cold chisel.
- Mount the Engineered Vent: Insert the stainless steel or UV-stabilized polymer flood vent (such as those manufactured by SmartVent or Crawl Space Door Systems) into the opening. Secure the flange to the foundation using 3/16-inch Tapcon masonry screws spaced every 4 inches.
- Seal the Perimeter: Apply a continuous bead of polyurethane masonry sealant (like OSI QUAD Max) between the vent flange and the foundation wall to prevent pest intrusion and air leakage, ensuring the internal louvers remain unobstructed.
Automated Temperature and Humidity Vent Installation
For homeowners in arid climates (IECC Climate Zones 2 and 3) where cross-ventilation is still beneficial, automated crawlspace vents offer precise environmental control. These units utilize motorized louvers tied to digital hygrostats.
- Electrical Routing: Run 14/2 NM-B (Romex) wiring from a dedicated 15-amp GFCI breaker to the crawlspace. Hardwired units (like the Humidity-Controlled Foundation Vent by Tjernlund) require a weatherproof junction box mounted inside the crawlspace joist bay.
- Sensor Calibration: Mount the remote humidity sensor on the central support girder, at least 4 feet away from the foundation wall to ensure an accurate reading of the ambient crawlspace air, not the localized wall temperature.
- Threshold Programming: Set the louvers to close when exterior temperatures drop below 40°F (to prevent frozen plumbing lines) and when exterior dew points exceed the interior crawlspace temperature.
Sealing and Encapsulating Existing Crawlspace Vents
In humid climates (Zones 4 through 8), the Building Science Corporation strongly advocates for unvented, conditioned crawlspaces. Sealing existing passive vents is the critical first step in full encapsulation.
The Rigid Foam Sealing Method
Do not attempt to seal foundation vents with spray foam alone; the expansive pressure can crack aging mortar joints, and it lacks structural rigidity. Follow this composite sealing protocol:
- Measure and Cut XPS Foam: Measure the interior dimensions of the vent opening. Cut 2-inch thick extruded polystyrene (XPS) rigid foam board (R-10 value) to size, making the piece exactly 1/2 inch larger than the opening on all sides for a friction fit.
- Apply Polyurethane Adhesive: Apply a continuous zigzag pattern of foam-board adhesive (such as Loctite PL 300) to the back of the XPS board.
- Press and Anchor: Press the foam firmly into the vent opening from the interior. Secure it with masonry washers and concrete nails driven into the mortar joints.
- Perimeter Air Sealing: Fill the 1/2-inch gap between the foam edge and the foundation wall with closed-cell spray foam. Once cured, trim the foam flush with a serrated knife.
- Vapor Barrier Integration: When rolling out your 20-mil reinforced polyethylene crawlspace liner, run the material up the foundation wall and over the sealed vent. Tape the liner to the XPS foam using 4-inch wide butyl flashing tape to create a monolithic moisture barrier.
System Comparison: Vented vs. Flood Relief vs. Encapsulated
| System Type | Primary Function | Moisture Control Efficacy | 2026 Avg. Installed Cost |
|---|---|---|---|
| Traditional Passive | Cross-breeze evaporation | Poor (Introduces summer humidity) | $45 - $85 per vent |
| Engineered Flood Vents | Hydrostatic pressure relief | Neutral (Requires secondary encapsulation) | $180 - $320 per vent |
| Automated Smart Vents | Climate-responsive airflow | Moderate (Highly dependent on exterior dew point) | $250 - $450 per unit |
| Complete Encapsulation | Total moisture and air sealing | Excellent (Creates conditioned space) | $4.50 - $8.00 per sq ft |
Common Installation Failure Modes and Edge Cases
Even with premium materials, crawlspace venting systems fail when installers ignore site-specific edge cases. Avoid these critical errors:
1. Grade Slope Obstructions
Installing flood vents at the correct 12-inch height is useless if the exterior landscaping slopes upward, burying the bottom of the vent. Maintain a minimum 6-inch clearance between the bottom of the vent louvers and any mulch, soil, or concrete walkways to prevent debris blockage during a surge event.
2. The Rim Joist Bypass
Sealing the foundation vents without air-sealing the rim joist (where the wooden floor framing meets the foundation wall) renders encapsulation useless. The EPA Mold Course guidelines emphasize that stack effect will pull humid exterior air through the porous rim joist band. You must apply 2 to 3 inches of closed-cell spray foam directly to the interior rim joist perimeter after sealing the vents.
3. Undersized Dehumidification
When transitioning from a vented to an unvented crawlspace, the space becomes part of the building envelope. Simply sealing the vents without adding mechanical drying will trap existing groundwater vapor. Install a dedicated crawlspace dehumidifier (such as the AlorAir Sentinel HDi35) capable of removing 35 pints per day, and ensure it is hardwired and ducted to drain into a sump pump basin, not a passive gravity line that can dry out and lose its trap seal.
Final Inspection and Code Sign-Off
Before backfilling or finalizing landscaping around newly installed flood vents, photograph the interior and exterior mounting, the clear grade distance, and the manufacturer certification labels. Submit these to your local building inspector and your flood insurance underwriter. For encapsulated systems, schedule a blower-door test to verify that the sealed crawlspace maintains a pressure differential of less than 0.05 Pascals relative to the exterior, confirming a true air barrier.