How to Install Composite Shingles: Expert Step-by-Step Roofing Guide
Learn how to install composite shingles with our expert step-by-step guide. Covers deck prep, underlayment, nailing patterns, and flashing techniques.
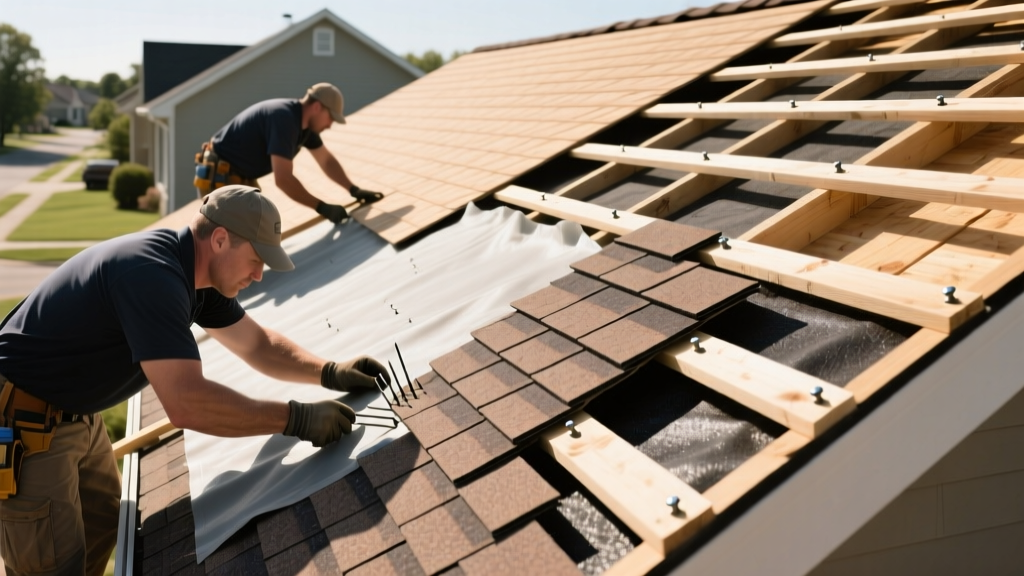
Pre-Installation: Deck Inspection and Material Acclimation
Installing composite shingles—whether they are engineered polymer, rubber, or synthetic slate variants—requires a fundamentally different approach than traditional asphalt. The dimensional stability and thermal expansion properties of modern composite materials dictate strict preparation protocols.
Deck Structural Requirements
Composite shingles are rigid and will telegraph any underlying deck irregularities. The roof deck must consist of minimum 15/32-inch CDX plywood or 7/16-inch OSB (Oriented Strand Board). Inspect the entire deck for soft spots, delamination, or raised nail heads. Any gap between decking panels must not exceed 1/8-inch; larger gaps require blocking or panel replacement to prevent the composite shingles from sagging or cracking under foot traffic during installation.
Material Acclimation Protocols
Unlike asphalt shingles, polymer-based composite shingles (such as F-Wave REVIA or DaVinci Roofscapes) are highly sensitive to ambient temperature during installation.
Underlayment and Flashing Preparation
The underlayment system serves as your secondary water barrier and slip sheet. For composite roofing, synthetic underlayment is mandatory. Felt paper retains moisture and can degrade the underside of certain polymer composites over time.
- Base Underlayment: Roll out a high-tensile synthetic underlayment (e.g., TigerPaw or RoofPro) horizontally starting from the eave. Overlap horizontal seams by a minimum of 4 inches and vertical end-laps by 6 inches.
- Ice and Water Shield: Apply a self-adhering polymer-modified bitumen membrane at the eaves (extending at least 24 inches past the interior warm wall line), in all valleys, and around all penetrations (chimneys, skylights, vent pipes).
- Drip Edge Integration: Install the eave drip edge over the ice and water shield, but install the rake (gable) drip edge under the synthetic underlayment. This specific sequencing prevents wind-driven rain from infiltrating the rake edge.
For comprehensive underlayment specifications and wind-mitigation standards, always cross-reference the IBHS FORTIFIED Home Program guidelines, which dictate enhanced sealing requirements for roofs in high-wind and hail-prone regions.
The Starter Strip and First Course Application
Composite shingles do not have an adhesive tar strip like asphalt shingles. Therefore, the starter strip and first course must be mechanically secured with absolute precision to prevent wind uplift at the eave.
- Cut the Starter Strip: Use a heavy-duty utility knife or tin snips to cut the exposure tabs off the composite shingles, leaving only the top nailing flange and headlap section. Alternatively, use the manufacturer's proprietary starter strip if provided.
- Positioning: Align the starter strip flush with the drip edge. Do not overhang the drip edge by more than 1/4-inch.
- First Course Staggering: To ensure a randomized, natural slate or shake appearance, cut 3 inches off the left side of the first full shingle in the second row. Cut 6 inches off the first shingle in the third row. This 3-inch step-down pattern prevents vertical joint alignment, which is a critical failure point for water ingress.
Field Shingle Installation: Nailing Patterns and Exposure
The most common cause of composite roof failure is improper fastening. Because composite materials do not self-seal via heat-activated adhesive, the mechanical fasteners bear 100% of the wind uplift load.
Fastener Specifications
Use 11-gauge or 12-gauge hot-dipped galvanized smooth-shank roofing nails. The nail head must be a minimum of 3/8-inch in diameter. Never use staples or electro-galvanized nails, as they will corrode and compromise the polymer matrix. Nail length must ensure a minimum 3/4-inch penetration into the solid wood deck (or fully through plywood decks).
Do not overdrive nails. Crushing the composite material around the nail head creates a stress concentration point that will crack under thermal cycling. The nail head should sit perfectly flush with the shingle surface, neither dimpling the material nor sitting proud.
Nailing Matrix for Wind Ratings
Refer to the table below to determine the required fastening pattern based on local building codes and wind speed requirements. For further technical details on roofing mechanics, consult the NRCA Technical Resources database.
| Wind Speed Rating | Roof Pitch | Nails per Shingle | Nail Placement Strategy |
|---|---|---|---|
| Up to 110 mph | 2:12 to 21:12 | 4 | Standard nailing zone (1 inch from edges) |
| 110 - 130 mph | 2:12 to 21:12 | 6 | Standard zone + 2 additional edge nails |
| Over 130 mph | Any | 6 + Adhesive | 6 nails + 1-inch dab of roofing cement at corners |
| Any High Wind | Over 21:12 (Steep) | 6 | 6 nails required regardless of base wind zone |
Always snap horizontal chalk lines every 3 to 5 courses. Relying on the shingle edges for alignment will result in cumulative drift, causing wavy courses that are highly visible on composite roofs due to their thick, shadow-casting profiles. For specific exposure measurements and interlocking techniques, always download the DaVinci Roofscapes Installation Manuals or the equivalent guide for your specific brand.
Ridge Cap and Final Flashing Details
The ridge cap on a composite roof requires specialized handling. Polymer ridge caps are typically thicker and less pliable than asphalt.
- Bending the Ridge: If using a continuous polymer ridge roll, it must be warmed slightly in cold weather (below 40°F) to prevent snapping when bending over the ridge peak. Use a heat gun on a low setting, keeping it moving to avoid melting the surface finish.
- Fastening the Ridge: Fasten ridge caps with 2.5-inch corrosion-resistant screws or long roofing nails that penetrate at least 1 inch into the ridge board. Place fasteners 1 inch from the edge of the ridge cap and 12 inches on center.
- Step Flashing: When integrating step flashing against sidewalls, use minimum 4x4-inch pieces of 26-gauge galvanized steel or aluminum. Interleave each piece with every course of composite shingles. Do not use continuous L-flashing, as it restricts the independent thermal movement of the composite shingles.
Common Installation Mistakes to Avoid
Even experienced asphalt roofers make critical errors when transitioning to composite materials. Avoid these frequent pitfalls:
- Ignoring the Interlock Mechanism: Many modern composite shingles feature a proprietary side-lock or top-lock groove. Failing to fully seat the adjacent shingle into this groove before nailing will leave a micro-gap that drives wind-driven rain into the underlayment.
- Walking on Installed Shingles: Composite shingles can be slippery, especially in the morning dew. More importantly, walking on the installed field with hard-soled boots can scuff the engineered UV granule coating or crack the polymer in cold weather. Wear soft-soled roofing shoes and use roof jacks with plank scaffolding whenever possible.
- Improper Valley Weaving: Do not weave composite shingles through open valleys. The thickness and rigidity of the material will prevent a tight weave, creating a raised dam that directs water under the adjacent shingles. Always use a closed-cut valley method with a metal valley liner or a 36-inch wide ice and water shield center-line.
- Cutting with the Wrong Tools: Standard hook blades used for asphalt will tear and fray the edges of polymer composites. Use straight, heavy-duty utility blades and change them every 3 to 4 cuts to ensure clean, factory-like edges that maintain the roof's aesthetic integrity.
By adhering to these precise installation protocols, you ensure the composite roof system achieves its rated lifespan, often exceeding 50 years, while maintaining its impact and fire resistance ratings.