Roof Rack in Car Maintenance: A Roofer's Cleaning Playbook
Master fleet upkeep with our cleaning playbook for the roof rack in car setups. Learn to remove tar, prevent rust, and secure heavy roofing loads safely.
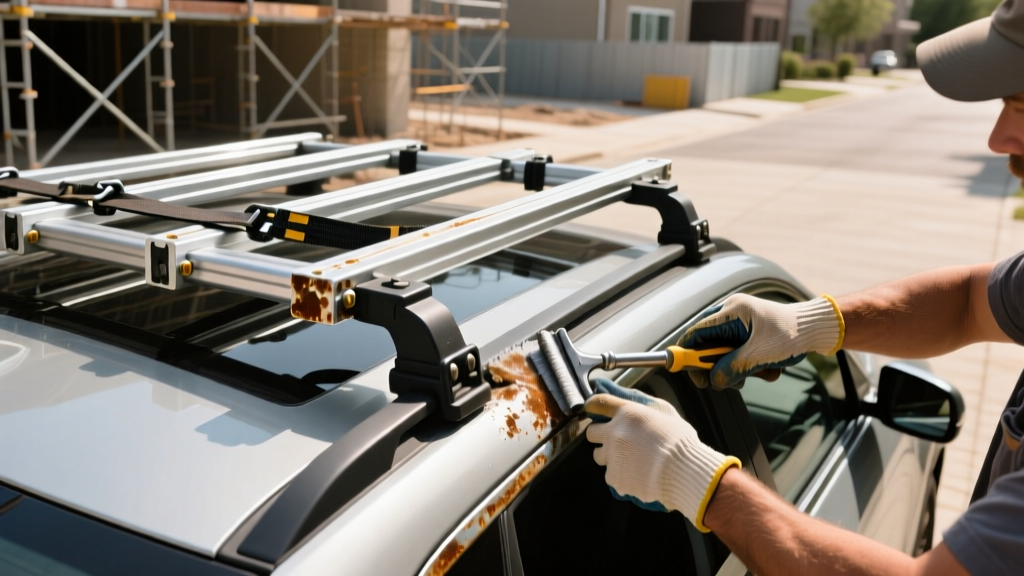
The Hidden Toll of Roofing Debris on Vehicle Racks
For roofing contractors, a vehicle is more than just transportation; it is a mobile staging area. While pickup trucks with dedicated ladder racks are standard, many independent roofers and inspection specialists rely on SUVs and wagons equipped with a heavy-duty roof rack in car configurations. These setups are essential for hauling aluminum extension ladders, PVC vent piping, ridge vents, and rolls of synthetic underlayment. However, the residential job site is a hostile environment for automotive hardware.
Unlike standard commuter use, a roofer's roof rack is continuously bombarded with fiberglass insulation dust, asphalt shingle granules, roofing mastic, and stray galvanized nails. If left unchecked, this debris acts as an abrasive compound, grinding away protective anodized coatings, accelerating galvanic corrosion, and ultimately compromising the structural integrity of the rack and the vehicle's roof mounting points. This maintenance playbook provides a rigorous, step-by-step protocol for preserving your fleet's roof rack systems.
Job Site Hazard Matrix: What Destroys the Roof Rack in Car Setups
Understanding the specific failure modes caused by roofing materials is the first step in preventative maintenance. The table below outlines the most common job site hazards and their mechanical impact on aluminum and steel crossbar systems.
| Hazard / Debris Type | Mechanical Impact on Rack | Secondary Vehicle Damage |
|---|---|---|
| Asphalt Shingle Granules | Acts as sandpaper in T-tracks, stripping anodized finishes and jamming accessory cleats. | Scratches vehicle clear coat when granules are trapped under rubber rack feet. |
| Roofing Tar & Mastic | Hardens in locking mechanisms and hinge joints, seizing moving parts and preventing torque adjustments. | Requires harsh chemical solvents that can degrade vehicle paint and plastic trim. |
| Fiberglass & Mineral Wool | Retains moisture against metal surfaces, accelerating oxidation and galvanic corrosion on steel hardware. | Clogs vehicle sunroof drains and HVAC intakes. |
| Stray Roofing Nails | Punctures rubberized load pads, exposing bare metal to the elements and causing rust spots. | Punctures the actual vehicle roof if the rack's protective padding is compromised. |
The Weekly Deep-Clean Playbook
A standard car wash will not remove construction-grade contaminants. Roofing contractors must implement a specialized weekly cleaning protocol to maintain the structural and aesthetic integrity of their roof rack in car setups.
Step 1: Granule and Grit Extraction
Before applying any liquid cleaners, you must remove dry particulate matter. Asphalt granules lodged in the T-track slots of aluminum crossbars (like the Thule ProBar Evo or Yakima HD Bar) will scratch the tracks when you slide accessories.
- Tool: Use a soft-bristle detailing brush and a high-PSI air compressor nozzle (minimum 90 PSI).
- Action: Blow out the T-tracks, the base of the tower feet, and the gaps between the crossbar and the vehicle roof.
- Inspection: Run a gloved hand under the rubber foot pads. If you feel grit, lift the pad and rinse with water to prevent clear-coat scratching.
Step 2: Asphalt Tar and Mastic Removal
Roofing tar requires chemical dissolution, but standard automotive bug-and-tar removers often lack the cutting power for thick roofing mastic, while industrial degreasers will strip your vehicle's wax and damage plastic rack end-caps.
Pro-Tip for Mastic Removal: Apply a citrus-based industrial solvent (such as De-Solv-it or a dedicated contractor-grade citrus cleaner) to a microfiber towel, not directly onto the rack. Wrap the saturated towel around the tar spot on the crossbar for 60 seconds to soften the mastic, then wipe clean. This prevents solvent runoff from damaging the car's paint below.
Step 3: Hardware Lubrication
Once the rack is clean and dry, lubrication is mandatory to prevent hardware seizure. Avoid standard WD-40, which attracts dust and creates a grinding paste.
- Lock Cylinders: Apply a dry PTFE (Teflon) lubricant to all key locks and latch mechanisms. Dry lubes do not hold onto fiberglass dust.
- Moving Hinges & Knobs: Use a white lithium grease spray on the pivot points of folding ladder racks or adjustable tie-down cleats.
Rubberized roof pads and aerodynamic fairings trap moisture against the vehicle's roof and the rack's mounting feet. If your crew works in high humidity or frequent rain, remove the crossbars entirely once a month. Wipe down the vehicle roof and the bottom of the rack feet with a 50/50 mix of isopropyl alcohol and water to kill mold spores and prevent localized rust on steel mounting bolts.
Load Limits and Structural Torque Specifications
A critical mistake roofing contractors make is confusing the roof rack's weight capacity with the vehicle roof's dynamic load limit. According to testing data referenced by the Insurance Institute for Highway Safety (IIHS), vehicle roofs are engineered primarily for crashworthiness (roof crush resistance), not for carrying heavy, shifting cargo at highway speeds.
Dynamic vs. Static Load Realities
While a heavy-duty steel rack might boast a 600 lb static capacity (when the vehicle is parked), the dynamic capacity (while driving) is usually capped between 130 lbs and 165 lbs by the vehicle manufacturer. Bundles of architectural shingles weigh roughly 250 lbs to 300 lbs each. Never transport shingle bundles on a passenger vehicle's roof rack. Restrict roof rack in car hauling to lightweight, high-volume items: aluminum ladders, PVC piping, foam insulation boards, and ridge vents.
Hardware Torque Maintenance
Vibration from driving, combined with the shifting weight of ladders, causes mounting hardware to loosen. Incorporate a torque check into your monthly fleet maintenance schedule.
| Hardware Type | Common Application | Target Torque Specification | Failure Mode if Over-Torqued |
|---|---|---|---|
| M8 Stainless Steel Bolt | Tower to crossbar connection | 12 - 15 Nm | Strips the internal threads of the aluminum crossbar T-track. |
| M6 Hex Bolt | Accessory cleats / ladder stops | 6 - 8 Nm | Shears the bolt head or cracks the plastic accessory housing. |
| Clamp Jaw Screws | Foot pack to vehicle rain gutter | Hand-tight plus 1/4 turn | Crushes the vehicle's rain gutter or cracks the fiberglass roof cap. |
Troubleshooting Common Rack Failures
When hardware degrades on the job site, quick diagnostics can prevent catastrophic load failure on the highway. Use this decision tree for common roof rack in car issues.
- Symptom: Whistling or excessive wind noise at speeds over 45 mph.
Cause: The rubber T-track seal strip has dislodged, or the crossbar end-caps are missing, allowing air to resonate inside the hollow aluminum bar.
Fix: Replace missing end-caps immediately. Re-seat the rubber T-track strip, trimming it flush with the bar edge so it doesn't flap in the wind. - Symptom: Visible rust streaking down the vehicle's doors from the rack feet.
Cause: Galvanic corrosion occurring where steel mounting bolts touch aluminum crossbars in the presence of salt water or acidic job site runoff.
Fix: Remove the bolts, clean with a wire brush, and apply a dielectric grease or anti-seize compound containing copper or nickel before reinstalling. Replace any deeply pitted bolts. - Symptom: Rack shifts laterally when braking hard.
Cause: The rubber foot pads have hardened and lost their coefficient of friction, or the clamp tension has relaxed due to thermal expansion/contraction.
Fix: Clean the rubber pads with isopropyl alcohol to restore grip. Re-torque the clamp jaws to manufacturer specifications.
Cargo Securement: FMCSA Compliance for Roofers
Securing a 24-foot aluminum extension ladder to a passenger vehicle's roof rack requires strict adherence to safety regulations. The Federal Motor Carrier Safety Administration (FMCSA) mandates specific tie-down protocols for commercial vehicles, and while passenger SUVs may not always fall under strict DOT enforcement depending on your fleet's GVWR, adopting these standards prevents lethal highway accidents and protects your company from catastrophic liability.
Always use cam-buckle straps or heavy-duty ratchet straps rated for at least 500 lbs of working load limit (WLL). Never rely on bungee cords or elastic tie-downs to secure ladders or piping. Thread the strap through the vehicle's open door frames (using a soft door-jam anchor to prevent paint damage) or through the dedicated tie-down loops integrated into modern roof rack towers. Ensure the ladder is secured at two distinct points: one near the front crossbar and one near the rear crossbar, with a high-visibility red flag attached to any overhang exceeding four feet beyond the vehicle's rear bumper.