How Much Does It Cost to Build a Brick Mailbox? Durability Cost Guide
Discover how much it costs to build a brick mailbox. We analyze material durability, mortar selection, and long-term maintenance to maximize your investment.

When homeowners ask how much does it cost to build a brick mailbox, the standard answer is a broad range of $800 to $2,500. However, viewing this project purely through the lens of upfront material and labor costs is a critical mistake. A mailbox built with substandard masonry practices will succumb to frost heave, spalling, and mortar degradation within five to seven years, effectively doubling your long-term costs. A properly engineered brick mailbox, utilizing severe-weathering clay and chemically balanced mortar, will easily outlast the 50-year lifespan of the home it sits in front of.
The True Cost: Upfront Pricing vs. 50-Year Lifespan
To understand the real financial commitment, we must break down the costs based on durability tiers. The data below reflects 2026 masonry labor rates (averaging $85 to $130 per hour) and current material supply costs.
| Component | Standard Build (10-15 Year Lifespan) | High-Durability Build (50+ Year Lifespan) |
|---|---|---|
| Foundation | $150 (Shallow 12" slab) | $450 (Frost-line pier + reinforced pad) |
| Brick Material | $180 (Common/Interior grade) | $380 (ASTM C216 Grade SW Face Brick) |
| Mortar & Sand | $45 (Pre-mixed Type S) | $95 (Custom Type N mix + lime) |
| Cap & Hardware | $120 (Standard concrete cap) | $350 (Limestone/Bluestone sloped cap) |
| Mason Labor | $600 (1 day, basic layup) | $1,400 (2 days, precision tooling) |
| Total Estimated Cost | $1,095 | $2,675 |
Material Selection: Engineering for Freeze-Thaw Survival
The primary enemy of exterior masonry is the freeze-thaw cycle. When water penetrates porous brick and freezes, it expands by 9%, generating internal tensile forces that exceed the masonry unit's structural capacity. This results in spalling—the flaking and peeling of the brick face.
Brick Grading and ASTM C216 Compliance
Never use common brick or leftover interior brick for a mailbox. According to the Brick Industry Association, exterior masonry in climates experiencing freezing temperatures must utilize brick that meets ASTM C216 Grade SW (Severe Weathering). Grade SW bricks are manufactured to have a lower initial rate of absorption (IRA) and higher compressive strength (minimum 3,000 psi). They cost roughly $0.85 to $1.40 per unit compared to $0.45 for moderate weathering (MW) grades, but this 80% premium prevents catastrophic structural failure.
Mortar Chemistry: Why Type N Outperforms Type S
A common misconception is that stronger mortar equals a stronger mailbox. In masonry, the mortar must actually be slightly weaker and more flexible than the brick it binds. Type S mortar (1,800 psi) is highly rigid. If the mailbox experiences minor soil settlement or thermal expansion, the rigid mortar will not yield, forcing the brick itself to crack.
For above-grade exterior masonry like a mailbox, Type N mortar (750 psi) is the optimal choice. Type N consists of 1 part Portland cement, 1 part hydrated lime, and 6 parts masonry sand. The high lime content provides crucial flexibility and enables autogenous healing—a process where free lime in the mortar dissolves in rainwater and naturally seals micro-cracks as it re-crystallizes. For a deeper understanding of mortar compatibility, the National Park Service preservation guidelines offer extensive data on why high-lime mortars protect historic and modern masonry alike.
Avoid using "mortar cement" or pre-mixed bags that rely on plasticizers instead of true hydrated lime. While plasticizers improve workability, they trap air and reduce the mortar's ability to bond and breathe, accelerating freeze-thaw degradation. Always mix Portland cement, true hydrated lime (Type S), and washed masonry sand on-site.
The Foundation: Preventing Frost Heave and Settlement
The most frequent cause of total mailbox failure is not the brickwork, but the foundation. A brick mailbox weighs between 800 and 1,500 pounds. If this mass rests on a shallow concrete pad, the expanding soil beneath it during winter (frost heave) will tilt the structure. Once a masonry column tilts, the mortar joints crack, water enters, and the destruction accelerates.
Proper Footing Specifications
To achieve a 50-year lifespan, the foundation must bypass the active soil layer. This requires a concrete footing poured below the local frost line. In northern US climates, this means excavating 36 to 48 inches deep.
- Pier Depth: Minimum 12 inches below the local frost line using a 12-inch diameter Sonotube.
- Pad Dimensions: 24" x 24" x 12" thick reinforced concrete pad sitting at grade level.
- Reinforcement: Two pieces of #4 (1/2-inch) rebar running vertically through the pier and bending into the pad to tie the structure together.
- Weep Holes: Leave a 1/2-inch gap at the base of the brickwork (above the flashing) to allow trapped moisture to escape.
Failure Mode Analysis: Troubleshooting Masonry Decay
Even well-built mailboxes require observation. Understanding the symptoms of masonry decay allows for low-cost interventions before structural replacement is necessary.
- Symptom: White, powdery residue on the brick surface (Efflorescence).
Cause: Water-soluble salts naturally present in the clay or migrating from the concrete foundation are carried to the surface by moisture evaporation.
Fix: Dry-brush the residue with a stiff natural-bristle brush. Do not use muriatic acid or high-pressure washing, which will force water deeper into the masonry and degrade the mortar joints. - Symptom: Brick faces peeling or flaking off (Spalling).
Cause: Water absorption combined with freeze-thaw cycles, often exacerbated by the use of a non-breathable acrylic sealant that traps moisture inside the brick.
Fix: Replace the spalled units with Grade SW brick. If sealing is necessary, use only a breathable silane/siloxane penetrating sealer that allows water vapor to escape while blocking liquid water intrusion. - Symptom: Mortar joints receding or crumbling.
Cause: Improper initial tooling (failing to compress the mortar against the brick edge) or the use of high-cement/low-lime mortar that lacks durability.
Fix: Tuckpointing. Rake out the degraded mortar to a depth of 2.5 times the joint width and repack with Type N mortar. As noted by masonry experts at Fine Homebuilding, proper joint tooling with a convex jointer is critical for shedding water.
The Capstone: Designing for Water Shedding
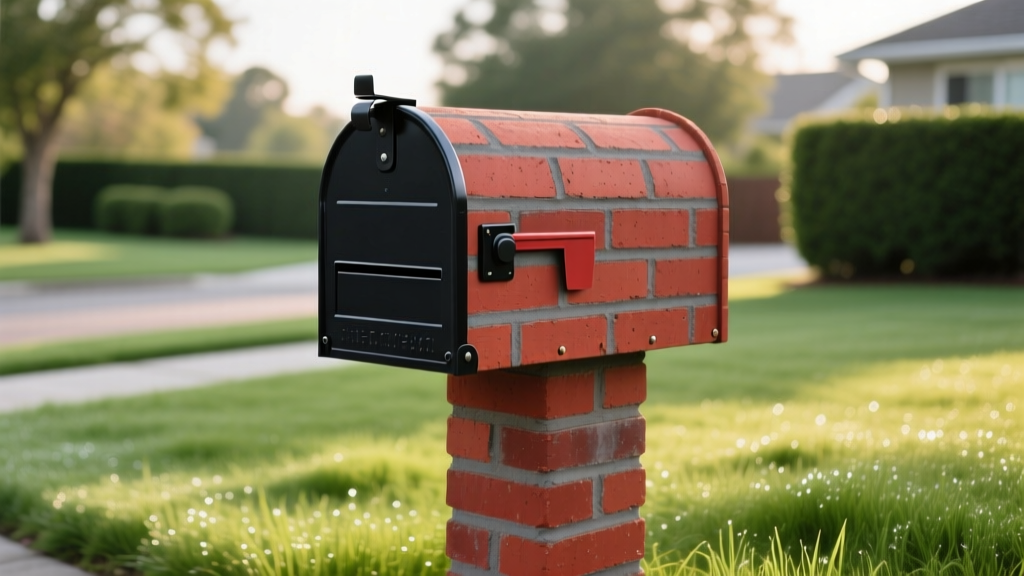
The horizontal top surface of a brick mailbox is its most vulnerable point. Flat brick rowlocks or standard concrete caps absorb water directly from above, channeling it down into the vertical masonry walls. A high-durability build mandates a sloped capstone made of dense, non-porous material like bluestone, limestone, or cast architectural concrete.
The cap must feature a minimum 15-degree slope and a 1-inch overhang with a drip edge (a shallow groove cut into the underside of the overhang). This drip edge breaks the surface tension of rainwater, forcing it to drop to the ground rather than wrapping around the lip and running down the brick facade. While a custom-cut bluestone cap adds $200 to $350 to the initial cost, it effectively eliminates top-down water infiltration, reducing long-term maintenance costs to near zero.
Summary: Investing in Permanence
Answering the question of how much does it cost to build a brick mailbox requires looking past the initial contractor quote. Spending $2,600 on a structurally sound, freeze-thaw-resistant masonry column is significantly cheaper than spending $1,200 today and another $1,800 in a decade to rebuild a leaning, spalled structure. By insisting on ASTM C216 Grade SW brick, Type N lime-rich mortar, and a sub-frost-line reinforced foundation, you secure a permanent, elegant landmark for your property that will endure for half a century or more.
Written by
James ThorntonJames Thornton is a construction industry veteran with 25 years of hands-on experience in wood framing, lumber grading, and residential building codes. He started as a framing carpenter in rural Oregon, earned his ICC Residential Building Inspector certification, and eventually became a senior plan reviewer for the City of Portland Bureau of Development Services. James holds a B.S. in Wood Science & Technology from Oregon State University and is a certified lumber grader through the West Coast Lumber Inspection Bureau (WCLIB). He has inspected over 3,000 residential construction sites and authored the city's internal guide on advanced framing techniques (2x6 at 24" O.C.). James lives in Bend, OR, where he builds custom timber-frame cabins and competes in lumberjack sports.
More from James Thornton
View all
Insulation
Best Home Insulation Materials: Complete 2026 Guide
Compare top home insulation materials for 2026. Find R-values, installed costs per square foot, and best uses for fiberglass, spray foam, and mineral wool.
Aug 4, 2026

Sustainable Building
Certify Your Green Building Material for LEED and WELL
Step-by-step guide to certifying a green building material for LEED v5 and WELL v2. Master EPDs, HPDs, and VOC limits for 2026 project specifications.
Aug 4, 2026

Stone & Masonry
Veneer Stacked Stone Panels: Interior Design & Style Showcase
Discover how veneer stacked stone panels transform interiors. Explore modern design profiles, material pairings, and technical installation specs.
Aug 4, 2026