How to Order and Evaluate Stone Veneer Samples Before Buying
Learn how to order, inspect, and evaluate stone veneer samples before your next project. Avoid costly mistakes with our expert buyer's selection guide.

Why Full-Size Panels Outperform Small Swatches
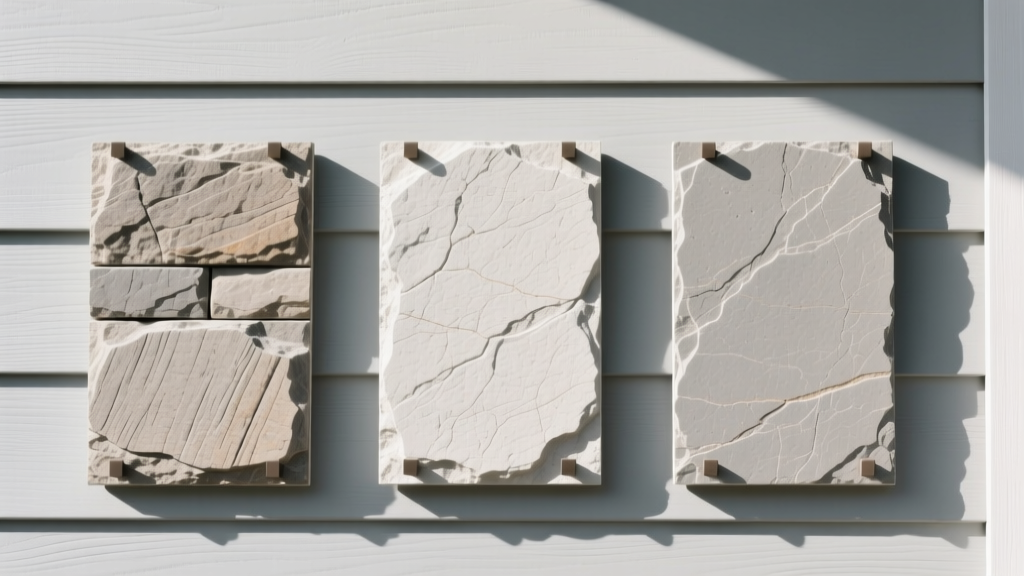
Ordering stone veneer without evaluating physical samples is a financial gamble. Screen resolutions distort color depth, and small 2x2-inch swatches hide structural inconsistencies, edge profile variations, and mortar joint realities. While a tiny chip might show you the base color, it fails to demonstrate the macro-texture and shadow lines that define the final installation.
For any project exceeding 200 square feet, buyers must transition from digital catalogs to physical, full-size sample panels. A 12x12-inch or full-panel sample reveals the "blend"—how the manufacturer mixes light, medium, and dark stones within a single square foot. This blend ratio dictates whether your exterior facade will look like a natural, weathered quarry wall or a repetitive, manufactured grid. According to the Masonry Veneer Manufacturers Association (MVMA), evaluating the macro-pattern is critical for avoiding the "stair-step" or "columnar" visual defects that occur when installers run out of varied stone shapes during the layout phase.
The 5-Point Physical Inspection Checklist
When your sample box arrives, do not just look at the color. Perform a rigorous physical inspection to verify manufacturing quality and compliance with ASTM C1670 Standard Specification for Adhered Manufactured Stone Masonry Veneer.
1. Weight and Density Verification
Manufactured stone veneer (MSV) is engineered to be lightweight. Weigh your sample on a digital postal scale and calculate the pounds per square foot (PSF). Authentic MSV should fall between 10 and 15 lbs/sq ft. If a manufactured sample weighs over 20 lbs/sq ft, it likely contains excessive aggregate and insufficient lightweight pumice or perlite, which will increase your structural load requirements and labor fatigue during installation.
2. Backside Keying Depth
Turn the sample over. The back must feature deep, aggressive grooves (keying) designed to lock into the mortar scratch coat. Run your fingernail across the grooves. The keying depth should be a minimum of 1/16-inch to 1/8-inch. Smooth or shallow backs indicate poor mold maintenance and will result in adhesion failure, leading to delamination within three to five freeze-thaw cycles.
3. The Scratch Test (Color Penetration)
Take a steel utility knife and scratch an inconspicuous edge of the stone. High-quality MSV utilizes iron-oxide pigments mixed throughout the entire concrete matrix, not just surface-painted. If the scratch reveals a stark, bright gray concrete core that contrasts sharply with the surface color, the pigment layer is too thin. Over time, UV exposure and minor impacts will wear through this thin veneer, exposing the raw concrete.
4. Edge Profile and Flash Removal
Inspect the perimeter edges of the sample stones. High-end manufacturers use multi-part polyurethane molds that produce crisp, natural edges with minimal "flash" (the thin ridge of concrete where the mold halves meet). Excessive flash requires installers to spend extra time chipping edges with a masonry hammer, increasing labor costs by up to 15%.
5. Efflorescence Potential
Submerge the sample in a bucket of distilled water for 24 hours, then remove it and let it dry in direct sunlight. As the water evaporates, watch for white, powdery salt deposits (efflorescence) on the surface. While some efflorescence is normal in cementitious products, heavy blooming indicates poor mix design or inadequate use of efflorescence-inhibiting admixtures at the factory.
Dimensional & Weight Tolerances: Manufactured vs. Natural
Understanding the baseline metrics of your sample helps you plan for structural support, mortar volume, and shipping logistics. The table below outlines standard industry tolerances as of 2026.
| Metric | Manufactured Stone Veneer (MSV) | Natural Thin Stone Veneer |
|---|---|---|
| Weight per Sq Ft | 10 - 15 lbs | 15 - 25 lbs |
| Standard Thickness | 1.0" - 2.5" | 0.75" - 1.5" |
| Water Absorption Limit | < 22% (per ASTM C1670) | Varies (Limestone < 12%, Sandstone up to 25%) |
| Mortar Joint Width | 0.5" (Standard) to Dry-Stack | 0.5" to 1.0" (Irregular) |
Environmental Stress Testing Your Samples
A sample sitting in a climate-controlled office looks vastly different than stone installed on a south-facing exterior wall in a high-humidity environment. Perform these rapid environmental stress tests before signing a purchase order.
While you cannot replicate years of weathering in a week, you can accelerate the process. Saturate your stone veneer sample completely in water, place it in a sealed plastic bag, and leave it in a standard kitchen freezer for 48 hours. Remove it and immediately place it in direct, hot sunlight or a 150°F oven. Repeat this cycle three times. Inspect for micro-cracking, spalling, or pigment flaking. Any structural degradation during this rapid test is a massive red flag for long-term exterior durability.
Decoding Sample Fees, Freight, and Dye-Lot Batching
Ordering samples is not free, and the logistics require strategic planning. In 2026, expect to pay $8 to $25 per individual sample piece, plus $35 to $85 in freight surcharges for palletized shipping. Because stone is heavy and fragile, carriers use specialized LTL (Less Than Truckload) freight with liftgate services, which drives up the base delivery fee.
The Dye-Lot Trap
The most common buyer mistake is approving a sample and assuming the final 2,000-square-foot production run will match it perfectly. Concrete pigments vary slightly between manufacturing batches (dye-lots). Actionable Strategy: When ordering samples, request three panels from three different production lots. This establishes the manufacturer's acceptable variance range. When you place your final order, explicitly state in the purchase contract that the entire project must be pulled from a single, continuous dye-lot, or that the delivered product must fall within the color variance of your three approved samples.
Critical Red Flags to Reject a Batch
Not all samples are created equal. If you observe any of the following defects, reject the manufacturer immediately. InterNACHI inspectors frequently document these exact failure modes in homes suffering from moisture intrusion and facade collapse.
- Painted Appearance: If the color looks like a uniform, opaque coat of paint rather than translucent, mottled mineral deposits, the manufacturer is using cheap acrylic surface stains instead of integral iron-oxide pigments.
- Spalling Edges: If the edges of the sample stones are crumbling or flaking off in your hands right out of the box, the concrete curing process was rushed or the mix lacked sufficient Portland cement.
- Flat Backs: Samples with completely flat, smooth backs lacking mechanical keying grooves will not achieve the required shear bond strength with Type S or Type N mortar.
Frequently Asked Questions About Veneer Samples
Can I return stone veneer samples for a refund?
Rarely. Most manufacturers classify samples as "consumable evaluation tools" and explicitly state them as non-refundable due to the high cost of return freight and the likelihood of damage during transit. Factor the $100-$200 sample and shipping cost into your overall project R&D budget as a sunk cost.
How many samples should I order for a large exterior project?
For projects under 500 square feet, order two full panels and one corner piece. For projects over 1,000 square feet, order a minimum of four flat panels, two outside corners, and one keystone or hearth piece. This ensures you can evaluate the transition profiles and verify that the corner pieces seamlessly blend with the flat field stone without obvious repeating patterns.
Should I test the mortar on the sample?
Yes. Buy a small bag of Type S masonry mortar and a wire lath scrap from a local hardware store. Apply the scratch coat, press the sample into the mortar, and let it cure for 14 days. Attempt to pry the stone off with a crowbar. The stone should fracture before the mortar bond fails. This real-world adhesion test is the ultimate proof of the sample's backside keying quality.
Written by
James ThorntonJames Thornton is a construction industry veteran with 25 years of hands-on experience in wood framing, lumber grading, and residential building codes. He started as a framing carpenter in rural Oregon, earned his ICC Residential Building Inspector certification, and eventually became a senior plan reviewer for the City of Portland Bureau of Development Services. James holds a B.S. in Wood Science & Technology from Oregon State University and is a certified lumber grader through the West Coast Lumber Inspection Bureau (WCLIB). He has inspected over 3,000 residential construction sites and authored the city's internal guide on advanced framing techniques (2x6 at 24" O.C.). James lives in Bend, OR, where he builds custom timber-frame cabins and competes in lumberjack sports.
More from James Thornton
View all
Insulation
Best Home Insulation Materials: Complete 2026 Guide
Compare top home insulation materials for 2026. Find R-values, installed costs per square foot, and best uses for fiberglass, spray foam, and mineral wool.
Aug 4, 2026

Sustainable Building
Certify Your Green Building Material for LEED and WELL
Step-by-step guide to certifying a green building material for LEED v5 and WELL v2. Master EPDs, HPDs, and VOC limits for 2026 project specifications.
Aug 4, 2026

Stone & Masonry
Veneer Stacked Stone Panels: Interior Design & Style Showcase
Discover how veneer stacked stone panels transform interiors. Explore modern design profiles, material pairings, and technical installation specs.
Aug 4, 2026