Lightweight Stone Veneer Maintenance and Cleaning Guide
Expert lightweight stone veneer maintenance guide: Learn safe cleaning methods, efflorescence removal, mortar repair, and moisture prevention tips.

The Hidden Vulnerabilities of Manufactured and Thin Stone
Lightweight stone veneer—encompassing both manufactured stone veneer (MSV) and thin-cut natural stone—has become a dominant exterior and interior cladding choice due to its low structural load and cost efficiency. However, a pervasive industry myth is that these cementitious or porous systems are "maintenance-free." In reality, the Portland cement matrix of MSV and the high absorption rates of thin natural stones like limestone and sandstone make them highly susceptible to chemical etching, moisture entrapment, and mortar joint degradation.
Unlike full-bed natural stone, lightweight stone veneer relies heavily on the integrity of its scratch coat, mortar joints, and the concealed weather-resistant barrier (WRB) behind it. Failure to maintain the exterior surface often masks catastrophic moisture intrusion occurring within the wall cavity.
Standard masonry cleaning practices often involve muriatic (hydrochloric) acid to remove mortar smears. Because manufactured lightweight stone veneer is colored with iron oxide pigments and bound with Portland cement, acid washing will strip the pigment, etch the surface, and permanently weaken the structural binder. Always use alkaline or neutral pH cleaners specifically formulated for MSV.
Routine Cleaning: The 3-Step Safe Wash Protocol
When biological growth, dirt, or mild efflorescence accumulates on lightweight stone veneer, aggressive cleaning methods will cause irreversible damage. Follow this protocol to safely restore the cladding without compromising the mortar joints.
- Pre-Wet the Substrate: Lightweight stone and its mortar joints are highly porous. Using a garden hose, thoroughly saturate the wall from the bottom up. This prevents the cleaning solution from being absorbed too deeply into the masonry, which can cause internal salt crystallization later.
- Apply a Specialized Cleaner: Use a non-acidic, MSV-approved cleaner such as Prosoco Sure Klean® Limestone & Masonry Cleaner or a diluted solution of mild, non-phosphate dish soap. Apply with a low-pressure pump sprayer. Allow a 3-to-5-minute dwell time, but do not let the solution dry on the surface.
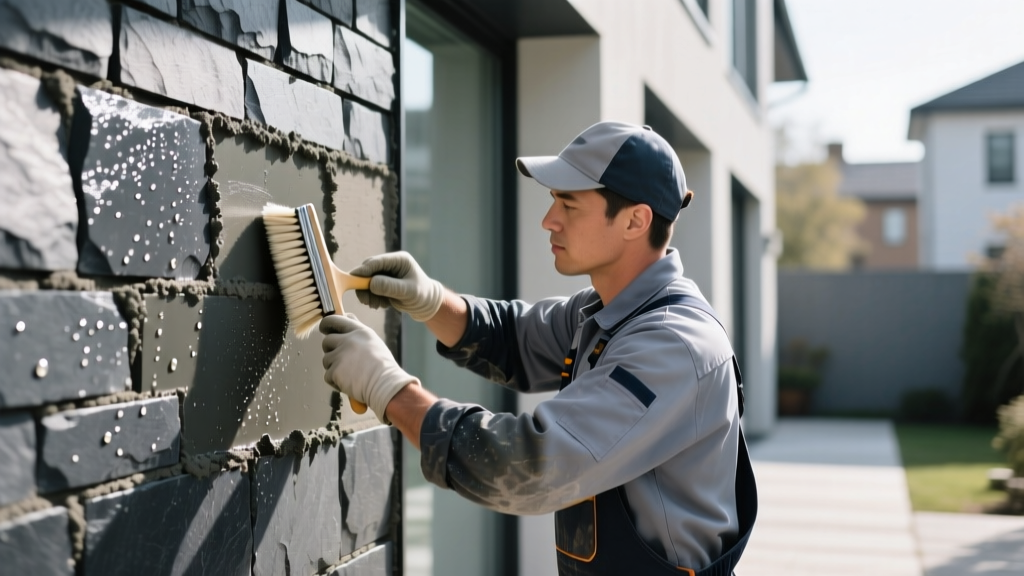
- Agitate and Rinse: Gently agitate stubborn areas with a natural or synthetic soft-bristle brush (never use wire brushes, which leave rust stains and scratch the veneer). Rinse thoroughly from the top down using a garden hose or a pressure washer strictly limited to 400 PSI maximum with a 12-inch minimum standoff distance.
Diagnostic Matrix: Troubleshooting Common Veneer Failures
Visual symptoms on the face of lightweight stone veneer are often indicators of systemic wall assembly issues. Use the matrix below to diagnose and address the root cause rather than just treating the symptom.
| Symptom | Root Cause | Corrective Action | 2026 Est. Repair Cost |
|---|---|---|---|
| White, powdery residue (Efflorescence) | Water migrating through the wall assembly, dissolving soluble salts in the mortar/scratch coat and depositing them on the surface as it evaporates. | Dry-brush immediately. Identify and fix the water entry point (usually failed flashing or missing weep screed). Do not wash with water until the leak is resolved. | $0 (DIY brushing) to $450+ (flashing repair) |
| Crumbling or missing mortar joints (Spalling) | Freeze-thaw cycling combined with the use of overly rigid mortar (e.g., Type M) that lacks the flexibility to accommodate thermal expansion of the lightweight stones. | Rake out damaged joints to a depth of 1/2 inch and repoint using a flexible, polymer-modified Type N or Type S mortar mix colored to match the original. | $12 - $18 per sq. ft. (Professional repointing) |
| Dark, damp patches at the base | Weep screed is buried by landscaping, mulch, or soil, preventing the WRB from draining and causing capillary wicking into the bottom course of veneer. | Excavate soil/mulch to maintain a minimum 4-inch clearance below the weep screed. Replace any rotted bottom-course stones. | $5 - $8 per sq. ft. (Stone replacement) |
The Sealing Debate: Moisture Management vs. Vapor Traps
A frequent question among property owners is whether to apply a penetrating sealer to lightweight stone veneer to prevent staining and water ingress. The building science community generally advises against routine sealing of MSV and thin natural stone.
"Lightweight masonry veneers are designed as mass walls that manage moisture through absorption and subsequent evaporation. Applying a film-forming or low-permeability sealer traps incidental moisture inside the wall cavity, accelerating the corrosion of metal lath and the rotting of wood framing."
— Adapted from principles outlined by Building Science Corporation on water-managed wall systems.
If you are in an extreme freeze-thaw climate (e.g., USDA Hardiness Zones 3-5) and the manufacturer explicitly permits it, you may apply a silane/siloxane-based penetrating water repellent. These sealers do not form a surface film and maintain the high vapor permeability (ASTM E96) required for the wall to dry to the exterior. Never use acrylic, polyurethane, or "wet-look" sealers on lightweight stone veneer.
Annual Inspection and Maintenance Checklist
To prevent minor cosmetic issues from escalating into structural water damage, conduct this targeted inspection every spring. According to guidelines referenced by the Brick Industry Association (BIA) for sensitive masonry, proactive maintenance extends cladding lifespan by decades.
- Check Weep Screeds: Ensure the weep screed at the base of the wall is completely unobstructed. Clear away dirt, spider webs, and debris using a shop vacuum or compressed air. Verify that grade level remains at least 4 inches below the screed.
- Inspect Flashing Intersections: Examine the transition points where the lightweight stone veneer meets roofing, decks, or windows. The sealant at these joints degrades under UV exposure. Re-caulk using a high-quality, paintable polyurethane sealant (e.g., Sikaflex-1a) if cracking or pulling is observed.
- Tap Test for Delamination: Gently tap the face of the stones with the handle of a screwdriver or a rubber mallet. A solid "thud" indicates proper adhesion to the scratch coat. A hollow, echoing sound means the stone has delaminated from the metal lath and requires immediate removal and re-setting to prevent water from pooling behind it.
- Evaluate Roof Runoff: Ensure gutters and downspouts are not discharging directly onto the veneer. Continuous water concentration will rapidly degrade the mortar joints and cause localized efflorescence. Install splash blocks or extend downspouts at least 5 feet away from the veneered foundation.
- Monitor Biological Growth: North-facing walls are prone to algae and lichen. If spotted early, treat with a diluted oxygen bleach solution. Avoid chlorine bleach, which can discolor the iron oxide pigments in manufactured stone and harm surrounding landscaping.
For extensive efflorescence removal or large-scale repointing, consult a certified masonry restoration specialist. When dry-brushing or grinding out old mortar joints, always adhere to OSHA's respirable crystalline silica standards by utilizing N95 respirators and wet-cutting methods to protect against hazardous dust inhalation.
Written by
Elena RodriguezElena Rodriguez is a civil engineer and technical writer specializing in concrete technology, masonry systems, and ASTM/ACI compliance. She earned her B.S. in Civil Engineering from Texas A&M University and spent a decade at a materials testing laboratory, performing over 2,000 concrete compressive strength tests and masonry prism evaluations. Elena is an ACI-certified Field Testing Technician (Grade I) and a member of ASTM Committee C12 on Natural Building Stone. She currently consults on forensic engineering cases involving concrete failures and moisture intrusion. Based in San Antonio, TX, Elena is a proud member of the Society of Women Engineers (SWE) and coaches her daughter's FIRST Robotics team.
More from Elena Rodriguez
View all
Walls & Panels
Cost Analysis: Light Gauge Steel Framing Advantages and Disadvantages
Evaluate light gauge steel framing advantages and disadvantages through a strict cost analysis lens, comparing material, labor, and lifecycle expenses.
Aug 4, 2026

Walls & Panels
Gypsum Board Types: Exact Specifications, Thickness & Dimensions
Compare standard, Type X, and moisture-resistant gypsum board types. Get exact specifications, thicknesses, dimensions, and ASTM standards for your project.
Aug 4, 2026

Fire Resistance
Best Fire-Resistant Outdoor Decking Materials: 2026 Buyer Guide
Discover the best fire-resistant outdoor decking materials for 2026. Compare Class A PVC, aluminum, and hardwood options for WUI compliance and safety.
Aug 4, 2026