Mastering the Exterior Stone Veneer Install: Step-by-Step Pro Guide
Learn the exact steps for a flawless exterior stone veneer install. Covers WRB prep, lath, scratch coats, mortar selection, and 2026 cost data.

Pre-Installation Substrate Prep and Waterproofing
The most critical phase of any stone veneer install happens before a single stone is unpacked. Moisture intrusion and improper drainage account for the vast majority of veneer failures, including efflorescence, spalling, and delamination. For exterior wood-framed walls, the substrate must be structurally sound, typically requiring a minimum of 7/16-inch OSB or 1/2-inch CDX plywood sheathing.
Once the sheathing is verified, you must install a Weather-Resistive Barrier (WRB). While single-layer housewraps are common in siding, a proper stone veneer install demands a dual-layer approach or a specialized dimpled drainage mat. If using Grade D asphalt-impregnated kraft paper, apply two layers, shingling the upper layer over the lower by at least 2 inches. This creates a capillary break that allows incidental moisture to drain down and out of the wall cavity.
Per ASTM C1063 standards, a corrosion-resistant weep screed with a minimum 3.5-inch vertical flange must be installed at the base of all exterior stud walls. The WRB must lap over the weep screed's flange, ensuring water exits the wall system above the foundation line. Never bury the weep screed in concrete or mortar.
Lath and Scratch Coat Application
Metal lath provides the mechanical key for the mortar base coat. Use only 2.5 lb per square yard, self-furring, galvanized woven wire lath. The self-furring dimples must face outward, holding the wire 1/4-inch away from the WRB so mortar can fully encapsulate the mesh.
Fastening and Overlap Specifications
- Fasteners: Use galvanized roofing nails or corrosion-resistant staples long enough to penetrate the framing studs by a minimum of 1 inch. Fasten every 6 inches on center vertically and 16 inches on center horizontally.
- Horizontal Seams: Overlap lath by a minimum of 1 inch.
- Vertical Seams: Overlap lath by a minimum of 2 inches.
- Corners: Wrap the lath around all exterior and interior corners by at least 8 inches. Never terminate lath directly on a corner, as this creates a natural hinge point for cracking.
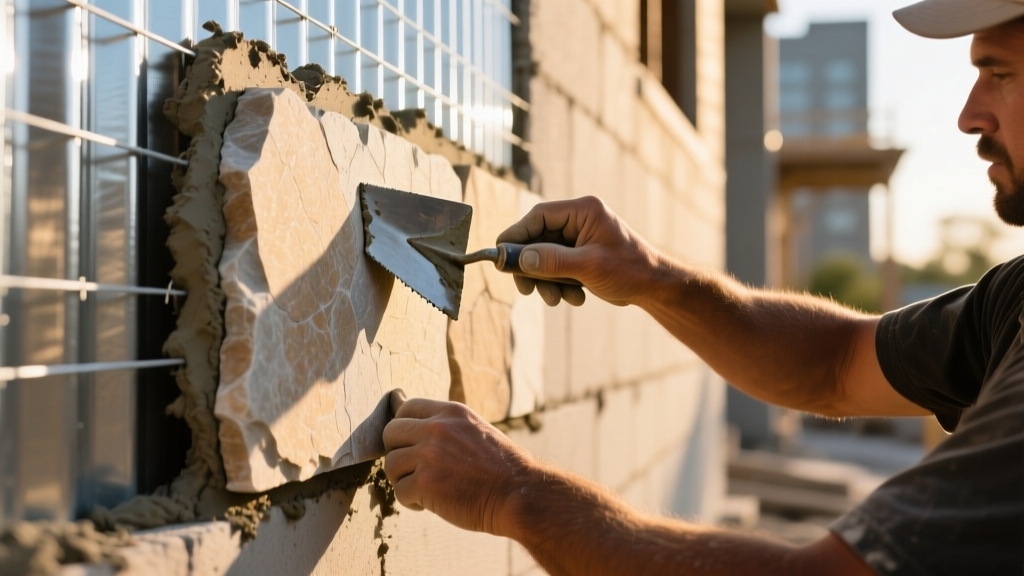
Once the lath is secured, apply the scratch coat. Mix a Type S masonry mortar (which offers high compressive strength and excellent bond) to a stiff, workable consistency. Trowel the mortar completely through the lath mesh, pressing it firmly against the WRB, then pull it out to a uniform thickness of 3/8-inch to 1/2-inch. Before the mortar sets, use a coarse rake or notched trowel to scarify the surface with horizontal grooves. This horizontal scoring provides the mechanical tooth for the setting bed. Allow the scratch coat to cure for a minimum of 48 hours, misting it lightly with water if temperatures exceed 80°F to prevent rapid drying and shrinkage cracks.
The Mortar Bed and Stone Veneer Install Sequence
When executing the actual stone veneer install, mortar selection is paramount. While Type S is ideal for the scratch coat, a Type N mortar or a specialized polymer-modified veneer mortar (such as QUIKRETE® Veneer Stone Mortar) is preferred for the setting bed. Polymer-modified mortars offer superior flexural strength and adhesion, accommodating the slight thermal expansion and contraction inherent in exterior walls.
Step-by-Step Installation Flow
- Layout and Dry-Fit: Open multiple boxes of veneer and blend the stones to ensure a natural distribution of color and texture. Dry-fit corner pieces first to establish your vertical lines.
- Install Corners First: Apply a 1/2-inch layer of setting mortar to the scratch coat. Back-butter the corner stone with a 1/4-inch layer of mortar. Press the stone firmly into place with a slight twisting motion until mortar squeezes out slightly at the edges.
- Run the Field Stone: Work from the bottom up, filling the field between corners. Maintain a consistent joint width, typically between 1/2-inch and 1 inch for standard stacked or fieldstone profiles.
- The Back-Buttering Mandate: Never rely solely on mortar applied to the wall. Every single stone must be back-buttered to ensure 100% coverage and eliminate hidden air voids where moisture can collect and freeze.
- Cut Stones to Fit: Use a masonry chop saw with a diamond blade or a 4-inch angle grinder for precise cuts. Hide cut edges by turning them into the joint or placing them where they will be covered by adjacent mortar joints.
Your setting mortar should have the consistency of thick peanut butter. If it is too wet, it will shrink and pull away from the stone as it cures. If it is too dry, it will fail to bond. Always follow the manufacturer's exact water-to-mix ratios, and never re-temper (add water to) mortar that has begun to set.
Jointing, Tooling, and Cleanup
Proper jointing seals the installation and defines the aesthetic. Wait until the mortar is "thumbprint hard"—firm enough that pressing your thumb into it leaves only a shallow impression, but soft enough to be tooled. This typically takes 30 to 60 minutes depending on ambient temperature and humidity.
Use a pointing trowel or a jointing iron to compact the mortar into the joints. Compaction is critical; it densifies the mortar, pushing it tightly against the stone edges and significantly reducing its permeability to water. After tooling, wait another 15 minutes, then use a stiff, dry bristle brush to sweep away excess mortar crumbs and smooth the joint face.
Unlike natural clay brick, manufactured stone veneer is highly susceptible to acid etching. Muriatic acid or commercial brick cleaners will permanently stain the cementitious surface and degrade the mortar joints. Clean smears immediately with a damp sponge and a stiff nylon brush while the mortar is still fresh. For dried smears, use a specialized, non-acidic masonry cleaner approved by the Masonry Veneer Manufacturers Association (MVMA).
2026 Material and Labor Cost Estimates
Budgeting for a stone veneer install requires accounting for both the visible materials and the critical concealed components. The following table outlines current 2026 national average costs for a standard exterior application.
| Component | Material Cost (per sq. ft.) | Labor Cost (per sq. ft.) | Total Installed |
|---|---|---|---|
| WRB, Lath & Fasteners | $1.50 - $2.50 | $2.00 - $3.50 | $3.50 - $6.00 |
| Scratch & Setting Mortar | $1.00 - $1.80 | $3.00 - $5.00 | $4.00 - $6.80 |
| Manufactured Stone Veneer | $6.00 - $12.00 | $12.00 - $22.00 | $18.00 - $34.00 |
| Total Project Average | $8.50 - $16.30 | $17.00 - $30.50 | $25.50 - $46.80 |
Note: Natural stone veneer (e.g., thin-cut granite or limestone) will increase material costs by 40% to 80% and requires specialized heavy-duty anchors for thicker profiles, pushing total installed costs well above $60 per square foot.
Troubleshooting Common Installation Defects
Even experienced masons can encounter issues if environmental variables or material tolerances are ignored. Here is how to diagnose and prevent the three most common failure modes in stone veneer installations.
1. Efflorescence (White Powdery Staining)
The Cause: Water-soluble salts within the mortar or stone are drawn to the surface by migrating moisture, leaving a white residue when the water evaporates.
The Fix: Prevention is the only true cure. Ensure your WRB and weep screed are flawlessly installed to keep bulk water out of the wall cavity. If efflorescence appears, do not use water to wash it off, as this drives the salts back into the masonry. Use a dry, stiff brush to remove it, and apply a breathable, silane-siloxane penetrating masonry sealer once the wall is fully cured (minimum 28 days post-install).
2. Stone Delamination (Stones Popping Off)
The Cause: Delamination almost always traces back to a failure in the bond coat. This occurs if the mason skipped back-buttering, applied mortar to a dusty/dry scratch coat without dampening it first, or installed stones when ambient temperatures were below 40°F, causing the mortar to freeze before achieving initial set.
The Fix: Remove all loose stones. Wire-brush the exposed scratch coat and the back of the stone to remove degraded mortar. Re-install using a high-bond, polymer-modified veneer mortar, ensuring strict adherence to the manufacturer's temperature and mixing guidelines.
3. Hairline Cracking in the Scratch Coat
The Cause: Rapid moisture loss during the curing phase, often exacerbated by high winds, direct sunlight, or applying the scratch coat too thick (exceeding 5/8-inch in a single pass).
The Fix: If cracks are tighter than 1/16-inch, they will typically be bridged by the setting mortar. For wider cracks, grind them out slightly with an angle grinder and fill them with a flexible polyurethane masonry caulk before proceeding with the stone veneer install. Always mist-cure the scratch coat in hot, dry climates.
For comprehensive visual guides and manufacturer-specific tolerances, always consult the Eldorado Stone installation resources or the specific technical data sheets provided by your veneer manufacturer before beginning your project.
Written by
Elena RodriguezElena Rodriguez is a civil engineer and technical writer specializing in concrete technology, masonry systems, and ASTM/ACI compliance. She earned her B.S. in Civil Engineering from Texas A&M University and spent a decade at a materials testing laboratory, performing over 2,000 concrete compressive strength tests and masonry prism evaluations. Elena is an ACI-certified Field Testing Technician (Grade I) and a member of ASTM Committee C12 on Natural Building Stone. She currently consults on forensic engineering cases involving concrete failures and moisture intrusion. Based in San Antonio, TX, Elena is a proud member of the Society of Women Engineers (SWE) and coaches her daughter's FIRST Robotics team.
More from Elena Rodriguez
View all
Walls & Panels
Cost Analysis: Light Gauge Steel Framing Advantages and Disadvantages
Evaluate light gauge steel framing advantages and disadvantages through a strict cost analysis lens, comparing material, labor, and lifecycle expenses.
Aug 4, 2026

Walls & Panels
Gypsum Board Types: Exact Specifications, Thickness & Dimensions
Compare standard, Type X, and moisture-resistant gypsum board types. Get exact specifications, thicknesses, dimensions, and ASTM standards for your project.
Aug 4, 2026

Fire Resistance
Best Fire-Resistant Outdoor Decking Materials: 2026 Buyer Guide
Discover the best fire-resistant outdoor decking materials for 2026. Compare Class A PVC, aluminum, and hardwood options for WUI compliance and safety.
Aug 4, 2026