How to Install GenStone Stone Veneer: Step-by-Step DIY Guide
Learn how to install GenStone stone veneer panels with this step-by-step DIY guide. Covers tools, cutting techniques, adhesive tips, and edge cases.
Material Science: Why Polyurethane Outperforms in DIY Applications
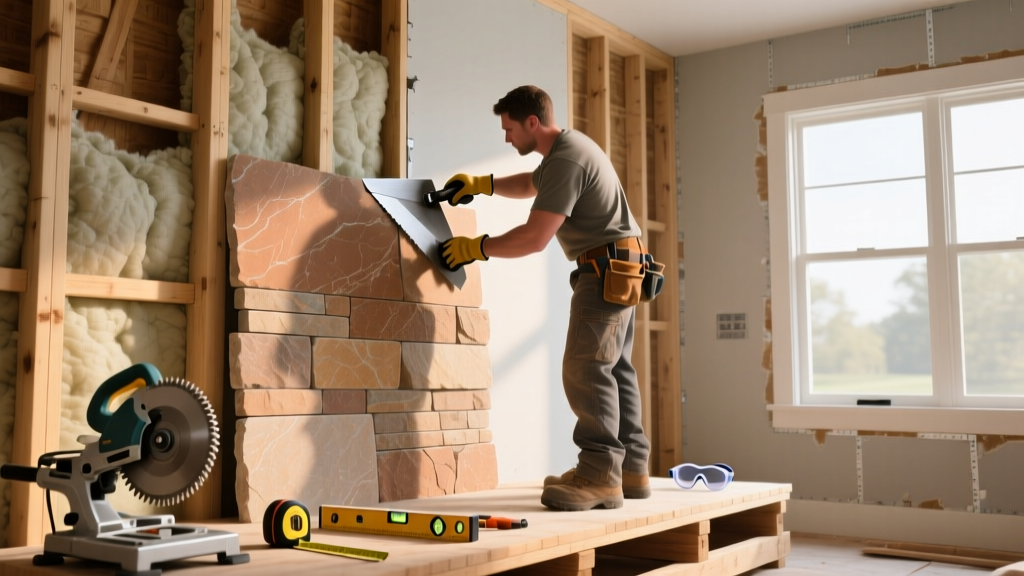
GenStone stone veneer is manufactured from high-density, closed-cell polyurethane. Unlike traditional cementitious manufactured stone or natural quarried stone, these panels weigh approximately 1 pound per square foot and feature a uniform 1-inch to 1.5-inch thickness. This material composition eliminates the need for masonry mortar, metal lath, or specialized wet saws. The interlocking shiplap edges are molded directly into the polyurethane, allowing the panels to hide fasteners and create seamless transitions without the need for skilled trowel work.
| Feature | GenStone Polyurethane | Cementitious Manufactured Stone |
|---|---|---|
| Weight | 1 lb / sq ft | 10 - 15 lbs / sq ft |
| Installation Method | Screws & Construction Adhesive | Mortar, Metal Lath, Scratch Coat |
| Substrate Requirements | OSB, Plywood, Drywall, Concrete | Structural sheathing + WRB + Lath |
| R-Value (Insulation) | R-3.5 (approx. per inch) | Negligible (R-0.1) |
| Cutting Tool | Standard Wood Miter/Circular Saw | Diamond-blade Wet Saw or Grinder |
Exact Tool and Material Manifest
Success with faux stone veneer relies heavily on using the correct chemical adhesives and cutting blades. Standard acrylic adhesives will not bond properly to the polyurethane surface, and coarse saw blades will tear the faux mortar joints.
- Panels: GenStone Stacked Stone or Ledgerock panels (covers ~3.5 sq ft per 12" x 42" panel).
- Adhesive: Loctite PL Premium 3x or 8x Polyurethane Construction Adhesive. Do not use standard latex or acrylic adhesives.
- Fasteners: 1.5-inch or 2-inch exterior-grade star-drive screws (e.g., GRK or Simpson Strong-Tie). Length depends on substrate thickness.
- Saw Blade: 60-tooth to 80-tooth carbide-tipped finishing blade. A standard 24-tooth framing blade will shred the panel edges.
- Sealant: GenStone color-matched polyurethane sealant for seams and corners.
- Layout Tools: 4-foot spirit level, chalk line, tape measure, and a caulking gun.
Step-by-Step Installation Protocol
Step 1: Substrate Preparation and Weather Barrier
GenStone can be applied directly over flat, structurally sound substrates including OSB, plywood, and interior drywall. For exterior applications, the substrate must be protected by a Weather-Resistive Barrier (WRB) such as Tyvek HomeWrap. According to the U.S. Department of Energy, a properly installed WRB is critical to prevent bulk water intrusion while allowing water vapor to escape from the wall assembly. Ensure all existing siding is removed down to the sheathing before applying the WRB and installing the veneer.
Step 2: Establishing the Level Line and Starter Trim
Never assume your foundation or deck line is perfectly level. Measure up from the lowest point of your starting area and snap a chalk line. Install the GenStone metal or polyurethane starter trim along this line. The starter trim provides a structural ledge that supports the weight of the first row and ensures a straight baseline. Secure the trim with exterior screws every 12 inches.
Step 3: Precision Cutting (The Back-Cut Rule)
When measuring panels to fit around windows, corners, or at the end of a run, always measure from the back of the panel. Critical Rule: Always cut GenStone panels from the back side (the flat side) using your 60-tooth blade. Cutting from the front face will cause the high-speed saw teeth to chip and blow out the faux mortar lines, ruining the aesthetic edge. Support the panel fully on a workbench to prevent binding and kickback.
Step 4: Adhesive Application and Fastening Pattern
Apply a continuous 1/4-inch bead of Loctite PL Premium adhesive to the back of the panel. Run the bead along the perimeter and in an 'S' pattern through the center field. Press the panel firmly against the substrate. While the adhesive provides long-term holding power, mechanical fasteners are required to hold the panel in place while the polyurethane adhesive cures (which can take 24 to 48 hours). Drive exterior screws through the flat nailing flanges located at the top and sides of the panel. Space screws every 12 to 16 inches. The next overlapping panel will completely hide these flanges and fasteners.
Step 5: Interlocking and Staggering Seams
GenStone panels feature a shiplap interlocking system. Slide the right edge of the new panel into the left receiving channel of the installed panel. Push down firmly to seat the top interlocking lip. To maintain a natural, randomized stone appearance, stagger your vertical end joints by at least 12 inches. Never allow vertical seams to line up in consecutive rows. Use a 4-foot level across the face of the panels every third row to ensure the faux stone is not bowing or drifting out of plumb.
Handling Corners, Outlets, and Edge Cases
Outside and inside corners require specialized GenStone corner pieces. These are designed to wrap seamlessly around 90-degree angles. Install corner pieces first, then butt your field panels into the receiving channels of the corner units. For exterior light fixtures or electrical outlets, you must cut the polyurethane panel to fit around the electrical box. Because GenStone is 1 inch thick, you will need to purchase electrical box extenders (spacer rings) from your local hardware store to bring the outlet flush with the new surface of the faux stone. Never bury an electrical box behind the veneer, as this violates National Electrical Code (NEC) clearance requirements and creates a severe fire hazard.
2026 Cost Analysis: GenStone vs. Professional Masonry
When evaluating the ROI of exterior or interior accent walls, the labor savings of polyurethane veneer drastically alter the project economics. Below is a comparative cost breakdown based on average 2026 North American material and labor rates.
| Cost Component | GenStone (DIY Install) | Natural Stacked Stone (Pro Install) |
|---|---|---|
| Material / Stone Cost | $3.80 - $4.50 | $9.00 - $14.00 |
| Adhesive / Mortar / Lath | $0.45 | $2.50 |
| Fasteners / Trim / Sealant | $0.65 | $1.00 |
| Labor Cost | $0.00 (DIY) | $12.00 - $18.00 |
| Total Installed Cost | $4.90 - $5.60 / sq ft | $24.50 - $35.50 / sq ft |
For a standard 200-square-foot exterior wainscoting project, utilizing GenStone faux stone panels keeps the total project cost under $1,200, whereas hiring a mason to install natural stone will routinely exceed $5,500. Furthermore, the DIY installation time for 200 square feet of GenStone is typically one weekend (12-16 hours), compared to 4 to 6 days of masonry labor, factoring in lath installation, scratch coats, mortar curing, and grouting.

Maintenance and Long-Term Care
GenStone panels are coated with a UV-resistant acrylic finish that prevents fading and chalking. However, in high-moisture environments or heavily shaded areas, organic growth like mildew or algae can accumulate on the textured surface. Clean the veneer annually using a garden hose and a soft-bristle brush with a mild detergent solution. Never use a high-pressure power washer. Pressures exceeding 1,200 PSI can force water behind the interlocking seams and compromise the WRB, or physically chip the faux mortar lines. If a panel becomes severely damaged by impact, it can be carefully cut out with an oscillating multi-tool, the adhesive scraped away, and a replacement panel glued and screwed into the existing grid without dismantling the entire wall.
Written by
Marcus ChenMarcus Chen is a licensed structural engineer (PE) and building materials analyst with over 12 years of experience across residential, commercial, and industrial construction. He holds a Master of Science in Civil Engineering from UC Berkeley and spent six years at Thornton Tomasetti before transitioning to independent consulting and technical writing. Marcus specializes in material selection for seismic-prone regions, concrete reinforcement strategies, and lifecycle cost analysis. His work has been cited by the American Concrete Institute (ACI) and the Structural Engineers Association of California (SEAOC). When he is not on a job site or at his desk, you will find him hiking the Sierra Nevada or restoring a 1920s craftsman bungalow in Oakland, CA.
More from Marcus Chen
View all
Construction Cost
How Much Did the Eiffel Tower Cost to Build?
How much did the Eiffel Tower cost to build in 1889? We adjust for inflation and compare its budget to modern skyscraper construction.
Aug 4, 2026
Fire Resistance
What Is a Fire Resistant Material? Testing & Certification Guide
Discover what is a fire resistant material through ASTM and UL testing. Learn how fire ratings, certifications, and assemblies work in construction.
Aug 4, 2026

Construction Cost
How Much Did the Burj Khalifa Cost to Build?
How much did the Burj Khalifa cost to build? We break down the $1.5B project and extract 5 money-saving strategies for your next build.
Jul 30, 2026