Install Stacked Stone Fireplace Veneer: Expert Step-by-Step Guide
Master stacked stone fireplace veneer installation with our expert guide. Learn substrate prep, mortar selection, and step-by-step setting techniques.

Substrate Engineering & Load Tolerances
Installing stacked stone fireplace veneer requires bridging the gap between masonry principles and interior finish carpentry. The most common catastrophic failure in veneer installation is substrate deflection or delamination due to inadequate load-bearing preparation. Standard 1/2-inch drywall cannot support the sheer weight of natural or manufactured stone.
• Natural Stacked Stone: 10 to 15 lbs per square foot.
• Manufactured Stone Veneer (MSV): 7 to 9 lbs per square foot.
• Mortar/Grout Additive: 2 to 4 lbs per square foot.
Total system weight frequently exceeds 18 lbs/sq ft. Substrates must be rated for this continuous dead load.
For interior wood-framed chimney chases, you must strip the drywall down to the studs and install a 1/2-inch cementitious backer board. HardieBacker 500 or Durock Next Gen are industry standards. Fasten the backer board with corrosion-resistant alkali-resistant screws every 6 inches along the studs. Tape and mud the seams with alkali-resistant fiberglass mesh tape and a polymer-modified thin-set mortar to create a monolithic surface.
Material & Tool Matrix
Do not use standard Type N or Type S masonry cement for interior veneer applications over cement board. Masonry cement requires a porous, absorptive substrate (like brick or CMU) to cure properly and lacks the polymer bonding agents necessary to grip a dense cement board surface. You must use an ANSI A118.4 or ANSI A118.15 polymer-modified thin-set mortar.
| Component | Specification / Product Example | Purpose & Technical Note |
|---|---|---|
| Mortar | ANSI A118.15 (e.g., LATICRETE 254 Platinum) | High-bond, non-sag formula critical for vertical heavy-stone applications. |
| Trowel | 1/2' x 1/2' Square Notch | Ensures minimum 3/16' mortar thickness after back-buttering and pressing. |
| Saw Blade | 10' Continuous Rim Diamond Blade | Prevents chipping on the visible face of natural stone during wet cutting. |
| Sealer | Penetrating Silane/Siloxane (e.g., 511 Impregnator) | Blocks soot and moisture without altering the natural matte texture of the stone. |
The Dry-Layout & Blending Protocol
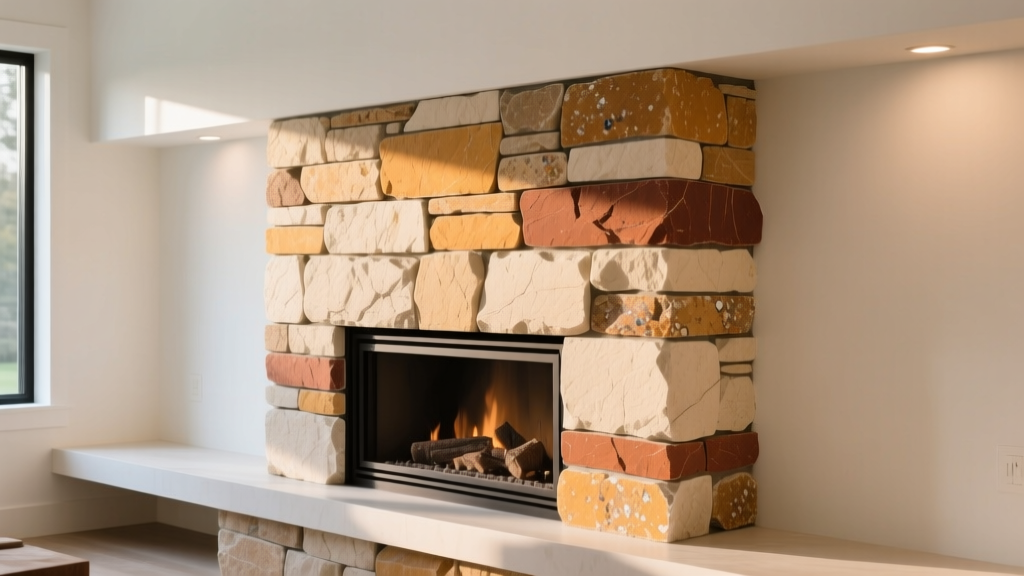
Stacked stone veneer is sold in boxes that often contain slight color variations due to the natural quarrying or casting process. Installing directly from a single box will result in visible 'color banding' on your fireplace.
Blending Strategy
- Open Minimum 3 Boxes: Mix flats and corners from at least three different boxes on the floor before mixing your first batch of mortar.
- Orient the Grain: Natural stone has a distinct bedding plane. Ensure all pieces are oriented horizontally as they were formed in the earth to prevent water ingress (for exterior) and to maintain visual consistency.
- Pre-Select Filler Pieces: Identify smaller, irregular pieces to use around electrical receptacles, mantel brackets, and the firebox perimeter.
Step-by-Step Mortar Application & Setting
Proper mortar manipulation is the difference between a veneer that lasts a lifetime and one that hollows out and drops after three years. Follow the guidelines established by leading manufacturers like Eldorado Stone for optimal adhesion.
- Dampen the Substrate: Lightly mist the cement board with water using a pump sprayer. This prevents the dry board from sucking the moisture out of the thin-set too quickly, which weakens the chemical cure.
- Comb the Substrate: Using the flat side of the trowel, key the mortar into the cement board. Then, use the 1/2' x 1/2' notched side to comb the mortar in a single, horizontal direction. Horizontal ridges allow air to escape when the stone is pressed into place.
- Back-Butter Every Piece: This is non-negotiable for natural stacked stone. Use the flat edge of your trowel to scrape a 1/16-inch layer of mortar directly onto the back of the stone. This fills the natural voids and pits in the stone's backing.
- Press and Twist: Press the stone firmly into the combed mortar, twisting it slightly to collapse the ridges and achieve 95%+ mortar coverage.
- Maintain the Reveal: Stacked stone is typically 'dry-stacked' (no visible grout lines). Push pieces tightly together, but do not force mortar out the front face. If mortar squeezes out, wait until it becomes thumbprint-hard (about 20-30 minutes) and brush it away with a dry, stiff-bristle brush.
Polymer-modified thin-sets skin over rapidly. Only comb as much mortar on the wall as you can cover with stone in 10 to 15 minutes. If the mortar forms a dry skin, scrape it off and reapply. Pressing stone into skinned mortar guarantees delamination.
Navigating Corners, Cuts, and Clearances
Corner Execution
Always install corner pieces first. Corners dictate the depth and plane of the entire wall. Alternate long and short corner pieces to mimic the look of full-thickness masonry. Once the corners are set and the mortar has firmed up (usually 2-4 hours), run a mason's line between the corners to act as a depth guide for the flat pieces.
Cutting Techniques
When cutting natural stone to fit around the firebox or mantel corbels, always cut from the back of the stone using a wet saw. Cutting from the front face will cause the diamond blade to tear out the visible edge, leaving a jagged, unusable margin. For small notches, use a 4-inch angle grinder with a diamond blade, making multiple relief cuts before knocking out the waste material.
NFPA 211 Clearance Compliance
If your fireplace is wood-burning, you must adhere to National Fire Protection Association (NFPA) 211 standards regarding combustible materials. Unless your specific firebox insert manufacturer states otherwise, combustible mantels and wood trim must remain at least 12 inches from the top of the firebox opening. Stacked stone veneer itself is non-combustible, but the wood framing and cement board paper facings behind it are subject to heat transfer limits.
Sealing & Maintenance
Because fireplaces generate soot, ash, and extreme temperature fluctuations, sealing the stone is highly recommended, particularly for porous stones like limestone or sandstone. Wait a minimum of 14 days after installation to allow the mortar to fully off-gas and cure. Apply a penetrating, breathable siloxane sealer. Avoid film-forming acrylic sealers, as the heat from the fireplace will cause the acrylic to yellow, peel, and trap moisture inside the stone, leading to spalling.
Troubleshooting Edge Cases
- Efflorescence (White Powdering): Caused by water-soluble salts migrating to the surface. Do not use muriatic acid to clean natural stone, as it will etch calcium-based stones (limestone, marble). Use a dedicated efflorescence remover and a stiff nylon brush.
- Stone Sagging During Installation: If heavy natural stones slide down the wall before the mortar grabs, use temporary finish nails or painter's tape to hold the stone in place. Alternatively, mix your thin-set slightly thicker (reduce water by 5%) to increase its non-sag properties.
- Hollow Sounds When Tapped: Indicates a lack of back-buttering or pressing into skinned mortar. The stone must be removed, the old mortar chipped off, and the piece reset with fresh material.
Written by
Marcus ChenMarcus Chen is a licensed structural engineer (PE) and building materials analyst with over 12 years of experience across residential, commercial, and industrial construction. He holds a Master of Science in Civil Engineering from UC Berkeley and spent six years at Thornton Tomasetti before transitioning to independent consulting and technical writing. Marcus specializes in material selection for seismic-prone regions, concrete reinforcement strategies, and lifecycle cost analysis. His work has been cited by the American Concrete Institute (ACI) and the Structural Engineers Association of California (SEAOC). When he is not on a job site or at his desk, you will find him hiking the Sierra Nevada or restoring a 1920s craftsman bungalow in Oakland, CA.
More from Marcus Chen
View all
Construction Cost
How Much Did the Eiffel Tower Cost to Build?
How much did the Eiffel Tower cost to build in 1889? We adjust for inflation and compare its budget to modern skyscraper construction.
Aug 4, 2026

Fire Resistance
What Is a Fire Resistant Material? Testing & Certification Guide
Discover what is a fire resistant material through ASTM and UL testing. Learn how fire ratings, certifications, and assemblies work in construction.
Aug 4, 2026

Construction Cost
How Much Did the Burj Khalifa Cost to Build?
How much did the Burj Khalifa cost to build? We break down the $1.5B project and extract 5 money-saving strategies for your next build.
Jul 30, 2026