How to Apply Stone Veneer to Interior Wall: Buyer's Guide
Master how to apply stone veneer to interior wall surfaces. Compare substrates, mortars, and costs for manufactured vs. natural stone installations.

Substrate Engineering: Beyond Standard Drywall
The most critical failure point in interior stone veneer installation is substrate deflection and moisture mismanagement. Unlike exterior applications where weather barriers dictate the prep, interior walls require specific load-bearing and adhesion preparations based on the existing wall composition. Stone veneer, particularly natural stone, can exert 15 to 25 pounds of dead load per square foot. Standard 1/2-inch drywall attached to 16-inch on-center framing is not engineered to support this sheer weight long-term without sagging or fastener pull-through.
Approved Interior Substrates
- Cement Backer Board (Preferred): 1/2-inch Durock or HardieBacker installed directly over studs with 1-5/8-inch corrosion-resistant screws. This provides a dimensionally stable, moisture-impervious surface.
- Bare Concrete/CMU: Existing interior masonry walls require only a wire brush cleaning and a damp sponge prep before mortar application.
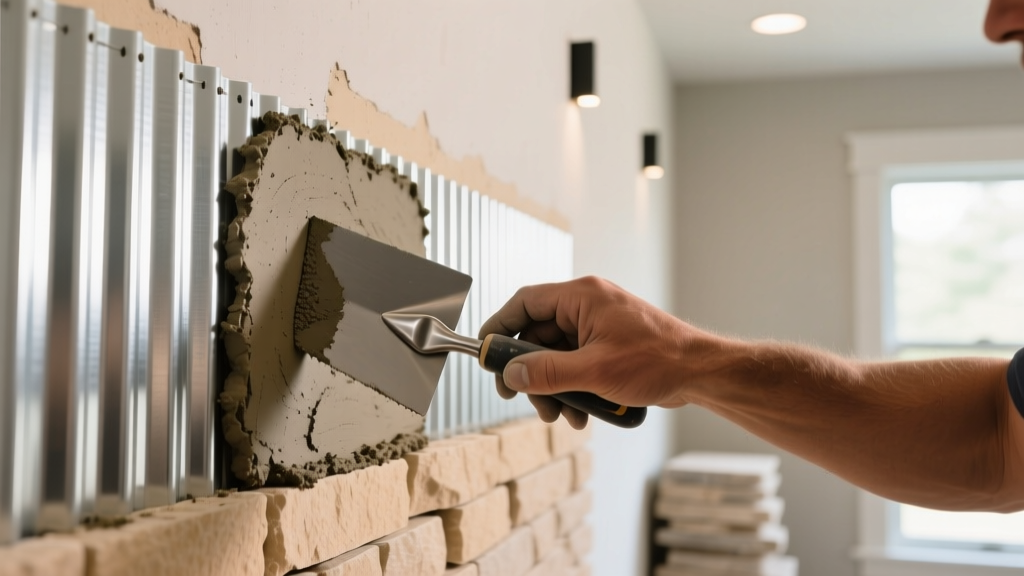
- Framed Drywall (Requires Prep): If removing drywall is unfeasible, you must overlay with a moisture barrier (15-lb asphalt felt or 4-mil polyethylene) followed by 2.5-lb self-furring galvanized diamond mesh lath, fastened directly into the wall studs using 1-inch staples or screws every 6 inches.
Material Selection Matrix: Manufactured vs. Natural Veneer
Choosing between architectural manufactured stone and natural stone veneer dictates your mortar selection, structural requirements, and cutting tools. Manufactured stone (such as profiles from Westlake Royal/Cultured Stone or Eldorado) is cast in molds from real stone, resulting in a lightweight, uniform product. Natural veneer is quarried and sliced, offering authentic geological variations but requiring heavier structural support.
| Feature | Manufactured Veneer | Natural Stone Veneer |
|---|---|---|
| Weight | 8 - 12 lbs / sq. ft. | 13 - 20+ lbs / sq. ft. |
| Average Material Cost | $7.50 - $14.00 / sq. ft. | $12.00 - $28.00 / sq. ft. |
| Thickness | 1.5 - 2.5 inches | 0.75 - 2.0 inches |
| Cutting Method | Masonry blade, tile saw, or nippers | Diamond wet saw or angle grinder |
| Color Consistency | High (batch dependent) | Low (highly variable) |
Mortar and Adhesive Specifications
Do not use standard drywall joint compound, mastic, or unmodified thinset for stone veneer. The mortar must accommodate the dead load and slight thermal expansion of interior climate control systems.
For Metal Lath over Drywall
You must use Type S Masonry Mortar (such as SPEC MIX or Quikrete Veneer Stone Mortar). Type S contains a higher ratio of Portland cement to lime compared to Type N, yielding a compressive strength of 1,800 PSI. This is necessary to grip the metal lath and support the sheer weight of the stone. According to the International Masonry Institute (IMI), Type S mortar provides the optimal bond strength for anchored veneer applications over non-masonry backups.
For Direct-to-Cement Board Applications
If you are installing lightweight manufactured veneer (under 10 lbs/sq. ft.) directly onto a properly primed cement backer board, you may use an ANSI A118.4 polymer-modified thinset mortar. This eliminates the need for metal lath and a scratch coat, significantly reducing installation time. However, this method is strictly prohibited for natural stone or heavy profiles.
The 6-Step Application Workflow
Follow this precise sequence to ensure structural integrity and aesthetic alignment. For comprehensive manufacturer-specific tolerances, always consult the Cultured Stone Installation Guide or your specific brand's technical data sheet.
- Weather/Moisture Barrier Application: If working over drywall, staple 15-lb asphalt felt horizontally, overlapping seams by 2 inches. This prevents the moisture from the mortar from wicking into the drywall paper and causing mold or structural degradation.
- Lath Installation: Unroll 2.5-lb self-furring galvanized diamond mesh. Fasten every 6 inches along the studs. Ensure the lath is tight against the wall; any bubbling will result in hollow spots behind the scratch coat.
- The Scratch Coat: Trowel a 1/2-inch layer of Type S mortar over the lath. Before it fully sets (usually 30-45 minutes), use a notched trowel or a stiff bristle brush to score horizontal grooves into the surface. This creates a mechanical key for the setting bed. Allow to cure for 24 to 48 hours.
- Mortar Bed and Buttering: Apply a 3/4-inch layer of fresh mortar to the scratch coat using a masonry trowel. Simultaneously, 'butter' the back of each stone with a 1/2-inch layer of mortar, ensuring complete coverage to the edges.
- Placement and Jointing: Press the stone firmly into the wall bed, twisting slightly to squeeze out excess mortar. Maintain a 1/2-inch to 1-inch joint gap for grouted profiles, or push flush for dry-stack profiles. Use a pointing tool or mortar bag to fill joints, then rake them back slightly for depth.
- Sealing: After 72 hours of curing, apply a water-based, penetrating siloxane sealer. This is critical in high-humidity interiors (like bathrooms or near indoor fireplaces) to prevent efflorescence.
Troubleshooting Interior Failure Modes
Even with perfect materials, environmental factors inside a home can cause specific masonry failures. Recognizing these early prevents costly tear-downs.
Efflorescence (White Powder Residue)
The Cause: Water-soluble salts within the Portland cement or the stone itself migrate to the surface as moisture evaporates. In interiors, this is often triggered by high ambient humidity or a lack of vapor barriers behind the wall.
The Fix: Do not use water or acid washes, which can drive salts deeper. Use a stiff, dry nylon brush to remove the powder. Once cleared, apply a breathable, silane/siloxane penetrating sealer to block moisture migration without trapping vapor inside the wall cavity.
Stone Delamination (Popping Off)
The Cause: Failure to wet the stone backs before application, or applying mortar to a dusty scratch coat. Manufactured stones often have a fine layer of release dust from the casting molds that acts as a bond-breaker.
The Fix: Always wire-brush the back of manufactured stones and mist them lightly with water before buttering. The stone should be damp (SSD - Saturated Surface Dry) but not dripping, preventing it from sucking the moisture out of the mortar too quickly.
2026 Interior Installation Cost Breakdown
When budgeting for an interior feature wall (e.g., a 100 sq. ft. fireplace surround or media wall), factor in both material waste and specialized labor. The costs below reflect current market averages for professional installation.
| Cost Category | Manufactured Veneer | Natural Stone Veneer |
|---|---|---|
| Materials (Stone + Mortar + Lath) | $9.00 - $16.00 / sq. ft. | $15.00 - $32.00 / sq. ft. |
| Professional Labor | $12.00 - $18.00 / sq. ft. | $18.00 - $28.00 / sq. ft. |
| Substrate Prep (if required) | $2.50 - $4.00 / sq. ft. | $2.50 - $4.00 / sq. ft. |
| Total Estimated Cost | $23.50 - $38.00 / sq. ft. | $35.50 - $64.00 / sq. ft. |
By selecting the appropriate substrate, matching the mortar to the stone weight, and executing a meticulous scratch coat, your interior stone veneer will provide a permanent, high-ROI architectural feature that outlasts the building itself.
Written by
Sarah WhitfieldSarah Whitfield is a chartered quantity surveyor (MRICS) and construction cost analyst with 15 years of experience in material pricing, procurement strategy, and project budgeting. She earned her degree in Construction Management from the University of Reading (UK) and has worked on projects ranging from $2M custom homes to $180M mixed-use developments across North America and Europe. Sarah currently leads cost estimating for BuildMat Insight, maintaining a proprietary database of 4,000+ material price points updated quarterly. She is a frequent contributor to RSMeans cost data panels and has presented at the International Cost Engineering Council (ICEC) congress. Based in Denver, CO, Sarah is an avid trail runner and volunteer mentor for Women in Construction.
More from Sarah Whitfield
View all
Wood & Lumber
What Are the Different Types of Wood? A Builder's Guide
Compare structural softwoods, finish hardwoods, and engineered lumber. Analyze Janka ratings, MOE values, and 2026 pricing for construction.
Aug 4, 2026

Walls & Panels
Steel Framing vs Wood Framing: Corrosion and Moisture Defense
Compare steel framing vs wood framing for moisture resistance. Learn about galvanized coatings, condensation risks, and corrosion protection strategies.
Jul 21, 2026

Stone & Masonry
How to Cut Stone Veneer: Wet Saw vs Grinder Comparison
Compare the best tools for cutting stone veneer. We review wet saws, angle grinders, and chop saws to help you achieve clean, chip-free cuts.
Jul 21, 2026