How to Clean and Maintain Outdoor Stone Veneer Panels
Learn how to clean, seal, and repair outdoor stone veneer panels. Discover expert maintenance tips to prevent efflorescence, moisture damage, and fading.

The Hidden Vulnerabilities of Exterior Veneer Systems
Outdoor stone veneer panels are engineered to replicate the rugged aesthetics of natural masonry while offering a lighter, more cost-effective installation. However, whether your facade utilizes Cast Stone Masonry Veneer (CSMV) or thin-cut natural stone, exposure to the elements introduces specific degradation pathways. Unlike solid masonry walls, veneer systems rely on a concealed drainage plane, weather-resistant barrier (WRB), and weep holes to manage hydrostatic pressure. When maintenance is neglected, moisture becomes trapped behind the panels, leading to freeze-thaw spalling, efflorescence, and eventual adhesive failure.
Proper maintenance of outdoor stone veneer panels is not merely about aesthetics; it is a critical structural preservation task. According to guidelines published by the National Park Service on masonry cleaning and waterproofing, improper cleaning techniques and the use of non-breathable sealants are the leading causes of accelerated decay in exterior stone assemblies. This guide provides a field-tested, professional-grade framework for maintaining your veneer investment.
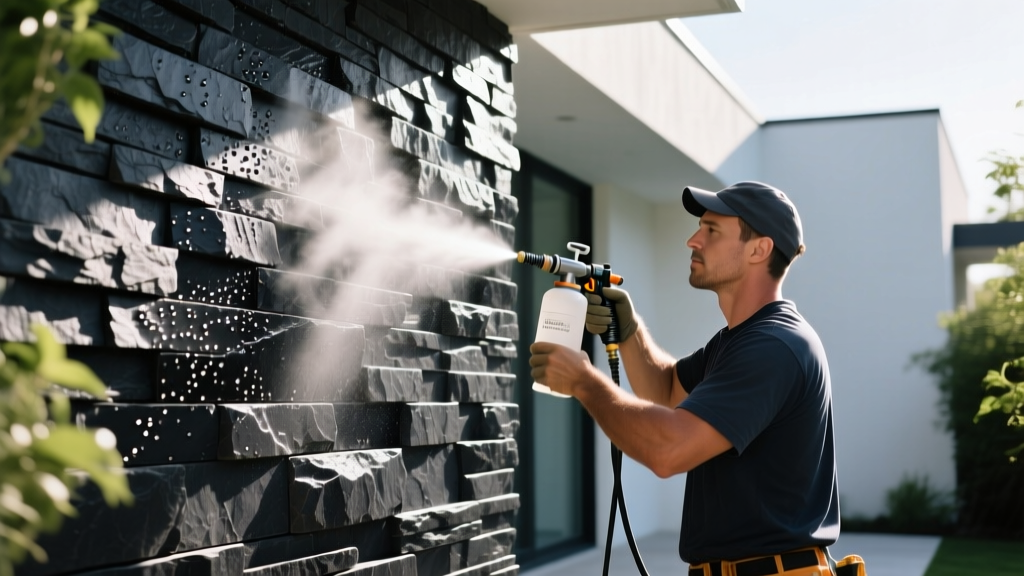
The 4-Step Routine Cleaning Protocol
Routine cleaning removes biological growth (algae, lichen), atmospheric dirt, and oxidized pollutants that can slowly etch into the porous surface of the stone. Follow this exact sequence to prevent surface damage.
Step 1: Dry Mechanical Agitation
Before introducing any moisture, use a stiff natural-bristle brush (never wire bristles, which can leave rust stains and scratch the cementitious matrix of manufactured panels) to dislodge loose dirt, spider webs, and dry spores. This prevents the creation of a mud slurry when water is applied.
Step 2: Pre-Wetting the Substrate
Saturate the outdoor stone veneer panels with clean water using a garden hose. This is a non-negotiable step. Pre-wetting fills the microscopic pores of the stone, preventing the cleaning solution from being absorbed too deeply, which can cause internal staining and make rinsing nearly impossible.
Step 3: Chemical Application
Apply a pH-neutral or mildly alkaline masonry cleaner. For manufactured stone, products like Prosoco Sure Klean Restoration Stone Cleaner are industry standards because they lift dirt without burning the synthetic pigments. Apply from the bottom up to prevent streaking, and allow a 5-to-10-minute dwell time. Do not let the cleaner dry on the surface.
Step 4: Low-Pressure Rinsing
Rinse from the top down. If using a pressure washer, strictly limit the pressure to 1,500 PSI for manufactured veneer and 2,000 PSI for natural stone. Always use a 40-degree fan tip and maintain a minimum distance of 18 inches from the surface. High-pressure streams can blast the mortar out of the joints and erode the textured face of the panels.
Never use muriatic (hydrochloric) acid or standard brick cleaners on outdoor stone veneer panels, especially manufactured varieties. Acid reacts with the Portland cement binder, dissolving the surface matrix, exposing the aggregate, and permanently bleaching the integral color pigments.
Diagnosing and Eliminating Efflorescence
Efflorescence appears as a white, powdery crystalline deposit on the surface of the stone or mortar joints. It occurs when water-soluble salts within the masonry assembly are drawn to the surface by evaporating moisture. While efflorescence is primarily a cosmetic issue, persistent heavy deposits indicate a chronic moisture intrusion problem behind the veneer.
- Light Dusting: Remove with a dry, stiff-bristle brush. Do not use water, as it will simply dissolve the salts and pull them back into the pores to re-emerge later.
- Moderate Buildup: Use a specialized, non-acidic efflorescence remover. Alternatively, a solution of 1 part white vinegar to 4 parts water can be used for spot treatments on natural stone, followed by an immediate and thorough freshwater rinse.
- Chronic Recurrence: If efflorescence returns within weeks of cleaning, the issue is hydrostatic. You must inspect the roof overhangs, flashing, and weep screeds at the base of the wall to ensure water is not bypassing the WRB.
Sealer Selection Matrix: Penetrating vs. Film-Forming
Applying a water repellent is highly recommended for outdoor stone veneer panels in climates with heavy rainfall or severe freeze-thaw cycles. However, selecting the wrong chemistry will trap moisture inside the wall cavity, causing catastrophic spalling. The Brick Industry Association (BIA) Technical Notes emphasize that masonry must remain vapor-permeable to allow internal moisture to escape.
| Sealer Chemistry | Vapor Permeability | Lifespan | Best Use Case |
|---|---|---|---|
| Silane / Siloxane | Excellent (Breathable) | 5–10 Years | All exterior veneers; prevents water ingress while allowing vapor egress. |
| Acrylic (Solvent-based) | Poor (Traps Moisture) | 1–3 Years | Avoid on exteriors. Creates a glossy 'wet look' but causes spalling in freeze-thaw zones. |
| Polyurethane | Very Poor | 3–5 Years | Strictly for interior applications or high-traffic horizontal paving, never vertical veneer. |
Application Tip: Apply siloxane sealers using a low-pressure pump sprayer in two coats, applied 'wet-on-wet' (the second coat applied before the first fully dries) to ensure deep penetration. Coverage rates typically range from 100 to 150 square feet per gallon, depending on the porosity of the stone.
Structural Triage: Repairing Loose Panels and Mortar Joints
Over time, thermal expansion and contraction can compromise the mortar joints or the mechanical bond of individual outdoor stone veneer panels. Addressing these failures promptly prevents water from entering the drainage plane.
Repointing Mortar Joints
When mortar joints crack or crumble, rake out the damaged mortar to a depth of at least 3/4 inch using a joint raking tool. Do not use an angle grinder, as it easily chips the delicate edges of veneer panels. Repoint using a Type N mortar mix (1 part Portland cement, 1 part hydrated lime, 6 parts masonry sand). Type N offers the ideal balance of compressive strength and flexibility required for thin veneer applications. Tool the joint to match the existing profile and mist it with water twice daily for three days to ensure proper curing and prevent shrinkage cracking.
Re-adhering Loose Panels
If a panel has detached but the substrate is intact, clean the back of the stone and the wall surface with a wire brush. While traditional mortar can be used, a high-grade polyurethane construction adhesive (such as Loctite PL Premium 3x) provides a faster, stronger, and more flexible bond for spot repairs. Apply the adhesive in a continuous serpentine pattern, press the panel firmly into place, and use painter's tape to hold it until the adhesive cures (typically 24 hours).
Annual Winterization and Moisture Management Checklist
To protect outdoor stone veneer panels from the destructive forces of winter, perform this site-specific audit every late autumn:
- Verify Grade Clearances: Ensure that soil, mulch, and hardscaping are at least 4 to 6 inches below the bottom edge of the veneer or the weep screed. Soil contact wicks ground moisture directly into the stone, bypassing the WRB and causing severe freeze-thaw damage at the base of the wall.
- Clear Weep Holes: Use a piece of stiff wire or compressed air to clear any debris, insect nests, or mortar droppings from the weep holes located at the base of the veneer system. Blocked weep holes trap water inside the wall cavity.
- Inspect Roof Drainage: Ensure gutters and downspouts are clear and that splash blocks are directing water at least 5 feet away from the veneered foundation. Uncontrolled roof runoff will rapidly erode mortar joints and stain the stone face.
- Trim Foliage: Cut back any shrubs, vines, or tree branches that touch the stone surface. Vegetation traps moisture against the veneer, creating a microclimate that accelerates biological growth and mortar degradation.
Expert Insight: The longevity of outdoor stone veneer panels is rarely determined by the stone itself, but by the management of water at the macro and micro levels. A perfectly installed drainage plane will fail if the grade is built up against the weep screed. Treat the surrounding landscape as an integral component of your veneer's waterproofing system.
By adhering to these precise cleaning parameters, utilizing vapor-permeable siloxane sealers, and maintaining strict moisture-management clearances, your exterior stone veneer will retain its structural integrity and aesthetic depth for decades.
Written by
Priya KapoorPriya Kapoor is a real estate market analyst and construction economics researcher with expertise in housing affordability, development feasibility, and infrastructure investment. She holds a Master of Regional Planning from Cornell University and previously worked as a senior analyst at CBRE's Investment Properties group, where she modeled returns for $4B in mixed-use development pipelines. Priya now runs an independent research practice advising developers, municipalities, and REITs on construction cost forecasting and market timing. She publishes the quarterly "BuildMat Market Pulse" report tracking material price indices across 12 commodity categories. Based in Austin, TX, Priya serves on the board of Habitat for Humanity Austin and is a marathon runner.
More from Priya Kapoor
View all
Construction Cost
Cost to Build a 1600 Sq Ft Home in 2026: Full Breakdown
Accurate 2026 cost to build a 1600 sq ft home—material, labor, and regional pricing breakdowns included. Plan your budget with real-time estimates.
Aug 11, 2026

Wood & Lumber
Name the Types of Wood for Pressure Treatment and Preservation
Learn how to name the types of wood best suited for pressure treatment. Compare species treatability, chemical retention levels, and 2026 preservation costs.
Aug 4, 2026

Stone & Masonry
Stone Veneer Suppliers Lindenhurst: 2026 Cost Analysis
Analyze 2026 stone veneer costs in Lindenhurst, NY. Compare local supplier pricing, delivery fees, and Suffolk County installation labor rates.
Aug 4, 2026