How to Clean and Maintain Affordable Stone Veneer Walls
Learn how to clean, seal, and maintain affordable stone veneer. Discover specific cleaners, sealing schedules, and repair tips for manufactured stone.

Understanding the Composition of Affordable Stone Veneer
Most affordable stone veneer on the market is Manufactured Stone Veneer (MSV), also known as cultured stone. Unlike solid quarried granite or thick limestone, MSV is a composite material engineered from Portland cement, lightweight aggregates (such as expanded shale, pumice, or perlite), and iron oxide pigments cast in polyurethane molds. This specific composition dictates its maintenance requirements. The cementitious matrix is inherently alkaline and porous, while the iron oxide pigments are concentrated near the surface to mimic natural stone coloration.
Because the structural integrity and aesthetic finish rely on a relatively thin face (typically 1 to 2.5 inches thick), aggressive cleaning methods that might be tolerated by solid masonry will permanently damage MSV. Acidic cleaners will etch the cement and strip the pigment, while high-pressure water can erode the lightweight aggregate core and blow out the mortar joints. Thin-cut natural stone veneers share similar vulnerabilities due to their reduced thickness and the delicate Type N mortar joints used in their installation.
Routine Cleaning Protocols: A Step-by-Step Framework
Routine maintenance should occur annually, preferably in early spring or late fall when ambient temperatures are consistently between 50°F and 70°F. Cleaning in direct, hot sunlight causes cleaning solutions to evaporate before they can be properly rinsed, leaving alkaline residue behind.
Step 1: Dry Soil Removal
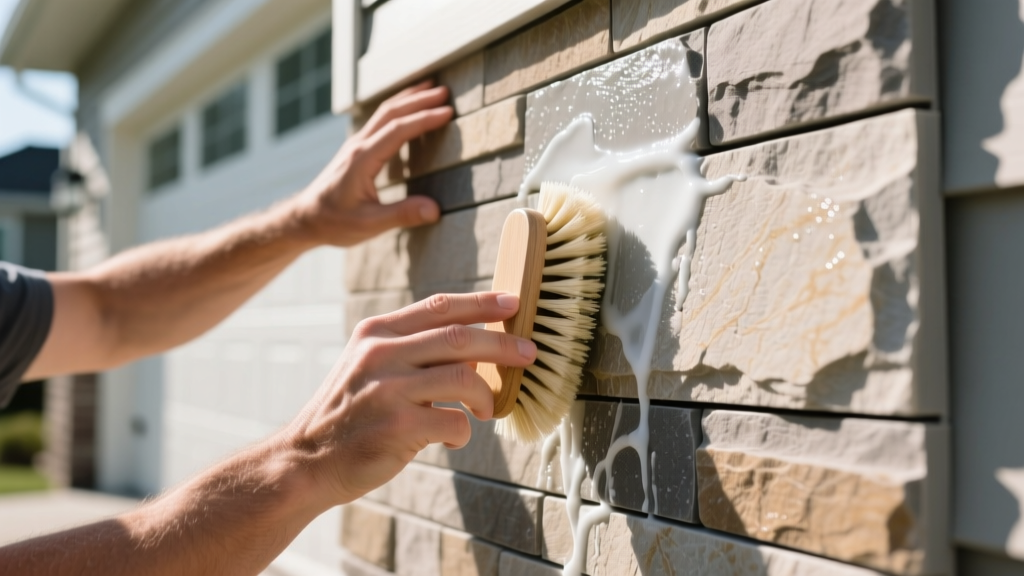
Never apply water to a dusty wall; this creates a slurry that embeds deeply into the porous cement matrix. Use a soft-bristle nylon brush or a dry microfiber mop to sweep away cobwebs, loose dirt, pollen, and surface debris. Avoid wire brushes or stiff synthetic bristles, which will leave micro-scratches and potentially deposit rust-inducing metal fibers on the stone face.
Step 2: Pre-Wetting the Substrate
Saturate the veneer with clean water from a standard garden hose. Pre-wetting fills the microscopic capillary pores of the cement and mortar. This prevents the cleaning solution from being absorbed too deeply, which can cause secondary staining and efflorescence as the wall dries.
Step 3: Applying the Cleaning Agent
Use a pH-neutral masonry cleaner specifically formulated for manufactured stone or concrete. Avoid generic household degreasers, which often contain ammonia or high-alkaline surfactants that react negatively with iron oxide pigments. Apply the cleaner using a low-pressure pump sprayer, working from the bottom of the wall upward to prevent streaking and lap marks. Allow a 3-to-5-minute dwell time, misting with water to keep the surface wet, but do not let the cleaner dry on the stone.
Step 4: Low-Pressure Rinsing
Never use a pressure washer exceeding 300 PSI on affordable stone veneer. High pressure will erode the cementitious face, expose the lightweight aggregate, and compromise the mortar joints. Use a garden hose with a wide-fan spray nozzle, rinsing from the top down to push the suspended dirt off the wall.
Sealing Strategies: Breathability vs. Surface Protection
Applying a water repellent is optional for exterior installations but highly recommended in freeze-thaw climates or for interior applications prone to splashing (such as kitchen backsplashes or shower surrounds). The critical metric for MSV sealers is vapor permeability (breathability). Trapped moisture behind a film-forming sealer will cause spalling and delamination during winter freezes. According to the National Park Service guidelines on masonry treatments, water-repellent coatings should only be applied after moisture intrusion issues have been resolved, as sealing a damp wall will trap destructive salts inside the masonry.
| Sealer Type | Chemical Base | Vapor Permeability | UV Stability | Lifespan |
|---|---|---|---|---|
| Penetrating Silane/Siloxane | Solvent or Water-based | 100% Breathable | Excellent | 5–7 Years |
| Film-Forming Acrylic | Water-based Polymer | Low (Traps Moisture) | Poor (Yellows) | 1–2 Years |
| Fluoropolymer | Water-based | High Breathability | Excellent | 10+ Years |
Recommendation: Always select a penetrating silane/siloxane sealer for exterior MSV. These molecules are small enough to penetrate the capillary network of the cement, reacting chemically to form a hydrophobic barrier below the surface without altering the stone's natural matte texture or trapping vapor.
Troubleshooting Common Veneer Defects
Maintaining affordable stone veneer requires identifying the root cause of surface anomalies rather than just treating the symptom. The Brick Industry Association Technical Notes on masonry cleaning emphasize that improper chemical selection can permanently alter the mineral composition of cementitious products.
Efflorescence (White Powdery Deposits)
Cause: Water-soluble salts within the Portland cement or mortar migrate to the surface as moisture evaporates, reacting with carbon dioxide to form calcium carbonate.
Fix: Do not use water immediately, as it dissolves the salts and drives them back into the pores. First, aggressively dry-brush the deposits with a stiff nylon brush. If the efflorescence persists, apply a specialized, non-acidic efflorescence cleaner formulated for manufactured stone. Never use muriatic acid, which will dissolve the cement matrix and exacerbate the problem.
Algae, Mold, and Mildew
Cause: Organic growth thriving in shaded, damp areas, particularly on north-facing exterior walls or interior steam environments.
Fix: Mix a solution of oxygen bleach (sodium percarbonate) and warm water. Apply, let dwell for 15 minutes, and rinse. Avoid chlorine bleach (sodium hypochlorite); while it kills surface mold, it degrades the lignin in wood substrates behind the veneer and can break down the lime content in the mortar joints over time.
Mortar Smears and Haze
Cause: Improper cleaning during the initial installation phase, leaving a thin film of Portland cement on the stone face.
Fix: For fresh smears (less than 72 hours old), use a wooden scraper and a damp sponge. For cured mortar haze, apply a diluted, buffered masonry acid wash specifically designed for MSV, strictly following the manufacturer's dwell-time limits (usually under 3 minutes) and neutralizing immediately with a baking soda and water solution.
Inspecting the Drainage Plane and Weep Screeds
Maintenance of affordable stone veneer extends beyond the visible surface to the concealed moisture management system. MSV is a drainage-type cladding, meaning water that penetrates the stone and mortar must be evacuated via a weather-resistive barrier (WRB) and a weep screed at the base of the wall.
- Grade Clearance: Ensure the bottom edge of the stone veneer maintains a minimum 4-inch clearance from soil grade, or 2 inches from paved surfaces like concrete patios. Soil contact wicks ground moisture directly into the bottom course of stone, bypassing the flashing.
- Weep Hole Clearance: Inspect the weep screed annually. Landscaping mulch, dirt splash-back, and insect nests frequently clog weep holes. Use a straightened wire coat hanger or a can of compressed air to clear the weep slots, ensuring the drainage plane can evacuate water freely.
- Flashing Integration: Check the transition points where the veneer meets roofing, deck ledgers, or window sills. The mortar should never bridge over the flashing; it must terminate above it to allow water to exit the wall cavity.
Repairing Chips and Mortar Joint Degradation
Affordable stone veneer relies heavily on the mortar joint for structural cohesion and water shedding. Over time, Type N mortar can crack, crumble, or separate from the stone edges due to thermal expansion and structural settling.
To repair degraded joints, use a joint raking tool to remove the damaged mortar to a depth of 1/2 inch. Mix a small batch of Type N masonry cement with fine masonry sand at a strict 1:3 ratio. Add water incrementally until the mixture reaches the consistency of thick peanut butter. For color matching, incorporate dry masonry pigments into the mix before adding water, testing a small batch on a piece of cardboard and allowing it to cure for 48 hours to verify the final dry color.
Apply the mortar using a pointing trowel, pressing it firmly into the joint to eliminate voids. Once the mortar has become "thumbprint hard" (usually 30 to 60 minutes depending on humidity), tool the joint with a concave jointer. This compresses the mortar against the stone edges, densifying the surface and creating a watertight seal that sheds water away from the wall.
Seasonal Maintenance Checklist
Spring
- Clear weep screeds of winter debris and soil splash-back.
- Inspect mortar joints for freeze-thaw cracking and schedule repointing if necessary.
- Perform the annual pH-neutral wash to remove winter grime and early pollen.
Summer
- Check for algae or mildew growth in shaded areas; treat with oxygen bleach.
- Verify that landscaping sprinklers are not directly hitting the veneer, which causes localized mineral staining and efflorescence.
Fall
- Clear gutters and downspouts above the veneer to prevent concentrated water cascades from eroding the mortar joints.
- Apply penetrating silane/siloxane sealer before the first freeze, ensuring ambient temperatures remain above 40°F for 24 hours post-application.
Winter
- Never use chemical ice melters (like magnesium chloride or rock salt) on adjacent walkways, as salt spray will degrade the bottom courses of the stone.
- Avoid piling snow directly against the veneer walls; maintain a 12-inch buffer zone.
Written by
James ThorntonJames Thornton is a construction industry veteran with 25 years of hands-on experience in wood framing, lumber grading, and residential building codes. He started as a framing carpenter in rural Oregon, earned his ICC Residential Building Inspector certification, and eventually became a senior plan reviewer for the City of Portland Bureau of Development Services. James holds a B.S. in Wood Science & Technology from Oregon State University and is a certified lumber grader through the West Coast Lumber Inspection Bureau (WCLIB). He has inspected over 3,000 residential construction sites and authored the city's internal guide on advanced framing techniques (2x6 at 24" O.C.). James lives in Bend, OR, where he builds custom timber-frame cabins and competes in lumberjack sports.
More from James Thornton
View all
Insulation
Best Home Insulation Materials: Complete 2026 Guide
Compare top home insulation materials for 2026. Find R-values, installed costs per square foot, and best uses for fiberglass, spray foam, and mineral wool.
Aug 4, 2026

Sustainable Building
Certify Your Green Building Material for LEED and WELL
Step-by-step guide to certifying a green building material for LEED v5 and WELL v2. Master EPDs, HPDs, and VOC limits for 2026 project specifications.
Aug 4, 2026

Stone & Masonry
Veneer Stacked Stone Panels: Interior Design & Style Showcase
Discover how veneer stacked stone panels transform interiors. Explore modern design profiles, material pairings, and technical installation specs.
Aug 4, 2026