Essential Maintenance Guide for Stone Veneer Paneling
Discover expert maintenance techniques for stone veneer paneling. Learn how to remove efflorescence, choose penetrating sealers, and protect your facade.

Stone veneer paneling offers the aesthetic weight and textural richness of full-thickness masonry at a fraction of the cost and structural burden. However, as building envelope professionals, we frequently address the misconception that masonry surfaces are entirely maintenance-free. In reality, the long-term durability of stone veneer paneling depends heavily on proactive moisture management, correct chemical cleaning, and the application of breathable protective treatments. Improper maintenance does not just affect curb appeal; it can lead to premature degradation of mortar joints, efflorescence staining, and moisture intrusion behind the weather-resistive barrier (WRB). This guide details the exact protocols required to preserve both manufactured stone veneer (MSV) and natural stone installations.
The Chemistry of Stone Veneer Paneling: What Damages the Surface
Before selecting a cleaning agent, you must understand the chemical composition of your wall. Manufactured stone veneer paneling is primarily a Portland cement-based product, meaning it possesses a naturally high, alkaline pH. Natural stone veneers, such as limestone or marble, are calcium carbonate-based and highly reactive to acids. Using harsh acidic cleaners (like standard brick wash or muriatic acid) causes a violent chemical reaction. This etches the surface, exposes the internal lightweight aggregates to UV degradation, and dissolves the calcium hydroxide in the mortar joints, leading to permanent pitting and structural weakening of the scratch coat.
Routine Maintenance Schedule
Establishing a proactive maintenance calendar prevents minor issues from requiring expensive remediation. The following schedule aligns with seasonal weather patterns to address moisture and biological threats before they penetrate the masonry matrix.
| Frequency | Maintenance Task | Tools & Materials Needed |
|---|---|---|
| Bi-Annual (Spring/Fall) | Clear weep screed holes and inspect flashing for debris or soil contact. | Stiff bristle brush, compressed air canister, garden trowel. |
| Annual | Low-pressure wash to remove surface dirt, pollen, and early biological growth. | Garden hose with fan nozzle, pH-neutral masonry soap, soft bristle brush. |
| Every 3-5 Years | Inspect mortar joints for hairline cracking and repoint if necessary. | Mortar rake, Type N or Type S mortar mix, pointing trowel. |
| Every 5-10 Years | Perform water-drop test and reapply breathable penetrating sealer. | Siloxane-based sealer, low-pressure pump sprayer. |
Troubleshooting Efflorescence and Biological Growth
Managing Efflorescence
Efflorescence manifests as a white, powdery salt deposit on the surface of stone veneer paneling. According to the Masonry Veneer Manufacturers Association, efflorescence is not a defect in the stone itself, but rather a symptom of moisture moving through the masonry assembly, dissolving water-soluble salts, and depositing them on the surface as the water evaporates.
- Dry Brushing: Always attempt to remove efflorescence first with a stiff, non-metallic bristle brush. Introducing water to remove efflorescence can sometimes drive the salts deeper into the pores, worsening the cycle.
- Targeted Cleaning: If dry brushing fails, use a specialized, mildly acidic efflorescence remover specifically rated for manufactured stone (such as Prosoco Sure Klean). Apply it only to the affected joints, agitate gently, and rinse thoroughly.
- Moisture Correction: Recurring efflorescence indicates a water intrusion issue. Inspect roof overhangs, gutter downspouts, and window flashing to ensure water is not being directed onto the veneer.
Eliminating Algae, Moss, and Mildew
North-facing walls and heavily shaded areas are prone to biological growth. While many homeowners reach for chlorine bleach (sodium hypochlorite), this is a critical error. Chlorine bleach leaves behind salt residues that can trigger secondary efflorescence and will severely damage surrounding landscaping. Instead, use an oxygen bleach solution (sodium percarbonate). Mix the oxygen bleach powder with warm water, apply it to the stone veneer paneling, let it dwell for 10 to 15 minutes without drying, agitate with a soft brush, and rinse. This oxidizes the biological matter without altering the pH of the masonry.
Sealant Selection: Silane vs. Siloxane Penetrating Sealers
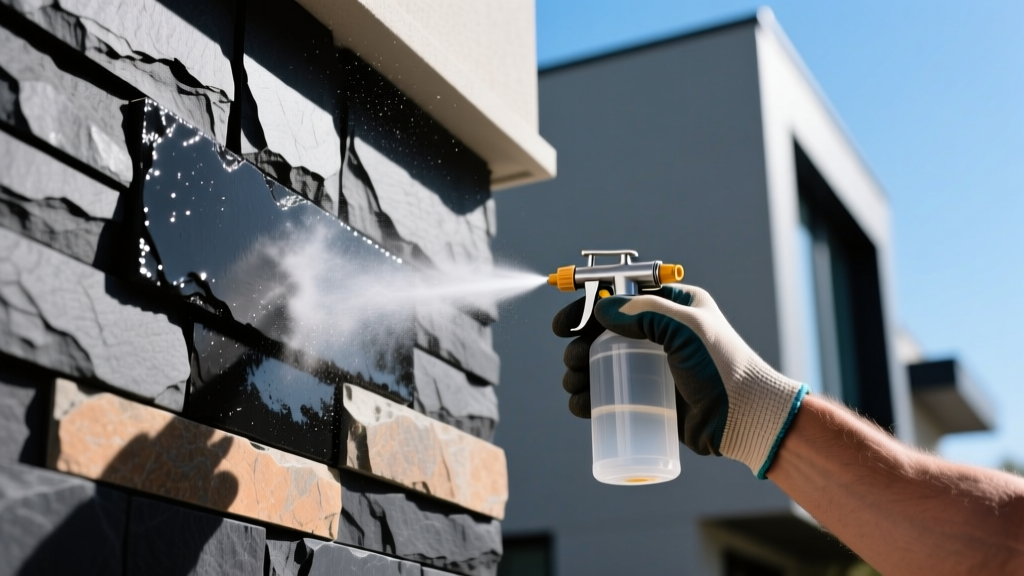
One of the most damaging maintenance mistakes is the application of film-forming sealers, such as acrylics or urethanes. These products create a plastic-like barrier on the surface that traps moisture inside the wall cavity. When temperatures drop below freezing, the trapped water expands, causing the face of the stone to pop off—a failure mode known as spalling. You must exclusively use breathable, penetrating sealers that line the pores of the stone and mortar, repelling liquid water while allowing water vapor to escape.
Expert Insight: The Natural Stone Institute strongly recommends against using topical coatings on exterior masonry. Always verify that your chosen sealer has a high vapor transmission rate (measured in perms) to comply with modern building science standards for moisture management.
| Sealer Type | Molecule Size | Best Application | Lifespan |
|---|---|---|---|
| Silane | Very Small | Dense natural stone (granite, slate) and dense concrete. | 7-10 Years |
| Siloxane | Medium | Porous manufactured stone veneer paneling, brick, and mortar joints. | 5-7 Years |
| Silane/Siloxane Blend | Mixed | Mixed masonry walls featuring both natural stone and mortar joints. | 5-8 Years |
Weep Screed and Flashing Inspections
The bottom edge of exterior stone veneer paneling must terminate at a code-compliant weep screed (typically meeting ASTM C2018 standards). The weep screed features small holes designed to allow any moisture that penetrates the weather-resistive barrier to drain out of the wall cavity. A common and destructive landscaping mistake is piling mulch, soil, or paving stones against the weep screed. This blocks the drainage holes and creates a capillary bridge, drawing ground moisture directly up into the wall assembly—a phenomenon known as rising damp. Always maintain a minimum 4-inch clearance between the weep screed and soil, or a 2-inch clearance above concrete patios and walkways. During your bi-annual maintenance walks, use a stiff brush or compressed air to clear spider webs, dirt, and insect nests from the weep holes.
Frequently Asked Questions
Can I power wash stone veneer paneling?
High-pressure washing can easily blast the mortar out of the joints and erode the surface of manufactured stone. If you must use a pressure washer, restrict the pressure to a maximum of 1,500 PSI, use a wide 40-degree fan tip, and keep the nozzle at least 12 inches away from the surface. Always spray at a downward angle to avoid forcing water behind the veneer panels.
How do I fix a chipped or damaged panel?
For minor chips, you can color-match a repair using a Portland cement and sand mixture combined with mineral oxide pigments. Press the mixture into the chip using a margin trowel, and texture it with a stiff brush or sponge to match the surrounding stone. For severe structural cracks spanning multiple panels, the affected panels must be carefully removed with a masonry chisel, the underlying lath and WRB inspected for water damage, and new panels installed with fresh mortar.
How do I know when it is time to reseal the stone?
Perform a simple water-drop test. Flick a few drops of water onto the stone and mortar joints in various locations. If the water beads up and rolls off, the sealer is still effective. If the water immediately darkens the stone and absorbs into the substrate, it is time to clean the wall and apply a fresh coat of siloxane penetrating sealer.
Written by
James ThorntonJames Thornton is a construction industry veteran with 25 years of hands-on experience in wood framing, lumber grading, and residential building codes. He started as a framing carpenter in rural Oregon, earned his ICC Residential Building Inspector certification, and eventually became a senior plan reviewer for the City of Portland Bureau of Development Services. James holds a B.S. in Wood Science & Technology from Oregon State University and is a certified lumber grader through the West Coast Lumber Inspection Bureau (WCLIB). He has inspected over 3,000 residential construction sites and authored the city's internal guide on advanced framing techniques (2x6 at 24" O.C.). James lives in Bend, OR, where he builds custom timber-frame cabins and competes in lumberjack sports.
More from James Thornton
View all
Insulation
Best Home Insulation Materials: Complete 2026 Guide
Compare top home insulation materials for 2026. Find R-values, installed costs per square foot, and best uses for fiberglass, spray foam, and mineral wool.
Aug 4, 2026

Sustainable Building
Certify Your Green Building Material for LEED and WELL
Step-by-step guide to certifying a green building material for LEED v5 and WELL v2. Master EPDs, HPDs, and VOC limits for 2026 project specifications.
Aug 4, 2026

Stone & Masonry
Veneer Stacked Stone Panels: Interior Design & Style Showcase
Discover how veneer stacked stone panels transform interiors. Explore modern design profiles, material pairings, and technical installation specs.
Aug 4, 2026