Stone Foundation Veneer: Complete Material and Installation Guide
Master stone foundation veneer installation with our complete material guide. Compare costs, moisture barriers, and mortar types for below-grade applications.

The Hidden Complexities of Below-Grade Veneer
Applying stone foundation veneer is fundamentally different from installing veneer on above-grade wood-framed walls. Foundation walls are in direct contact with the earth, subjecting them to hydrostatic pressure, capillary action, and severe freeze-thaw cycles. When homeowners and contractors treat a foundation wrap like a standard chimney or interior accent wall, the result is almost always trapped moisture, efflorescence, and eventual veneer detachment.
This complete material guide breaks down the exact specifications, code requirements, and 2026 market costs required to execute a durable stone foundation veneer installation. We focus strictly on the transition zone—the critical 24 to 36 inches of exposed concrete or CMU (concrete masonry unit) foundation between the soil grade and the above-grade siding.
Material Matrix: Foundation-Specific Components
Standard interior veneer mortars and meshes will fail when subjected to ground moisture and soil alkalinity. The following table outlines the non-negotiable material specifications for exterior foundation applications.
| Component | Required Specification | 2026 Avg. Cost | Why It Matters for Foundations |
|---|---|---|---|
| Metal Lath | ASTM C847, 2.5 lb self-furring galvanized diamond mesh | $1.10 - $1.60 / sq ft | Self-furring dimples keep the lath off the concrete, allowing the scratch coat to fully encapsulate the wire and prevent rust jacking. |
| Mortar (Scratch & Setting) | Type S Masonry Cement (ASTM C926 / C270) | $18 - $24 / 80lb bag | Type S offers higher compressive strength (1,800 psi minimum) and superior bond retention against damp concrete compared to Type N. |
| Moisture Barrier | Fluid-applied silane/siloxane or peel-and-stick membrane | $0.85 - $2.20 / sq ft | Prevents alkaline salts from the concrete foundation from migrating into the veneer mortar and causing efflorescence. |
| Weep Screed | PVC or galvanized steel with 3/16" weep holes (ASTM C1063) | $1.25 - $1.80 / linear ft | Creates the mandatory capillary break at the base of the wall, allowing trapped moisture to drain out rather than wicking up into the stone. |
Natural vs. Manufactured Stone: Foundation Performance
Choosing between natural stone and manufactured stone veneer (MSV) for a foundation wrap requires analyzing the material's porosity and weight. Foundations are already bearing the structural load of the home; adding heavy cladding requires structural verification.
Manufactured Stone Veneer (MSV)
Modern MSV is cast from Portland cement, lightweight aggregates, and iron oxide pigments. High-quality MSV (such as Cultured Stone or Eldorado) is engineered with a dense face and a porous back for mortar adhesion. For foundations, MSV is highly advantageous because it weighs roughly 7 to 9 lbs per square foot—less than half the weight of natural stone. However, cheaper, non-branded MSV can suffer from high water absorption rates. When specifying MSV for a foundation, demand a product with a water absorption rate of less than 8% and ensure it meets the freeze-thaw testing requirements outlined by the Portland Cement Association.
Natural Stone (Limestone, Granite, Fieldstone)
Natural stone offers unmatched authenticity and longevity, but its density is a double-edged sword. Granite and dense slate are virtually impervious to water, making them exceptional for wet foundation zones. Conversely, porous sandstones and certain limestones can act like sponges. If water wicks into a porous natural stone and freezes, the expanding ice will cause the face of the stone to spall and delaminate. Natural stone foundation veneers typically weigh 15 to 25 lbs per square foot, requiring the foundation footing to be engineered to support the additional dead load.
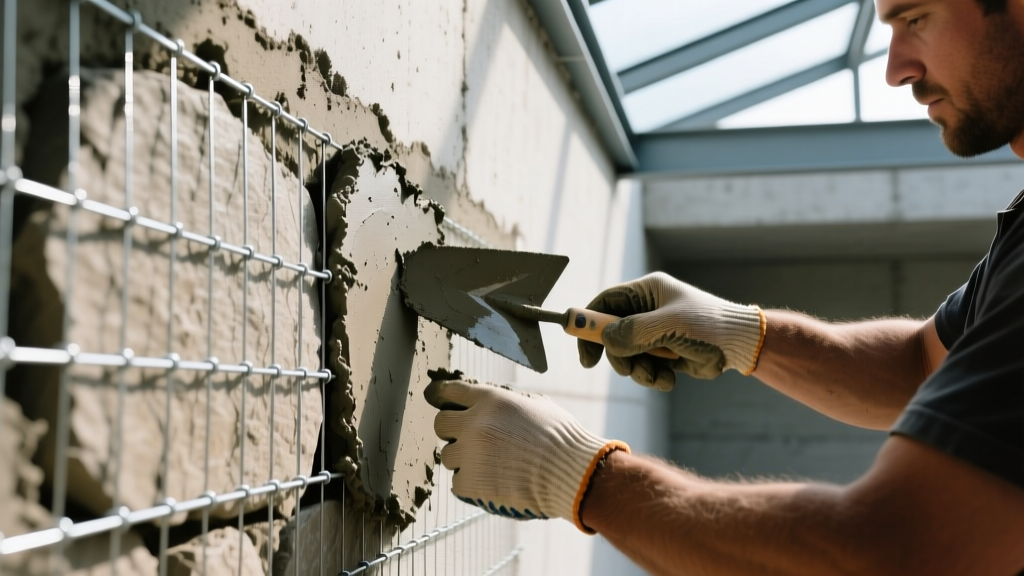
Step-by-Step Framework for Foundation Application
Bypassing any of these steps compromises the entire assembly. This framework assumes a poured concrete or CMU foundation wall.
- Surface Preparation and Sealing: Power wash the exposed foundation to remove dirt, form release agents, and efflorescence. Allow to dry completely. Apply a silane/siloxane penetrating sealer to the concrete. This acts as a primary capillary break, stopping ground moisture from pushing through the concrete and into the mortar bed.
- Flashing and Weep Screed Installation: Install a corrosion-resistant weep screed at the bottom of the installation zone, maintaining the code-required 2-inch to 4-inch clearance from the final soil grade. Fasten the screed directly to the concrete using powder-actuated pins or masonry screws spaced every 16 inches. Apply a continuous bead of polyurethane sealant behind the top flange of the screed before fastening.
- Lath Application: Unroll the 2.5 lb self-furring galvanized lath horizontally. Overlap horizontal seams by 1 inch and vertical seams by 2 inches. Fasten the lath to the concrete using masonry nails or concrete screws with fender washers, ensuring the fasteners penetrate at least 1 inch into the masonry substrate. The lath must feel rigid with no flexible pockets.
- The Scratch Coat: Mix Type S mortar to a thick, peanut-butter consistency. Using a trowel, force the mortar completely through the lath diamonds so it oozes out the back, then trowel it smooth to a uniform 3/8-inch thickness. While the mortar is still wet, use a coarse rake or stiff brush to score horizontal grooves into the surface. This mechanical key is mandatory for the setting bed to adhere. Cure the scratch coat for a minimum of 48 hours, misting lightly if temperatures exceed 80°F.
- Setting the Veneer: Apply a 1/2-inch setting bed of Type S mortar to the back of each stone (back-buttering) and press it firmly into a fresh mortar bed on the wall. Maintain consistent 1/2-inch to 1-inch joints for grouting. Never "butter" the wall and stick dry stone to it; back-buttering ensures 100% coverage and eliminates voids where water can pool and freeze.
- Grouting and Tooling: Once the stones are set and the mortar has firmed up (thumbprint hard), fill the joints using a grout bag. Tool the joints with a convex jointer to compress the mortar against the stone edges, creating a dense, water-shedding seal. Brush off excess mortar immediately with a stiff bristle brush—never use acid washes on foundation veneer, as the acid can react with the concrete substrate and cause severe staining.
Troubleshooting Common Foundation Veneer Failures
When foundation veneer fails, it is rarely a defect in the stone itself. It is almost always a failure in moisture management.
- Severe Efflorescence (White Staining): Caused by water-soluble salts in the concrete foundation or mortar migrating to the surface. The Fix: If efflorescence appears within the first 6 months, it is likely residual construction moisture drying out. If it persists, the capillary break (sealer or flashing) has failed, and ground moisture is continuously feeding the wall. The Masonry Society recommends dry brushing followed by a dedicated efflorescence cleaner, but the underlying water intrusion must be solved via exterior grading or French drains.
- Freeze-Thaw Spalling: The face of the stone pops off in thin layers after winter. The Fix: This occurs when the stone or mortar absorbed water and lacked the compressive strength to handle ice expansion. You must replace the damaged stones and switch to a denser, low-absorption stone or a high-grade MSV rated for freeze-thaw cycles.
- Base Course Detachment: The bottom row of stones pulls away from the weep screed. The Fix: The veneer was installed resting directly on the ground or the flashing, transferring the immense dead load of the stone to the screed rather than the wall. The bottom course must be supported by a structural masonry ledge or an angle iron bolted directly to the foundation footing.
2026 Cost Breakdown for Foundation Wraps
Pricing for stone foundation veneer varies significantly based on site accessibility, stone selection, and regional labor rates. The following estimates reflect national averages for 2026, assuming a standard 400-square-foot exposed foundation perimeter (typical for a 2,000 sq ft home with 2 feet of exposed foundation).
Estimated Project Costs (400 Sq Ft Foundation Wrap)
- Manufactured Stone Veneer (Materials Only): $3,200 – $5,600
- Natural Stone Veneer (Materials Only): $6,000 – $11,200
- Prep, Lath, Mortar & Accessories: $1,100 – $1,800
- Professional Masonry Labor: $4,800 – $8,800 ($12 - $22 per sq ft)
- Total Installed Cost (MSV): $9,100 – $16,200
- Total Installed Cost (Natural): $11,900 – $21,800
"The most expensive mistake a homeowner can make on a foundation wrap is cutting the prep budget to afford a premium natural stone. A $15,000 granite veneer will detach and crack just as easily as a $4,000 manufactured stone if the weep screed, lath, and capillary breaks are not installed to exact masonry codes."
By strictly adhering to foundation-specific material requirements and respecting the critical transition zone between soil and structure, your stone foundation veneer will provide decades of structural protection and aesthetic value without succumbing to the moisture traps that plague inferior installations.
Written by
Marcus ChenMarcus Chen is a licensed structural engineer (PE) and building materials analyst with over 12 years of experience across residential, commercial, and industrial construction. He holds a Master of Science in Civil Engineering from UC Berkeley and spent six years at Thornton Tomasetti before transitioning to independent consulting and technical writing. Marcus specializes in material selection for seismic-prone regions, concrete reinforcement strategies, and lifecycle cost analysis. His work has been cited by the American Concrete Institute (ACI) and the Structural Engineers Association of California (SEAOC). When he is not on a job site or at his desk, you will find him hiking the Sierra Nevada or restoring a 1920s craftsman bungalow in Oakland, CA.
More from Marcus Chen
View all
Construction Cost
How Much Did the Eiffel Tower Cost to Build?
How much did the Eiffel Tower cost to build in 1889? We adjust for inflation and compare its budget to modern skyscraper construction.
Aug 4, 2026

Fire Resistance
What Is a Fire Resistant Material? Testing & Certification Guide
Discover what is a fire resistant material through ASTM and UL testing. Learn how fire ratings, certifications, and assemblies work in construction.
Aug 4, 2026

Construction Cost
How Much Did the Burj Khalifa Cost to Build?
How much did the Burj Khalifa cost to build? We break down the $1.5B project and extract 5 money-saving strategies for your next build.
Jul 30, 2026