Stone Veneer Mortar Mix Comparison: Type S vs Polymer-Modified Blends
Comparing Type S and polymer-modified stone veneer mortar mixes. Discover the best QUIKRETE, Sakrete, and ProSpec blends for scratch coats and setting beds.

The Chemistry of Bond: Type S vs. Polymer-Modified Mortars
Selecting the correct stone veneer mortar mix dictates the structural longevity and aesthetic survival of your installation. While traditional Type S masonry mortar has been the historical default for heavy masonry, modern manufactured stone veneer (MSV) and high-density natural stones demand specific rheological properties that standard mixes cannot provide. The core debate in modern masonry centers on whether to use a site-mixed Type S blend or a factory-blended polymer-modified mortar.
According to BIA Technical Notes on Brick Construction, Type S mortar consists of 1 part Portland cement, 1/2 part hydrated lime, and 4.5 parts sand, yielding a minimum compressive strength of 1,800 psi. While this provides excellent load-bearing capacity, MSV systems are non-load-bearing. They require high flexural bond strength to resist wind shear, thermal expansion, and substrate movement.
Polymer-modified mortars integrate redispersible polymer powders (typically ethylene vinyl acetate or acrylics) into the dry blend. When hydrated, these polymers form a flexible matrix that dramatically increases bond strength, water retention, and freeze-thaw durability. For highly absorptive manufactured stones, which can rapidly wick moisture out of standard mortar, this polymer network prevents the mix from drying out before a mechanical bond is achieved.
Head-to-Head Brand Comparison Matrix
The market is dominated by three major pre-blended manufacturers, alongside the traditional site-mixed alternative. Below is a technical comparison of their flagship veneer mortars based on 2026 material specifications and regional pricing averages.
| Product / Mix | Base Chemistry | Compressive Strength | Flexural Bond | Working Time | Est. Cost (80lb Bag) |
|---|---|---|---|---|---|
| QUIKRETE Veneer Stone Mortar | Polymer-Modified Portland | > 2,500 psi | High | 60-90 mins | $18 - $22 |
| Sakrete Stone Veneer Mortar | Polymer-Modified Portland | > 2,500 psi | High | 60-90 mins | $17 - $21 |
| ProSpec Veneer Stone Mortar | High-Polymer Acrylic Blend | > 2,800 psi | Very High | 45-60 mins | $24 - $28 |
| Site-Mixed Type S | Portland / Lime / Sand | > 1,800 psi | Moderate | 90-120 mins | $6 - $9 (Material) |
As detailed in the QUIKRETE Veneer Stone Mortar Technical Data Sheet, the proprietary polymer additives eliminate the need for separate liquid latex admixtures, reducing on-site batching errors. ProSpec commands a premium due to its higher acrylic content, making it the preferred choice for large-format natural stones (exceeding 15 lbs per square foot) or extreme climate installations.
Scratch Coat vs. Setting Bed: Application Nuances
A common error in veneer installation is treating the scratch coat and the setting bed as identical applications. While you can use the exact same bag of polymer-modified mortar for both phases, the water-to-mix ratio and application technique must change.
The Scratch Coat
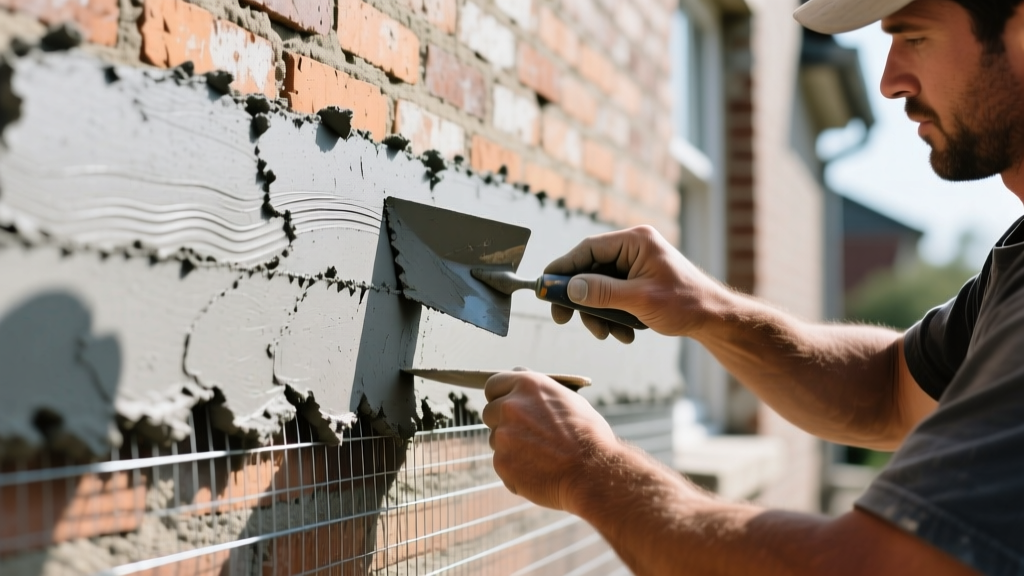
The scratch coat is applied over self-furring metal lath to create a rigid, textured base. This mix should be batched slightly stiffer, targeting a slump of 4 to 5 inches. Apply it at a thickness of 1/2 inch, pressing it firmly through the lath to ensure complete encapsulation. Before it fully cures, score the surface horizontally with a notched trowel to create a mechanical key. Allow the scratch coat to cure for a minimum of 24 to 48 hours, misting it lightly if ambient temperatures exceed 80°F to prevent rapid moisture loss.
The Setting Bed
The setting bed (or buttering mortar) requires a stickier, more cohesive consistency, targeting a slump of 6 to 7 inches. It must be pliable enough to allow for stone adjustment but stiff enough to support the stone's weight without sagging. When applying, use a notched trowel to create horizontal ridges on the scratch coat, and heavily back-butter the back of each stone. Press the stone into the wall with a slight twisting motion to collapse the ridges and eliminate air pockets.
Never apply mortar to a large section of the wall at once. If the setting bed begins to skin over or dry out before the stone is pressed into it, the mechanical bond is destroyed. This is known as 'burning' the mortar. If the mortar loses its wet sheen, scrape it off and reapply. Never attempt to re-wet skinned mortar with a spray bottle.
Real-World Failure Modes and How to Avoid Them
Even with premium materials, improper handling of stone veneer mortar mix leads to catastrophic failures. Understanding these edge cases is critical for long-term durability.
- Delamination from Substrate Suction: Manufactured stone veneer can have high absorption rates. If the stone is not dampened before application, it will instantly suck the moisture out of the mortar, halting the hydration process. Fix: Lightly mist the back of the stones and the scratch coat with water before applying the setting bed. The surface should be damp, not dripping.
- Efflorescence Blooming: White, powdery salt deposits on the stone surface are caused by water-soluble salts migrating through the mortar. This is frequently triggered by over-watering the mix or using unwashed, high-salt masonry sand in site-mixed batches. Fix: Stick to pre-blended polymer mortars where the sand is kiln-dried and washed, and strictly adhere to the manufacturer's water limits (typically 1.5 to 1.75 quarts per 80lb bag).
- Vertical Sagging: Heavy stones sliding down the wall before the mortar cures. This is almost exclusively caused by adding too much water to the setting bed to make it 'easier to trowel'. Fix: Mix to a stiff, peanut-butter-like consistency. Use temporary ledger boards or braces for the bottom course to support the weight of the stones above.
The Exact Mixing Protocol: Ratios and Slaking
Achieving the correct chemical activation in polymer-modified mortars requires a strict mixing protocol. Bypassing these steps compromises the polymer matrix.
- Measure Water First: Pour exactly 1.5 quarts of clean, potable water into the mixing bucket or mortar tub. Never add water to dry mix; always add dry mix to water to prevent dry clumps from forming at the bottom.
- Add the Mix: Gradually add the 80lb bag of stone veneer mortar mix while agitating with a heavy-duty 1/2-inch drill and a paddle mixer.
- Mix to Uniformity: Blend for 3 to 5 minutes until the mixture is completely lump-free and resembles thick peanut butter. If the mix is too dry, add water in increments of no more than 2 ounces. Do not exceed 1.75 quarts total water per bag.
- The Mandatory Slaking Period: Let the mortar rest (slake) for exactly 10 minutes. This rest period is non-negotiable. It allows the redispersible polymer powders to fully hydrate and the Portland cement particles to begin their initial chemical reaction.
- Remix Without Water: After 10 minutes, remix the batch for 1 to 2 minutes. Do not add any additional water at this stage. If the mortar seems too stiff after slaking, it has been over-mixed or the ambient temperature is too high; discard and start a new batch.
Final Verdict: Which Mix Should You Buy?
Your purchasing decision should be driven by the specific stone material, the climate, and your mixing capabilities. For 90% of residential manufactured stone veneer installations, QUIKRETE Veneer Stone Mortar or Sakrete Stone Veneer Mortar provides the optimal balance of bond strength, workability, and cost. The integrated polymers eliminate the guesswork of liquid admixtures and ensure consistent water retention.
Opt for ProSpec Veneer Stone Mortar if you are installing heavy, dense natural stone (like thick slate or fieldstone), working in regions with severe freeze-thaw cycles, or applying veneer to challenging substrates like tilted concrete panels. Reserve site-mixed Type S exclusively for traditional solid masonry applications, heavy brickwork, or below-grade stone foundations where high compressive load-bearing capacity is required, as detailed in Fine Homebuilding's masonry guides. For standard exterior and interior veneer walls, the superior flexural bond of polymer-modified blends makes them the undisputed technical choice.
Written by
Marcus ChenMarcus Chen is a licensed structural engineer (PE) and building materials analyst with over 12 years of experience across residential, commercial, and industrial construction. He holds a Master of Science in Civil Engineering from UC Berkeley and spent six years at Thornton Tomasetti before transitioning to independent consulting and technical writing. Marcus specializes in material selection for seismic-prone regions, concrete reinforcement strategies, and lifecycle cost analysis. His work has been cited by the American Concrete Institute (ACI) and the Structural Engineers Association of California (SEAOC). When he is not on a job site or at his desk, you will find him hiking the Sierra Nevada or restoring a 1920s craftsman bungalow in Oakland, CA.
More from Marcus Chen
View all
Construction Cost
How Much Did the Eiffel Tower Cost to Build?
How much did the Eiffel Tower cost to build in 1889? We adjust for inflation and compare its budget to modern skyscraper construction.
Aug 4, 2026

Fire Resistance
What Is a Fire Resistant Material? Testing & Certification Guide
Discover what is a fire resistant material through ASTM and UL testing. Learn how fire ratings, certifications, and assemblies work in construction.
Aug 4, 2026

Construction Cost
How Much Did the Burj Khalifa Cost to Build?
How much did the Burj Khalifa cost to build? We break down the $1.5B project and extract 5 money-saving strategies for your next build.
Jul 30, 2026