Choosing the Right Mortar for Stone Veneer: Types and Mix Guide
Discover the best mortar for stone veneer applications. Compare Type S, Type N, and polymer-modified mixes with expert ratios and installation tips.

The Core Chemistry: Why Standard Concrete Fails Veneer
Selecting the correct mortar for stone veneer is a structural decision, not merely an aesthetic one. A common and catastrophic error in residential construction is substituting masonry mortar with standard concrete mix or unmodified Portland cement. Concrete is engineered for high compressive strength and rigid load-bearing, but it lacks the flexural bond strength and water retention required to adhere vertical cladding.
Masonry mortar, governed by ASTM C270 standards, incorporates hydrated lime or limestone filler. This lime component provides critical autogenous healing (the ability to seal microscopic shrinkage cracks), superior workability, and the necessary "stick" to hold heavy stone profiles on vertical substrates without sagging. When mortar cures, it must remain slightly softer and more permeable than the stone itself. If a rigid, high-PSI concrete mix is used, thermal expansion and structural deflection will cause the mortar to crack through the stone face rather than the joint, resulting in irreversible material damage.
Mortar Classification Matrix for Stone Veneer
The choice between mortar types depends on the stone's density, the installation environment, and the substrate. Below is a technical comparison of the primary mortar classifications used in modern veneer applications.
| Mortar Type | Compressive Strength | Flexural Bond | Best Application | Est. Cost (80lb Bag) |
|---|---|---|---|---|
| Type S | 1,800 PSI (Minimum) | High | Exterior natural stone, heavy stacked profiles, below-grade accents. | $9.00 - $13.00 |
| Type N | 750 PSI (Minimum) | Medium | Interior fireplaces, protected exterior accents, lightweight manufactured stone. | $8.00 - $11.00 |
| Polymer-Modified | 2,500+ PSI | Very High | Manufactured stone veneer (MSV), non-porous substrates, high-wind seismic zones. | $18.00 - $26.00 |
| Masonry Adhesive | N/A (Tensile focus) | Extreme | Interior drywall applications, small-scale backsplashes, repair patching. | $14.00 - $20.00 (Tube) |
Scratch Coat vs. Setting Bed: Formulation Differences
A compliant stone veneer installation requires a two-part mortar system: the scratch coat and the setting bed. While both can be mixed from the same Type S bag, their application thickness and scoring requirements differ fundamentally.
The Scratch Coat (Base Layer)
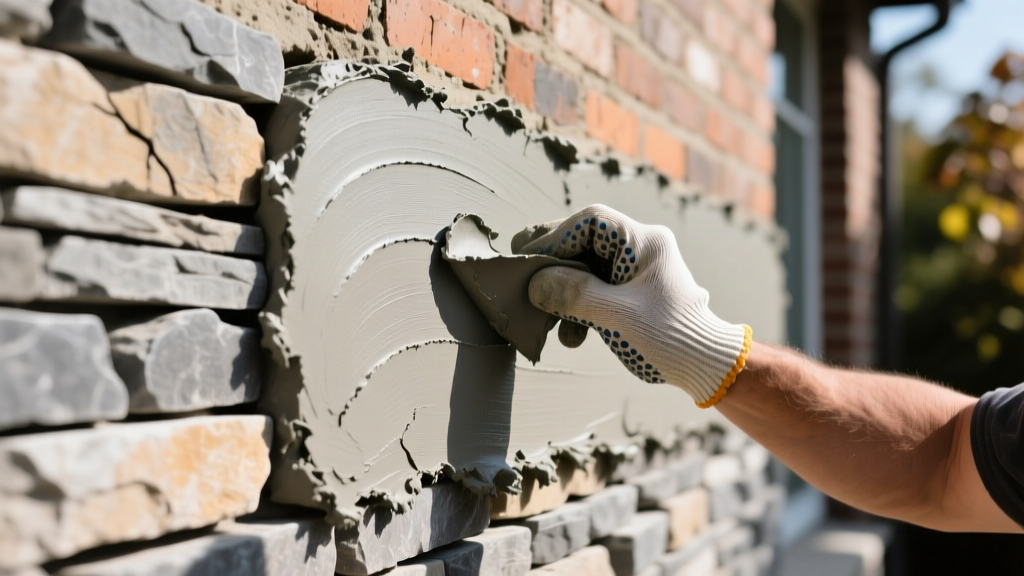
The scratch coat acts as the mechanical bridge between the weather-resistive barrier (WRB) and the stone. It must be applied at a consistent 1/2-inch thickness over metal lath. Crucially, while the mortar is still "thumbprint hard" (usually 45 to 90 minutes post-application depending on ambient humidity), it must be scored horizontally with a notched trowel. This horizontal scoring creates a mechanical shelf that supports the dead load of the stone, preventing vertical shear failure.
The Setting Bed (Adhesive Layer)
The setting bed is the 1/2-inch layer applied directly to the back of the stone (back-buttering) and the face of the cured scratch coat. The combined thickness of the scratch coat and setting bed should never exceed 1-1/4 inches. If the substrate is highly uneven, it must be furred out or leveled prior to lath installation; mortar is an adhesive, not a leveling compound.
Step-by-Step Mixing Protocol for Maximum Adhesion
Improper mixing is the leading cause of mortar delamination. Follow this precise protocol to ensure optimal hydration and polymer activation.
- Water First: Add approximately 4.5 to 5.5 quarts of clean, potable water to the mixing drum before adding the dry mix. Never dump dry powder into an empty drum.
- Incremental Addition: Slowly add the 80lb bag of Type S or polymer-modified mortar while the mixer is running. Mix for a minimum of 3 to 5 minutes until a uniform, lump-free consistency is achieved. The ideal texture resembles thick peanut butter—it should hold its shape on a trowel held at a 90-degree angle without sliding off.
- The Slake Period (Critical): Allow the mixed mortar to rest (slake) for exactly 10 minutes. This resting period allows the Portland cement and lime particles to fully absorb the water and the polymers to activate.
- Remix: After the 10-minute slake, remix for 2 additional minutes. Do not add additional water during this phase.
- Pot Life Management: The working time (pot life) is approximately 90 minutes at 70°F (21°C). Never retemper (add water to) mortar that has begun to stiffen. Retempering disrupts the crystalline matrix, reducing compressive and bond strength by up to 50%.
Troubleshooting Common Mortar Failures
When veneer installations fail, the root cause almost always traces back to mortar chemistry or application errors. Use this diagnostic framework to identify and correct field issues.
Symptom: Efflorescence (White Powdery Residue)
Cause: Soluble salts within the mortar or stone are dissolved by excess moisture and migrate to the surface. This is often exacerbated by a high water-cement ratio during mixing, lack of weep holes at the base of the wall, or using unbuffered acid to clean the stone post-installation.
Fix: For active efflorescence, dry-brush the surface with a stiff nylon brush. Do not use water, as it reintroduces the solvent. Apply a breathable, silane/siloxane penetrating sealer to the stone and mortar joints to prevent future moisture ingress while allowing vapor transmission.
Symptom: Stone Delamination (Popping Off the Wall)
Cause: Failure to back-butter the stone, or applying mortar to a dry, highly absorbent scratch coat that sucks the moisture out of the setting bed before hydration completes (known as "burning" the mortar).
Fix: Always mist the cured scratch coat with a fine water spray immediately before applying the setting bed. Ensure 100% back-butter coverage on the stone, pressing firmly until mortar squeezes out of the joints, confirming the displacement of air pockets.
Symptom: Mortar Skin-Over (Crusting)
Cause: Working in high-wind or low-humidity conditions causes a hard skin to form on the mortar bed before the stone is pressed into it, resulting in a false bond.
Fix: Limit mortar application to small, manageable sections (no more than 4 square feet at a time in arid conditions). If a skin forms, scrape it off and discard it; do not attempt to mix it back into the fresh batch.
Environmental and Curing Considerations
Mortar hydration is a temperature-sensitive chemical reaction. According to guidelines published by The Masonry Society, cold-weather and hot-weather protocols must be strictly enforced to maintain structural integrity.
- Cold Weather (Below 40°F / 4°C): Mortar hydration slows dramatically. Use heated water (up to 120°F) during mixing. Protect the installed veneer with insulated tarps for a minimum of 48 hours to prevent freeze-thaw damage to the uncured matrix. Never apply mortar to a frozen substrate.
- Hot Weather (Above 90°F / 32°C): Rapid moisture evaporation leads to shrinkage cracking. Use cold mixing water, store mortar bags in the shade, and mist the substrate heavily. Reduce the batch size to ensure the mortar is used well within its shortened 60-minute pot life.
By respecting the chemical limitations of the mix and adhering to precise application thicknesses, contractors and DIYers can ensure a stone veneer installation that withstands decades of thermal cycling and environmental stress. For specific product data sheets and localized code requirements, always consult the technical documentation provided by manufacturers like Sakrete or Quikrete prior to mixing.
Written by
Elena RodriguezElena Rodriguez is a civil engineer and technical writer specializing in concrete technology, masonry systems, and ASTM/ACI compliance. She earned her B.S. in Civil Engineering from Texas A&M University and spent a decade at a materials testing laboratory, performing over 2,000 concrete compressive strength tests and masonry prism evaluations. Elena is an ACI-certified Field Testing Technician (Grade I) and a member of ASTM Committee C12 on Natural Building Stone. She currently consults on forensic engineering cases involving concrete failures and moisture intrusion. Based in San Antonio, TX, Elena is a proud member of the Society of Women Engineers (SWE) and coaches her daughter's FIRST Robotics team.
More from Elena Rodriguez
View all
Walls & Panels
Cost Analysis: Light Gauge Steel Framing Advantages and Disadvantages
Evaluate light gauge steel framing advantages and disadvantages through a strict cost analysis lens, comparing material, labor, and lifecycle expenses.
Aug 4, 2026

Walls & Panels
Gypsum Board Types: Exact Specifications, Thickness & Dimensions
Compare standard, Type X, and moisture-resistant gypsum board types. Get exact specifications, thicknesses, dimensions, and ASTM standards for your project.
Aug 4, 2026

Fire Resistance
Best Fire-Resistant Outdoor Decking Materials: 2026 Buyer Guide
Discover the best fire-resistant outdoor decking materials for 2026. Compare Class A PVC, aluminum, and hardwood options for WUI compliance and safety.
Aug 4, 2026