Stone Veneer for Porch Posts: The Complete Material Guide
Discover the best stone veneer for porch posts, including material comparisons, moisture management tips, and step-by-step installation frameworks.

The "Splash Zone" Vulnerability in Porch Posts
Wrapping structural columns with stone veneer for porch posts introduces a unique set of hydrostatic and mechanical stresses not found on standard wall applications. The bottom 8 to 12 inches of any porch post exists in the "splash zone"—an area subjected to continuous moisture wicking from ground-level splashback, soil acidity, and standing snow. Standard manufactured stone veneer (MSV) is inherently porous. When capillary action draws groundwater into the base of the stone and the temperature drops below freezing, the trapped water expands, causing spalling (where the face of the stone fractures and pops off).
Moisture Management Rule: According to building envelope principles outlined by the Building Science Corporation, porous claddings must be separated from ground-level moisture sources. Never allow MSV to make direct contact with soil, concrete porches, or wooden decking without a dedicated weep gap and flashing.
Material Matrix: Choosing the Right Veneer
Selecting the correct material dictates both the structural load on your post framing and the long-term durability in your specific climate. Below is a comparison of the three primary stone veneer categories used for column wraps.
| Material Type | Weight (lbs/sq ft) | Moisture & Freeze-Thaw Resistance | Avg Material Cost (2026) | Best Application |
|---|---|---|---|---|
| Manufactured Stone (e.g., Cultured Stone) | 10 - 12 lbs | Moderate (Requires sealant in freeze-thaw zones) | $7.50 - $11.00 | Traditional aesthetics, covered porches |
| Natural Thin Veneer (Limestone/Slate) | 12 - 15 lbs | High (Dependent on stone density) | $9.00 - $16.00 | High-end custom builds, extreme weather |
| Polyurethane Faux Stone (e.g., Evolve Stone) | 1.2 - 2.0 lbs | Exceptional (Closed-cell, zero water absorption) | $11.00 - $14.50 | Direct ground contact, DIY, lightweight framing |
Substrate Engineering: Wrapping the Structural Core
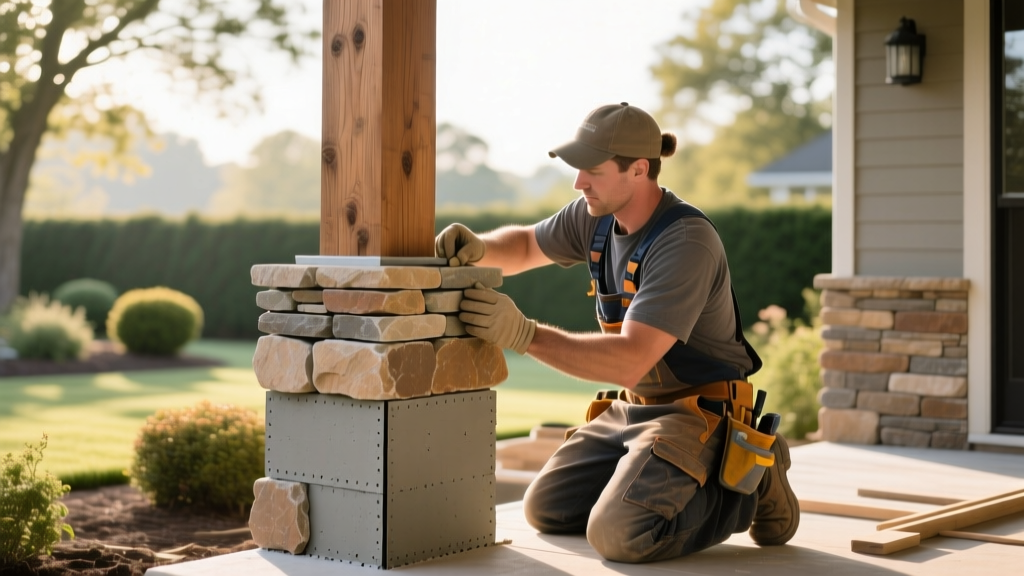
Porch posts typically consist of 6x6 pressure-treated pine, 4x4 steel tubes, or engineered wood columns. You cannot apply mortar or stone directly to these structural cores. The substrate must be engineered to handle the sheer weight of the stone while providing a stable, moisture-resistant bonding surface.
The 4-Layer Post Wrap Framework
- Weather Barrier: Wrap the structural post in Grade D asphalt-impregnated building paper or a high-performance housewrap. This prevents the mortar from drawing moisture out of the wood post and protects the wood from alkaline mortar burn.
- Cement Backer Board: For heavy natural stone, screw 1/2-inch cement board (like Durock or HardieBacker) to the post using corrosion-resistant alkali-resistant (AR) screws. For standard MSV, this step is optional if using heavy lath, but highly recommended for rigid corner alignment.
- Metal Lath: Wrap 2.5 lb galvanized diamond mesh metal lath around the post. Critical detail: The lath must overlap itself by at least 1 inch on vertical seams and wrap continuously around corners. Never butt lath pieces together at a corner; this guarantees a future cracking failure point.
- Weep Screed: Install a galvanized weep screed at the very bottom of the post wrap, elevated at least 2 inches above the porch decking or grade to allow trapped water to escape.
Mortar Science and the Scratch Coat Protocol
The longevity of stone veneer for porch posts relies entirely on the mortar bond. The Portland Cement Association recommends Type S mortar for exterior veneer applications due to its high tensile bond strength and flexibility.
Expert Type S Mortar Mix Ratio
- 1 part Type I/II Portland cement
- 1/2 part Hydrated Lime (Type S)
- 4.5 parts clean, well-graded damp masonry sand
- Water (added to achieve a stiff, workable consistency that holds its shape on a trowel)
The Scratch Coat: Apply a 3/8-inch thick layer of mortar over the metal lath, pressing it firmly through the mesh. Before it fully sets, use a notched trowel to scarify the surface horizontally. Horizontal grooves provide a mechanical key for the setting bed and prevent the mortar from sliding down the vertical post surface. Allow the scratch coat to cure for 24 to 48 hours, misting it lightly with water to prevent rapid drying and shrinkage cracks.
Step-by-Step Post Wrapping Sequence
When applying the stone, the sequence of installation dictates the visual authenticity and structural integrity of the column.
- Step 1: Flashing Integration. Ensure the top cap flashing of the post is integrated behind the weather barrier and extends over the top course of stone by at least 1/4 inch to shed water away from the veneer.
- Step 2: Set the Corners First. If using MSV with manufactured corner pieces, alternate long and short corner units up the post. This creates a structural interlocking "zipper" effect that prevents vertical seam splitting.
- Step 3: Apply the Setting Bed. Butter the back of each stone with a 1/2-inch layer of mortar. Press the stone firmly into the setting bed on the post until mortar squeezes out on all sides.
- Step 4: Tool the Joints. Wait until the mortar is thumbprint-hard (usually 30-45 minutes). Use a concave jointer to compress and seal the mortar joints. Do not use a wet brush to finish joints, as this brings laitance to the surface and causes efflorescence.
2026 Cost Analysis: Pricing a Standard Post Wrap
Budgeting for stone veneer requires calculating the total surface area of the wrapped column, not just the footprint of the post. A standard 6x6 structural post wrapped in 1/2-inch cement board and lath becomes roughly a 14" x 14" column. Over an 8-foot height, this yields approximately 37 square feet of veneer surface area per post.
| Cost Component | Material / Labor Details | Estimated Cost Per Post (37 sq ft) |
|---|---|---|
| Substrate & Lath | Cement board, 2.5lb lath, weep screed, AR screws | $110 - $160 |
| Stone Veneer | Mid-range MSV including 20% corner waste factor | $330 - $480 |
| Mortar & Consumables | Type S mix, bonding agent, sealant | $65 - $95 |
| Professional Labor | Masonry contractor ($18 - $28 per sq ft) | $660 - $1,030 |
| Total Estimated Cost | Turnkey installation per post | $1,165 - $1,765 |
Troubleshooting Edge Cases and Failures
Even with perfect materials, environmental factors can compromise porch post veneers. Understanding these failure modes allows for proactive prevention.
Efflorescence (White Powdery Residue)
Efflorescence occurs when water-soluble salts from the Portland cement or natural stone are carried to the surface by migrating moisture. Prevention: Use low-alkali Portland cement, ensure the top cap flashing is completely watertight, and apply a breathable, silane-siloxane penetrating sealer (like Prosoco Siloxane PD) 28 days after installation. Never use a film-forming acrylic sealer, which will trap moisture inside the stone and accelerate spalling.
Delamination at the Base
Stones falling off the bottom 12 inches of the post is almost always caused by freeze-thaw cycling combined with ground moisture. Prevention: If you are building in a climate with hard freezes, abandon cementitious MSV for the bottom 12 inches. Instead, install a PVC or composite post base (such as VersaPost) that mimics stone but is completely impervious to water, then transition to your chosen stone veneer above the splash zone.
Expert Verdict
Successfully installing stone veneer for porch posts requires treating the column as a miniature, high-stress building envelope. For covered porches in mild climates, traditional Manufactured Stone Veneer (like Cultured Stone) offers the most authentic aesthetic at a moderate price point. However, for exposed porches, direct ground contact, or regions with severe freeze-thaw cycles, polyurethane faux stone panels provide superior moisture resistance and eliminate the risk of base-level spalling, making them the most pragmatic choice for long-term durability.
Written by
David NakamuraDavid Nakamura is a licensed architect (AIA) and construction technology writer focused on sustainable building methods, mass timber engineering, and high-performance building envelopes. He holds a Master of Architecture from the University of Washington and is a certified Passive House Consultant (CPHC). David spent eight years at the Seattle firm Mithun, where he led the design of three LEED Platinum projects, before founding his own practice specializing in net-zero residential design. He serves on the editorial advisory board of GreenBuilder Magazine and has authored peer-reviewed papers on cross-laminated timber (CLT) connections for the Journal of Structural Engineering. In his spare time, David teaches woodworking at Pratt Fine Arts Center and kayaks the Puget Sound.
More from David Nakamura
View all
Construction Cost
Labor Cost to Build a Deck Per Sq Ft: 2026 Installation Guide
Discover the exact labor cost to build a deck per sq ft in 2026. This installation guide breaks down contractor rates, complexity factors, and hidden fees.
Aug 4, 2026

Construction Cost
How Much Does It Cost to Build a 3 Bedroom House? Financing Guide
Learn exactly how much it costs to build a 3 bedroom house and explore 2026 financing options, construction loan types, and budget frameworks for your build.
Aug 4, 2026

Construction Cost
Cost to Build a Tennis Court: 2026 Guide
How much does it cost to build a tennis court in 2026? Breakdowns for asphalt, concrete, and synthetic surfaces plus fencing and lighting.
Jul 30, 2026