Stone Veneer Siding Installation: The Complete Buyer's Guide
Navigate stone veneer siding installation with our 2026 buyer's guide. Compare material costs, prep requirements, and contractor vetting tips.
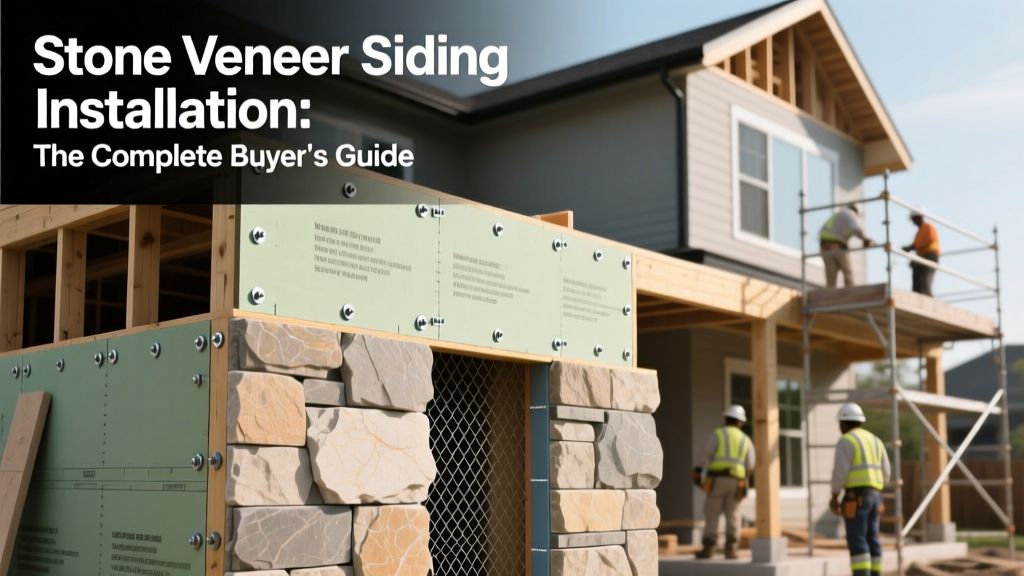
Material Selection: Natural vs. Manufactured Stone Veneer
The decision between natural and manufactured stone veneer dictates not only your material budget but also the structural preparation required for your exterior walls. While natural stone offers unmatched geological authenticity, manufactured stone veneer (MSV) has closed the aesthetic gap significantly while offering distinct installation advantages.
| Feature | Manufactured Stone Veneer (MSV) | Natural Stone Veneer |
|---|---|---|
| Weight | 10–12 lbs per sq. ft. | 15–25+ lbs per sq. ft. |
| Material Cost (2026) | $6.50 – $12.00 per sq. ft. | $15.00 – $35.00 per sq. ft. |
| Thickness | 1 to 2.5 inches | 2 to 4 inches |
| Structural Prep | Standard wood/steel framing sufficient | May require engineered footings or reinforced masonry |
| Top Brands | Eldorado Stone, Cultured Stone, Dutch Quality | Quarrymill, Real Stone Systems, local quarries |
For most residential retrofits and new builds utilizing standard 2x6 wood framing, manufactured stone veneer is the pragmatic choice. It eliminates the need for expensive structural reinforcements and shelf angles, keeping the overall stone veneer siding installation cost manageable. Natural stone is best reserved for projects where the budget allows for masonry substrate upgrades and where the homeowner demands the thermal mass and unique mineral variations only real quarry cuts can provide.
The Hidden Costs of Stone Veneer Siding Installation
Buyers frequently underestimate the ancillary costs associated with proper installation. The stone itself is only one component of a multi-layered cladding system. When budgeting for your project, you must account for the weather-resistive barrier (WRB), metal lath, mortar, weep screeds, and specialized labor.
2026 Comprehensive Cost Breakdown
- Manufactured Stone Material: $6.50 – $12.00 / sq. ft.
- WRB & Flashing Materials: $1.25 – $2.50 / sq. ft.
- Metal Lath & Fasteners: $0.80 – $1.50 / sq. ft.
- Mortar & Scratch Coat: $0.75 – $1.25 / sq. ft.
- Specialized Masonry Labor: $14.00 – $22.00 / sq. ft.
- Scaffolding & Site Prep: $800 – $2,500 per project
Total Installed Cost: Expect to pay between $23.30 and $39.25 per square foot for a code-compliant, professionally installed manufactured stone veneer system in 2026. Natural stone installations will push this range to $45.00 – $75.00+ per square foot.
The most common cause of catastrophic failure in stone veneer siding installation is value-engineering the drainage plane. Stone is a reservoir cladding—it absorbs and holds water. If your contractor proposes installing the stone directly over standard housewrap without a drainage gap or weep screed, terminate the contract immediately. Trapped moisture will rot your sheathing and framing within 3 to 5 years.
Substrate Preparation & Weather-Resistive Barriers (WRB)
Proper water management is the single most critical factor in the longevity of your exterior cladding. According to building science experts at the Building Science Corporation, stone veneer acts as a 'reservoir cladding,' meaning it absorbs significant moisture during rain events and releases it slowly. The substrate must be designed to handle this moisture load.
The Mandatory Drainage Assembly
- Sheathing: OSB or plywood, properly taped at seams.
- Primary WRB: A high-quality, breathable housewrap (e.g., Tyvek CommercialWrap or Henry BlueSkin VP).
- Drainage Mat / Rainscreen: A 3/16-inch to 1/4-inch drainage gap created by a textured WRB or a dedicated drainage mat (e.g., Keene Driwall). This allows water to flow downward unimpeded.
- Weep Screed: A code-compliant, corrosion-resistant weep screed (ASTM C926) installed at the base of the wall. It must be positioned a minimum of 4 inches above soil grade and 2 inches above paved surfaces to prevent wicking and block insect entry.
- Self-Furring Lath: 2.5 lb/sq. yd. galvanized wire lath, fastened every 6 inches directly into the wall studs (not just the sheathing) using corrosion-resistant nails or screws.
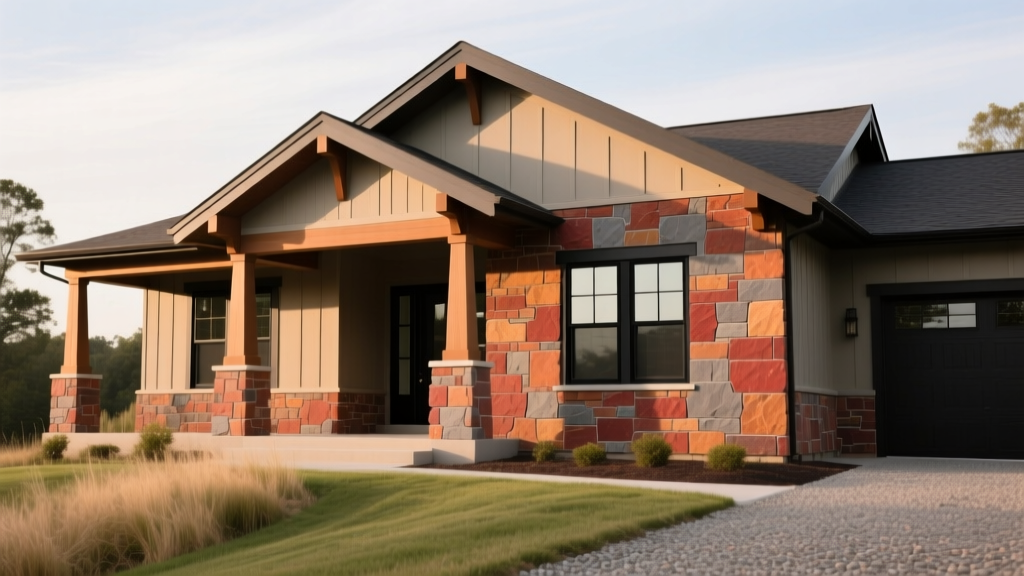
Mortar Selection and Climate Considerations
The mortar used in stone veneer siding installation is not merely an adhesive; it is a structural and aesthetic component that must accommodate thermal expansion and moisture vapor transmission. Using the wrong mortar mix is a primary driver of efflorescence and stone detachment.
Installation typically requires a two-coat mortar system:
- Scratch Coat: A 1/2-inch layer of Type S mortar is applied over the metal lath and scored horizontally. Type S offers high compressive strength (minimum 1,800 psi), creating a rigid base that locks into the self-furring lath.
- Setting Bed: A 1/2-inch to 1-inch layer of Type N or Type S mortar is used to adhere the stones. Type N (minimum 750 psi) is often preferred for the setting bed in regions with extreme freeze-thaw cycles because its lower compressive strength allows for greater flexibility and micro-movements without cracking the stone faces.
'Always defer to the specific mortar requirements outlined by the stone manufacturer. Brands like Eldorado Stone rigorously test their profiles with specific mortar blends, and deviating from their published guidelines will void your material warranty.' — Manufactured Stone Veneer Manufacturers Association (MSVMA)
Vetting Your Contractor: Critical Questions to Ask
General carpenters and standard siding contractors often lack the specific masonry training required for flawless stone veneer siding installation. You must hire a specialized mason or a contractor with documented MSV experience. Use this vetting framework during your consultation:
- 'Are you certified or trained by the MSVMA?' The Manufactured Stone Veneer Manufacturers Association offers specific installation guidelines and training. Contractors familiar with MSVMA standards understand the critical nature of weep screeds and clearances.
- 'How do you handle penetrations and transitions?' A qualified mason will explain that stone must stop 2 inches above roofing surfaces, 1/2 inch away from trim (sealed with a flexible polyurethane caulk), and must never bury window flanges or door thresholds.
- 'Will you use self-furring lath and fasten to the studs?' If they mention stapling flat lath to the OSB sheathing, they are violating building codes and manufacturer instructions. Fasteners must penetrate the structural studs.
- 'Do you include expansion joints in your bid?' Large expanses of stone veneer require soft joints (sealed with ASTM C920 sealant) to accommodate structural settling and thermal expansion, preventing diagonal cracking across the facade.
Common Installation Failure Modes & How to Avoid Them
Understanding how stone veneer systems fail allows you to inspect the work-in-progress and catch errors before the mortar cures.
1. Efflorescence (White, Powdery Staining)
Cause: Water moving through the masonry dissolves soluble salts in the mortar and deposits them on the stone surface as it evaporates. This is exacerbated by using unapproved colorants in the mortar or failing to install a proper drainage plane.
Prevention: Ensure the contractor uses only integral, manufacturer-approved mortar pigments. Verify the WRB and drainage mat are continuous and unbroken behind the lath.
2. Spalling and Face Delamination
Cause: In freeze-thaw climates, moisture trapped inside the manufactured stone expands when frozen, popping the colored face off the concrete core. This happens when stones are installed with 'buttered' backs but no cavity, trapping water inside the unit.
Prevention: The mortar must be applied to both the back of the stone and the scratch coat (back-buttering), ensuring 100% coverage with no hidden air pockets where water can condense and freeze.
3. Capillary Wicking at the Base
Cause: The stone or mortar is in direct contact with soil, mulch, or concrete patios, acting like a sponge and drawing ground moisture up into the wall cavity.
Prevention: Strict adherence to the 4-inch soil clearance and 2-inch hardscape clearance rule via a properly integrated weep screed. Grade the landscaping away from the foundation post-installation.
Written by
Marcus ChenMarcus Chen is a licensed structural engineer (PE) and building materials analyst with over 12 years of experience across residential, commercial, and industrial construction. He holds a Master of Science in Civil Engineering from UC Berkeley and spent six years at Thornton Tomasetti before transitioning to independent consulting and technical writing. Marcus specializes in material selection for seismic-prone regions, concrete reinforcement strategies, and lifecycle cost analysis. His work has been cited by the American Concrete Institute (ACI) and the Structural Engineers Association of California (SEAOC). When he is not on a job site or at his desk, you will find him hiking the Sierra Nevada or restoring a 1920s craftsman bungalow in Oakland, CA.
More from Marcus Chen
View all
Construction Cost
How Much Did the Eiffel Tower Cost to Build?
How much did the Eiffel Tower cost to build in 1889? We adjust for inflation and compare its budget to modern skyscraper construction.
Aug 4, 2026
Fire Resistance
What Is a Fire Resistant Material? Testing & Certification Guide
Discover what is a fire resistant material through ASTM and UL testing. Learn how fire ratings, certifications, and assemblies work in construction.
Aug 4, 2026

Construction Cost
How Much Did the Burj Khalifa Cost to Build?
How much did the Burj Khalifa cost to build? We break down the $1.5B project and extract 5 money-saving strategies for your next build.
Jul 30, 2026