Installation Guide to the Most Popular Types of Siding for Homes
Compare installation procedures, substrate prep, and labor costs for the most popular types of siding for homes, from vinyl to fiber cement.
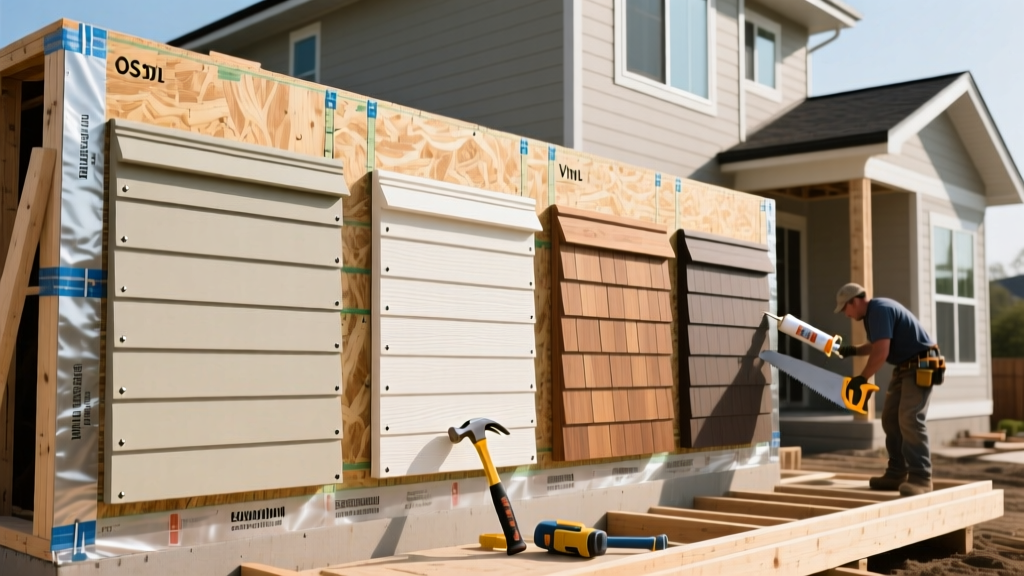
Selecting the right exterior cladding goes beyond aesthetics and material costs; the true differentiator among the various types of siding for homes lies in their specific installation procedures, substrate requirements, and long-term maintenance protocols. A material that seems affordable upfront may demand specialized labor, rigid environmental controls during application, or precise fastening techniques that drive up the total installed cost. According to the U.S. Department of Energy, proper installation and weather-resistive barriers are just as critical as the siding material itself in determining a home's thermal envelope and moisture management. This guide breaks down the exact application procedures, clearance specifications, and failure modes for the most common residential cladding systems.
Substrate Preparation and Weather-Resistive Barriers (WRB)
Before any siding is applied, the substrate must be prepared to manage bulk water and vapor. For wood-based sheathing (OSB or plywood), a continuous Weather-Resistive Barrier (WRB) such as Tyvek HomeWrap or Zip System sheathing is mandatory.
- Flashing Integration: All window and door flanges must be integrated with the WRB using manufacturer-approved flashing tapes. The top flange is taped last, overlapping the side tapes, which overlap the bottom tape (shingle-lap fashion).
- Furring Strips: For stucco, stone veneer, or certain rigid foam insulation setups, vertical 1x3 furring strips spaced 16 inches on center are required to create a drainage plane and provide a solid nailing base.
Vinyl Siding: Thermal Expansion and Fastening Protocols
Vinyl siding (governed by ASTM D3679 standards) is highly susceptible to thermal expansion and contraction. A 12-foot panel can expand up to 5/8 of an inch across seasonal temperature swings. The Vinyl Siding Institute mandates strict fastening protocols to prevent buckling and warping.
Never drive nails tight against the vinyl. Fasteners must be centered in the nailing hem slots, leaving a 1/32-inch gap between the nail head and the siding panel. This allows the panel to slide laterally during temperature shifts.
Vinyl Fastener Specifications
- Nail Type: Aluminum or hot-dipped galvanized roofing nails (electro-galvanized will rust and stain the vinyl).
- Shank Diameter: Minimum 1/4 inch.
- Penetration: Nails must penetrate the wood sheathing or framing by at least 3/4 inch.
- Accessory Clearances: Leave a 1/4-inch gap at all J-channels and corner posts to allow for panel expansion into the accessories.
Fiber Cement: Clearances, Cutting, and Fastening
Fiber cement siding, such as James Hardie HardiePlank, offers exceptional durability and fire resistance but requires rigorous adherence to clearance zones and cutting safety. The James Hardie installation guidelines are strict; failing to follow them voids the 30-year manufacturer warranty.
Critical Clearance Zones
| Location | Minimum Clearance | Failure Consequence |
|---|---|---|
| Grade / Soil | 6 inches | Capillary wicking, bottom edge rot |
| Roof Pitch | 2 inches | Water damming, material degradation |
| Decks / Steps | 2 inches | Moisture trapping, freeze-thaw spalling |
Cutting fiber cement generates respirable crystalline silica. Installers must use 5-mil carbide-tipped scoring blades or polycrystalline diamond (PCD) blades connected to a HEPA dust extraction vacuum. Never use high-speed grinders or standard abrasive masonry blades on a job site without localized vacuum containment.
Fastening: Use 1-1/4-inch hot-dipped galvanized ring-shank nails or stainless steel fasteners. For blind nailing (where the next course covers the nail head), position the fastener 1 inch from the top edge. For face nailing (used on the bottom course or in high-wind zones), position 3/4 inch from the bottom edge and seal the head with a color-matched polyurethane sealant.
Stucco Application: The Multi-Coat Matrix
Traditional Portland cement stucco (governed by ASTM C926) is a rigid, breathable, and highly durable cladding system. Its installation is a multi-day process heavily dependent on ambient temperature and humidity.
- Lath Attachment: 2.5 lb self-furring galvanized diamond mesh is stapled or nailed to the sheathing over a Grade D weather-resistant paper, overlapping horizontal seams by 2 inches and vertical seams by 1 inch.
- Scratch Coat: A 3/8-inch thick base coat is applied and horizontally scored to provide a mechanical key for the next layer. It must be kept continuously moist for 48 hours to cure properly.
- Brown Coat: A second 3/8-inch coat is applied and smoothed with a wood float. It requires a 7-day moist curing period.
- Finish Coat: A 1/8-inch acrylic or cementitious finish coat is troweled on.
Control Joints: Stucco will crack if not properly relieved. Control joints must be installed to create panels no larger than 144 square feet, with the length-to-width ratio not exceeding 3:1. Maximum spacing between joints is 18 feet.
Engineered Wood: Moisture Management and Joint Spacing
Engineered wood siding, such as LP SmartSide, combines the workability of wood with enhanced moisture and termite resistance via zinc borate treatments. While easier to install than fiber cement, joint management is critical.
- End Joints: Because engineered wood expands longitudinally more than fiber cement, a 1/8-inch gap must be left at all 16-foot end joints. These gaps must be filled with a high-quality, paintable polyurethane sealant before priming.
- Factory Finish vs. Prime: If using pre-finished lines (like ExpertFinish), utilize the proprietary lap joint system that eliminates the need for caulking end joints. If using primed panels, all cut edges, rips, and end joints must be field-primed with a 100% acrylic latex primer within 24 hours of cutting to prevent edge swelling.
Labor Cost and Time Matrix by Siding Type
The following table outlines the average 2026 labor metrics for a standard 2,500-square-foot exterior wall area, assuming a two-story elevation with standard window cutouts.
| Siding Material | Prep & WRB Time | Install Time | Avg. Labor Cost (per sq. ft.) | Specialty Tools Required |
|---|---|---|---|---|
| Vinyl Lap | 1-2 Days | 3-4 Days | $2.50 - $4.00 | Tin snips, zip tool, snap lock punch |
| Fiber Cement Lap | 1-2 Days | 5-7 Days | $4.50 - $7.00 | PCD shears, HEPA vac, pneumatic coil nailer |
| Traditional Stucco | 3-4 Days (Lath) | 7-10 Days (Multi-coat) | $8.00 - $12.00 | Hawk, trowels, mortar mixer, scaffolding |
| Engineered Wood | 1-2 Days | 4-5 Days | $4.00 - $6.50 | Standard carbide blades, caulking guns |
Expert Troubleshooting: Preventing the Top 3 Siding Failures
Even premium materials will fail if installation protocols are ignored. Address these common failure modes during the application phase:
1. Oil-Canning on Metal and Vinyl Panels
Symptom: Wavy, distorted reflections on flat siding panels, particularly on dark-colored vinyl or standing seam metal.
Cause: Fasteners driven too tight, restricting thermal movement, or installing panels over uneven sheathing.
Fix: Ensure sheathing is planar within 1/4 inch over a 10-foot span. For metal panels, use screw guns with adjustable depth-sensitive clutches to prevent over-driving neoprene-washer screws. For vinyl, strictly enforce the 1/32-inch gap under the nail head.
2. Fiber Cement Edge Wicking and Delamination
Symptom: The bottom edge of the siding swells, delaminates, or shows paint peeling within two years of installation.
Cause: Capillary action drawing water up from the ground or roof runoff, combined with unsealed cut edges.
Fix: Maintain the 6-inch ground clearance. When making rip cuts or end cuts in the field, immediately seal the exposed core with an alkali-resistant, 100% acrylic primer. Never install fiber cement in direct contact with horizontal masonry or flashing without a 1/4-inch air gap.
3. Stucco Map Cracking
Symptom: A web of fine, shallow cracks spreading across the stucco surface.
Cause: Rapid moisture loss during the curing phase (plastic shrinkage) or applying the brown coat before the scratch coat has fully hydrated.
Fix: Implement a strict moist-curing regimen. In hot or windy conditions (above 90°F or winds over 15 mph), use fog sprayers to keep the substrate damp and erect windbreaks. Never add excess water to the mix at the job site to improve workability; instead, use a plasticizer or acrylic fortifier approved by the mix manufacturer.