Using a Siding Removal Tool for Targeted Maintenance Repairs
Learn how to use a siding removal tool for targeted spot repairs, hidden moisture inspections, and seamless panel reinstallation in this maintenance playbook.
The Economics of Spot Repair in Modern Siding Maintenance
When a single panel of exterior cladding is compromised by impact damage, UV degradation, or localized moisture intrusion, replacing the entire wall elevation is a waste of capital. A targeted spot repair using a specialized siding removal tool—colloquially known as a zip tool—allows maintenance crews to isolate the defect, inspect the underlying weather-resistive barrier (WRB), and swap the damaged board without disturbing the surrounding interlocking matrix. As of 2026, professional spot repairs cost between $45 and $120 per panel (including labor and materials), whereas full-wall replacements routinely exceed $4,500. Mastering the siding removal tool is the foundational skill for high-efficiency exterior maintenance.
Anatomy of a Siding Removal Tool and Material Compatibility
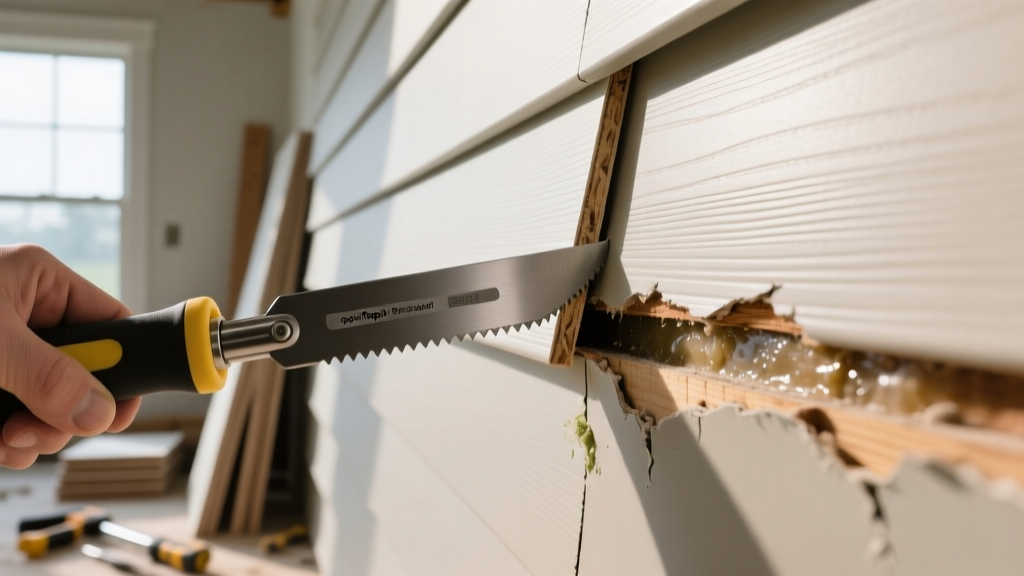
The standard siding removal tool features a hardened steel shaft terminating in a flattened, curved hook. The hook is engineered to slide precisely into the 1/8-inch to 1/4-inch interlocking channel where the bottom lip of the upper panel overlaps the top nailing hem of the lower panel. However, not all cladding materials respond to the same tool geometry. Using an undersized hook on thick fiber cement or a rigid steel hook on pre-finished metal can cause catastrophic cosmetic damage.
| Siding Material | Recommended Tool Type | Specific Model Examples | Risk of Incorrect Tool Use |
|---|---|---|---|
| Vinyl (Standard/Insulated) | Standard Steel Zip Tool | Malco TSR1, Generic Ergonomic Hooks | Tearing the interlock lip if pulled at wrong angle |
| Fiber Cement (Lap/Vertical) | Heavy-Duty Flat Pry / Siding Zip Tool | James Hardie Zip Tool, 12-inch Flat Pry Bar | Snapping the brittle cement board or cracking the panel above |
| Metal (Steel/Aluminum) | Non-Marring Nylon-Insert Zip Tool | Malco Non-Marring Siding Tool | Deep scratching of the factory Kynar 500 paint finish |
The Pre-Removal Maintenance Checklist
Before introducing the siding removal tool to the wall, the immediate work zone must be prepped to prevent secondary damage and ensure accurate post-removal inspections.
- Surface Cleaning: Wash the target area with a mild Trisodium Phosphate (TSP) solution and a soft-bristle brush. Removing surface dirt prevents abrasive particles from being ground into the interlock channel during the unzipping process.
- Thermal Assessment: Check the ambient temperature. Vinyl siding undergoes a significant drop in impact resistance and flexibility at temperatures below 40°F (4°C). Attempting to unzip cold vinyl will result in shattering the panel lip.
- Fastener Mapping: Use a stud finder with metal-detection capabilities to map the underlying nailing pattern. Knowing exactly where the fasteners are located prevents accidental prying against the nail heads, which can dent the overlapping panel.
If emergency maintenance requires panel removal in sub-40°F conditions, apply localized heat using a heat gun set to low (approx. 120°F) along the interlock seam for 30 seconds prior to inserting the siding removal tool. Never use an open flame or high-heat settings, which will melt the PVC substrate.
Step-by-Step Playbook: Unzipping and Removing Damaged Panels
Executing a clean removal requires a specific physical technique. Brute force will deform the overlapping panel, making reinstallation impossible without visible seam lines.
- Locate the Interlock Seam: Identify the horizontal seam directly above the damaged panel. The goal is to separate the bottom lip of the upper panel from the top nailing hem of the damaged panel.
- Insert the Hook: Slide the flat hook of the siding removal tool under the bottom lip of the upper panel. Push it inward until you feel the tool seat firmly against the top locking ridge of the damaged panel.
- The 'Slice and Pull' Motion: Do not pull straight outward. Instead, pull the tool downward and outward at a 45-degree angle while simultaneously sliding it horizontally along the seam. This 'slicing' motion disengages the mechanical lock progressively.
- Clear the Overlap: Once the seam is unzipped by at least 12 inches on either side of the damage, gently push the upper panel upward and pin it temporarily using small wooden wedges or specialized siding clips to expose the fasteners of the damaged board.
- Extract Fasteners: Use a cordless drill with a magnetic bit or a flathead screwdriver to back out the roofing nails or screws securing the damaged panel. Slide the compromised board out from the bottom.
Inspecting the Weather-Resistive Barrier (WRB)
With the damaged siding removed, the underlying WRB (such as Tyvek HomeWrap or Typar) is exposed. This is the most critical phase of the maintenance playbook. According to moisture management guidelines published by Building Science Corporation, localized cladding failures are often symptoms of broader water management defects behind the wall.
'A compromised piece of siding is rarely an isolated event; it is frequently the exhaust point for trapped moisture seeking an exit. The cavity behind the cladding must be evaluated for systemic failure before a new panel is installed.'
Deploy a pinless moisture meter (e.g., Wagner Meters Orion 910) across the exposed OSB or plywood sheathing. Readings above 16% indicate active rot or chronic water intrusion. If the WRB is torn, punctured, or delaminating from the sheathing, patch it using compatible flashing tape (such as Zip System tape) that overlaps the existing barrier by a minimum of 2 inches in all directions. If the sheathing is soft or delaminated, cut out the rotted wood and replace the structural substrate before proceeding.
Re-locking and Sealing: The Reinstallation Phase
Reinstalling the panel—whether it is the original undamaged board or a new replacement—requires reversing the removal mechanics. Slide the new panel into place, ensuring the top nailing hem rests flat against the WRB. Fasten the panel using 1.5-inch galvanized roofing nails, driving them dead-center into the nailing slots. Leave a 1/32-inch gap between the nail head and the vinyl to allow for thermal expansion and contraction, a standard mandated by the Vinyl Siding Institute (VSI).
If the bottom lip of the upper panel has lost its mechanical tension and refuses to 'click' back into the nailing hem of the new board, use a snap-lock punch tool. This tool crimps small, raised tabs into the top edge of the replacement panel, creating aggressive friction points that force a tight, rattle-free interlock when zipped back together.
Remove the temporary wedges, press the upper panel downward, and run the siding removal tool along the seam one final time in reverse (pushing upward and inward) to snap the interlock shut. The seam should be visually flush and mechanically rigid.
Tool Maintenance and Storage Protocols
A siding removal tool is a high-wear item. The thin steel hook is prone to blunting and rust, which increases friction during the unzipping process and raises the risk of tearing vinyl lips. After every job, wipe the steel shaft with an oiled rag (using 3-in-One oil or WD-40 Specialist Corrosion Inhibitor). If the hook edge becomes rounded or burred from prying against galvanized nails, dress it lightly with a 400-grit diamond sharpening stone to restore the sharp, flat profile required to slip into tight interlock channels. Store the tools in a dry, climate-controlled gang box to prevent micro-rusting.
Frequently Encountered Field Issues
Why does the tool keep slipping out of the seam?
Slippage occurs when the tool is not inserted deeply enough, or when the user pulls at a 90-degree angle directly away from the wall. Maintain the 45-degree downward vector. If the interlock channel is packed with decades of paint overspray or dirt, score the seam lightly with a utility knife before inserting the hook.
Can I use a flat pry bar instead of a dedicated siding removal tool?
While a flat pry bar can physically separate the panels, the lack of a specialized hook means the bar will likely rest against the face of the overlapping panel. This concentrates leverage forces on the visible exterior surface, resulting in deep gouges, permanent deformation, or cracked vinyl. Always use a purpose-built tool with a recessed hook geometry to protect the visible facade.
How do I match the color of a replacement panel on a faded wall?
UV exposure alters siding pigmentation over time. A brand-new panel from the manufacturer will rarely match a 10-year-old wall. For high-visibility elevations, maintenance teams should harvest replacement panels from隐蔽 areas of the structure (such as the rear elevation behind an AC unit or inside a detached garage) and use the newly purchased panels to patch the hidden areas, ensuring a seamless color match on the primary facade.