Stucco Wall Cleaning and Maintenance Playbook for Homeowners
Master stucco wall maintenance with our expert cleaning playbook. Learn pressure washing limits, efflorescence removal, and crack repair techniques.
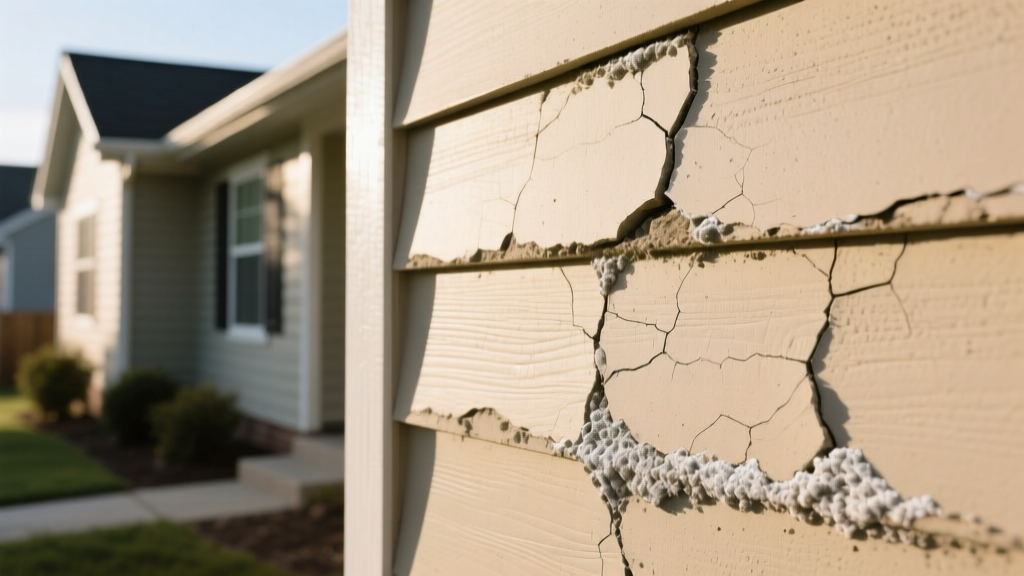
The Anatomy of Stucco Vulnerability
Stucco is a highly durable, cementitious matrix composed of Portland cement, lime, sand, and water. When properly applied over a weather-resistive barrier (WRB) and metal lath, a traditional three-coat stucco wall can last 50 to 80 years. However, its inherent porosity makes it susceptible to moisture intrusion, biological growth, and efflorescence. The most common failure mode is not the material itself degrading, but water bypassing the stucco lamina through unsealed hairline cracks or capillary action, leading to structural rot behind the wall.
Maintenance requires understanding the difference between traditional hard-coat stucco and Exterior Insulation and Finish Systems (EIFS). Traditional stucco is rigid and breathable, while EIFS relies on a synthetic polymer base coat over expanded polystyrene (EPS) foam. Cleaning and repairing these two systems require vastly different pressure thresholds and chemical compatibilities. According to the National Park Service Preservation Brief on Stucco, improper cleaning methods, particularly high-pressure washing, can permanently scar the finish coat and drive moisture into the substrate.
The Soft-Wash Cleaning Protocol
Soft washing relies on chemical dwell time rather than mechanical force to lift dirt, algae, and atmospheric pollution. This is the only approved method for routine stucco wall cleaning.
Equipment and Setup
- Pump: Low-pressure diaphragm pump or a pressure washer with the unloader valve removed and a 40-degree fan tip installed.
- Distance: Maintain a minimum 24-inch distance between the nozzle and the stucco surface.
- Pre-wetting: Always pre-wet adjacent landscaping, windows, and the stucco wall itself with clean water. Pre-wetting the stucco prevents the cleaning solution from absorbing too deeply into the porous surface.
Chemical Mixes for Specific Stains
| Stain Type | Active Chemical | Dilution Ratio | Dwell Time |
|---|---|---|---|
| Algae / Mildew | Sodium Hypochlorite (12.5% base) | 1:8 (Yields ~1.5% active) | 10-15 mins |
| Rust Stains | Oxalic Acid Solution | 10% by volume in water | 5-10 mins |
| Heavy Dirt / Soot | Alkaline Degreaser + Surfactant | Per manufacturer spec | 10 mins |
Pro Tip: Always add a non-ionic surfactant (like alkyl polyglucoside) to sodium hypochlorite mixes. Surfactants break the surface tension of the water, allowing the biocide to cling to vertical stucco walls and penetrate the microscopic pores where algae roots anchor.
Efflorescence Eradication
Efflorescence appears as a white, powdery crust on the stucco wall. It is caused by water-soluble salts migrating to the surface and crystallizing as moisture evaporates. If you attempt to power wash efflorescence, you will simply dissolve the salts and drive them back into the stucco matrix, guaranteeing a rapid recurrence.
- Dry Brush: Use a stiff, non-metallic nylon brush to aggressively scrub the dry surface. This removes the bulk of the crystallized salts without introducing moisture.
- Vacuum: Use a shop vac to remove the dislodged powder.
- Chemical Treatment (If persistent): Apply a heavily diluted muriatic acid solution (1 part 31.45% muriatic acid to 10 parts water). Never apply acid to dry stucco. Pre-wet the wall thoroughly, apply the acid mix, agitate lightly, and rinse immediately. Neutralize the area with a baking soda and water solution (1 cup per gallon) to halt the etching process.
Crack Assessment and Repair Matrix
Stucco cracks due to thermal expansion, structural settling, and shrinkage during the initial curing phase. The Portland Cement Association notes that hairline cracking is normal and largely aesthetic, but larger fissures compromise the moisture barrier. Use this decision matrix to select the correct repair methodology.
| Crack Width | Diagnosis | Required Material | Application Method |
|---|---|---|---|
| < 1/16 inch | Normal shrinkage | High-build elastomeric paint | Roll on two coats at 12-15 mils wet thickness. |
| 1/16 to 1/8 inch | Thermal movement | Polyurethane sealant (e.g., Sikaflex-1A) | V-groove the crack, inject sealant, tool smooth with soapy water. |
| > 1/8 inch | Structural shift / Impact | Polymer-modified patch (e.g., Quikrete No. 8640) | Rake out to 1/4 inch depth, apply bonding agent, trowel patch in two lifts. |
When using polyurethane sealants like Sikaflex-1A, ensure the crack is completely dry and free of dust. Polyurethane will not adhere to damp substrates and will bubble if applied over trapped moisture. For structural cracks wider than 1/4 inch, consult a structural engineer, as this indicates foundation settling rather than superficial stucco failure.
Sealing and Waterproofing: Penetrating vs. Film-Forming
Applying a water repellent to a stucco wall is highly debated in building science. The golden rule is that stucco must be able to dry to the exterior. If you trap moisture inside the wall assembly with an impermeable coating, you will accelerate rot and spalling.
Penetrating Sealers (Silane/Siloxane)
For unpainted, natural stucco, a silane/siloxane penetrating sealer (such as Prosoco Siloxane PD) is the optimal choice. These chemicals penetrate 1/4 to 1/2 inch into the cement matrix and react with free lime to form a hydrophobic resin. They repel liquid water while remaining 100% vapor permeable, allowing the wall to breathe. Apply using a low-pressure sprayer until the wall is saturated, maintaining a wet edge to prevent lap marks.
Film-Forming Coatings (Elastomerics)
Elastomeric paints (e.g., Sherwin-Williams SherLastic) form a thick, rubber-like membrane over the stucco wall. They are excellent for bridging hundreds of hairline cracks and providing a uniform color. However, they should never be applied to the interior side of a stucco wall or over damp stucco. If moisture gets behind an elastomeric coating from a roof leak or window flashing failure, it will blister and peel, requiring a complete mechanical scrape-off.
Seasonal Maintenance Checklist
To maximize the lifespan of your stucco wall, implement this bi-annual inspection routine:
- Spring: Inspect all penetrations (windows, doors, hose bibs, light fixtures). Re-seal any failed polyurethane caulk at the dissimilar material joints. Check the weep screeds at the base of the wall to ensure they are not buried by soil or mulch; maintain a minimum 4-inch clearance to prevent ground moisture wicking.
- Autumn: Clear gutters and downspouts. Overflowing gutters are the number one cause of localized stucco erosion and efflorescence. Trim back all landscaping to maintain a 12-inch clearance from the stucco wall to promote airflow and prevent mechanical damage from branches.