Drywall Knife Selection: Matching Blade Size to Finishing Stages
Match the right drywall knife to your taping, coating, and skimming stages. Expert guide on blade sizes, materials, and handle ergonomics.
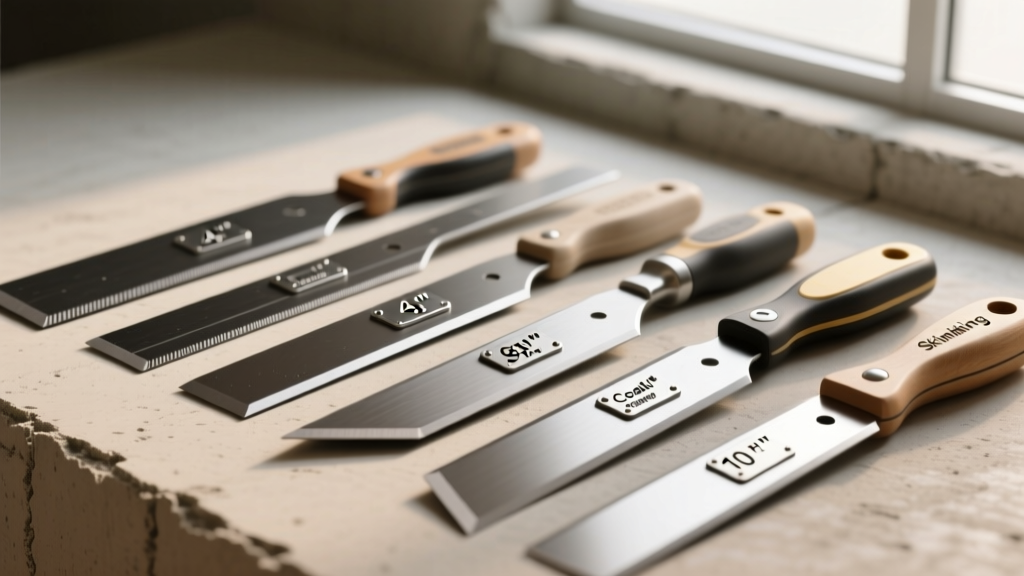
A drywall knife is not a universal tool. The transition from a basic Level 3 finish to a flawless Level 5 skim coat relies entirely on matching blade width, flex, and material to the specific viscosity of the joint compound and the geometry of the seam. Using a 6-inch knife for a third coat will leave ridges and require excessive sanding, while using a 14-inch blade for initial taping will squeeze out the bedding compound and cause tape blistering. This guide provides a precise, scenario-based framework for selecting the exact drywall knife required for every phase of gypsum board finishing.
The Anatomy of Professional Blade Flex
Before matching tools to tasks, contractors must understand blade flex. Flex is determined by the steel's thickness (typically ranging from 0.015 to 0.025 inches) and the blade's length. A stiff blade transfers maximum downward pressure, which is necessary for embedding tape. A highly flexible blade bows slightly under pressure, allowing the center to ride the seam while the edges feather the compound outward to zero thickness. According to the Gypsum Association's GA-214 guidelines, achieving higher levels of finish requires progressively wider feathering, which is physically impossible without the appropriate blade flex.
Scenario Matching: Blade Size by Finishing Stage
The following matrix dictates the exact blade width required for each specific application scenario. Deviating from these parameters is the primary cause of excessive sanding and visible seam ridges.
| Blade Size | Finishing Stage | Compound Type | Required Flex |
|---|---|---|---|
| 4" - 6" | Taping / Bedding / Inside Corners | Pre-mix or Hot Mud (Stiff) | Low (Stiff) |
| 8" - 10" | Second Coat / Block Coat | All-Purpose (Thinned) | Medium |
| 12" | Third Coat / Fastener Coverage | Topping Compound | High |
| 14" - 18" | Level 5 Skim Coating | Ultra-Light Topping | Maximum |
Stage 1: Taping and Bedding (4" to 6")
During the initial taping phase, the goal is to embed paper or fiberglass tape into a continuous bed of joint compound without squeezing the mud out from behind the tape. A 6-inch carbon steel knife (such as the Hyde Black & Gold 6-inch taping knife) provides the necessary stiffness. Apply firm, even pressure down the center of the tape. For inside corners, a specialized 4-inch angle-head knife or a dedicated corner tool ensures a tight 90-degree fold without tearing the paper tape.
Stage 2: Second and Third Coats (10" to 12")
The second coat (block coat) requires covering the tape and feathering the edges to blend with the gypsum board face. Step up to a 10-inch or 12-inch stainless steel knife. The increased width allows you to span the taped seam and apply outward pressure on the edges. As noted in USG's Sheetrock Brand finishing technical resources, the second coat should extend at least 2 inches beyond the edges of the first coat. A 12-inch blade naturally facilitates this overlap when held at a 15-degree angle to the wall.
Stage 3: Skim Coating and Level 5 Finishes (14" to 18")
A Level 5 finish requires a thin skim coat over the entire surface to eliminate texture differences between the paper face and the joint compound. This scenario demands a 14-inch or 18-inch blue steel knife. Blue steel offers maximum flex, allowing the blade to glide over minor imperfections without digging into the board. Hold the knife at a very shallow angle (less than 10 degrees) and pull in long, continuous strokes from ceiling to floor.
Material Science: Carbon vs. Stainless vs. Blue Steel
The metallurgy of the blade dictates its lifespan, maintenance requirements, and performance under load.
Blade Material Comparison
- Carbon Steel: The stiffest option. Ideal for heavy-pressure taping and embedding. Highly susceptible to rust; must be wiped dry and lightly oiled after every use. Leaves dark oxidation stains on white joint compound if left wet.
- Stainless Steel: The industry standard for general coating. Offers medium flex and excellent rust resistance. Requires minimal maintenance and will not stain topping compounds. Ideal for the 10" and 12" sizes.
- Blue Steel: A premium, high-carbon alloy treated for extreme flexibility and edge retention. Used almost exclusively for wide skim-coating blades (14"+). Expensive, but provides the smoothest glide for Level 5 finishes.
Handle Ergonomics and Weight Distribution
A drywall finisher pulls a knife thousands of times a day. Handle selection directly impacts fatigue and wrist strain. According to Marshalltown's professional drywall tool specifications, modern handles are engineered to shift the center of gravity closer to the blade.
- Wood Handles: Traditional and lightweight, but they absorb moisture, swell, and can crack over time. Best for occasional use or DIYers.
- Dura-Soft / Elastomeric Grips: Feature a rigid core with a textured, shock-absorbing overmold. These reduce vibration transfer to the carpal tunnel and provide a secure grip even when covered in wet mud.
- Aluminum / Hollow Core: Extremely lightweight and perfectly balanced. Preferred by high-production commercial finishers who use 14-inch and 18-inch blades, as reducing handle weight offsets the heavy steel blade.
Pro-Troubleshooting: Blade Marks and Chatter
Even with the correct knife, improper technique or poor tool maintenance will ruin a finish. Use this decision tree to diagnose and correct common knife-related defects.
Defect: Chatter Marks (Washboarding)
Symptom: A series of parallel, horizontal ridges across the seam.
Cause: The blade is bouncing due to excessive stiffness, or the joint compound is too thick.
Fix: If using a 10-inch carbon steel knife, switch to a 12-inch stainless or blue steel blade for more flex. Alternatively, thin your pre-mix compound by adding exactly 1/2 pint of clean water per gallon and remixing to a smooth, pudding-like consistency.
Defect: Edge Ridges (Knife Tracks)
Symptom: Deep, continuous scratches running parallel to the direction of the pull.
Cause: Nicks in the blade edge from dropping it or scraping against drywall screws.
Fix: Do not sand the wall yet. Lay a piece of 220-grit wet/dry sandpaper on a perfectly flat surface (like a pane of glass or a granite countertop). Rub the blade edge in a figure-eight motion until the nick is completely leveled. Wipe clean and resume.
Corner Knives vs. Flat Knives
Scenario matching also applies to corner detailing. Never use a standard flat knife for inside corners if a seamless 90-degree angle is required. A 4-inch angle-head knife features a pre-bent blade that matches the corner geometry, allowing you to apply pressure to both sides of the corner simultaneously. For outside corners, a standard 6-inch to 8-inch flat knife is used in conjunction with metal or vinyl corner bead. The flat knife rides the metal nose of the bead, using it as a screed to ensure a perfectly plumb, straight edge.
Curated Kit Recommendations for Commercial Finishers
For contractors building a professional kit in 2026, invest in targeted tools rather than buying bulk sets. A highly efficient, minimal kit includes:
- 6" Carbon Steel (Hyde Black & Gold): Dedicated solely to taping and bedding.
- 10" Stainless Steel (Goldblatt Pro-Form): Used for second coats and fastener spotting.
- 12" Blue Steel (Marshalltown Dura-Soft): Used for third coats and broad feathering.
- 14" Blue Steel (Goldblatt Ultra-Flex): Reserved strictly for Level 5 skim coating.
By strictly matching the blade size, material, and flex to the specific finishing stage, contractors can reduce sanding time by up to 40% and achieve consistent, photograph-ready gypsum board finishes.