Essential Gypsum Board Ceiling Details: Framing, Joints & Specs
Master gypsum board ceiling details including framing specs, fastener spacing, joint treatment, and sag-resistant board selection for modern builds.

Core Ceiling Assembly Components
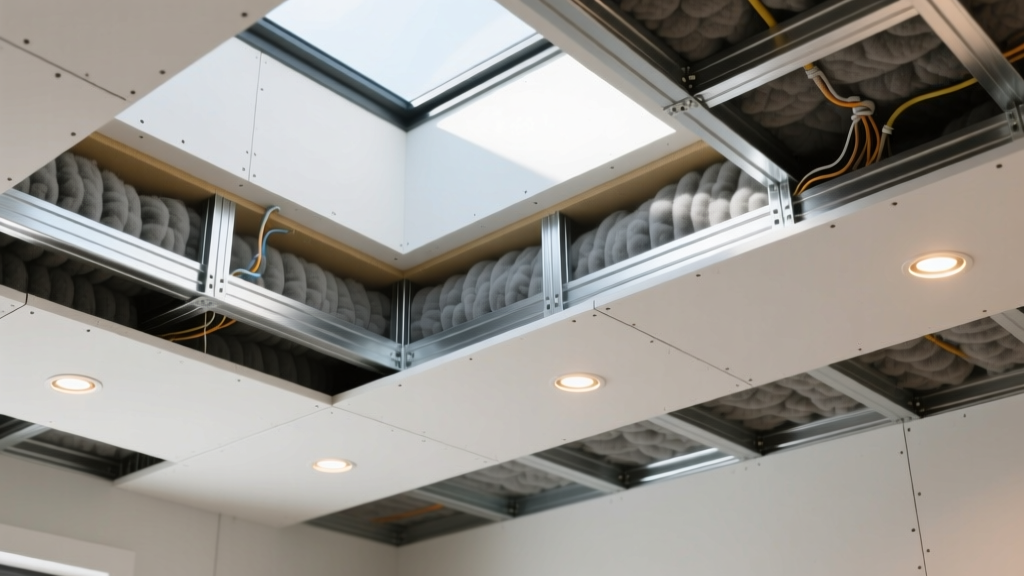
Designing a high-performance gypsum board ceiling requires moving beyond basic drywall installation and treating the assembly as an integrated structural, acoustic, and thermal system. The fundamental components of a modern suspended ceiling include the primary structural deck, isolation hangers, furring channels, the gypsum panel itself, and the joint treatment system. Direct-attached ceilings (furring channels screwed directly to wood joists or concrete) are common in residential applications, but commercial and high-end residential builds mandate suspended acoustical isolation systems to prevent structural vibration transfer.
When detailing the ceiling plane, the primary failure mode to engineer against is deflection-induced sagging and fastener back-out. Unlike walls, ceilings fight gravity continuously. A standard 1/2-inch gypsum panel spanning 24 inches on-center (OC) without specialized sag-resistant core technology will absorb ambient moisture during the construction drying-in phase and permanently bow between joists. Therefore, specifying the correct board thickness, core density, and framing spacing is the most critical gypsum board ceiling detail in the pre-construction phase.
Board Selection Matrix by Ceiling Application
Selecting the right panel involves balancing weight (installer fatigue and structural load), fire rating, and acoustic transmission. Below is a decision matrix for standard and specialized ceiling applications.
| Application Scenario | Recommended Board Type | Product Example | Max Framing Spacing | Weight (per sq. ft.) |
|---|---|---|---|---|
| Standard Residential (Conditioned) | 1/2" Sag-Resistant UltraLight | USG Sheetrock UltraLight Panels | 24" OC | 1.25 lbs |
| Garage / Fire-Separation Ceiling | 5/8" Type X Firecode | National Gypsum ProForm Type X | 24" OC | 2.20 lbs |
| Multi-Family / Hotel Corridors | Acoustic Damping Board | CertainTeed SilentFX QuickCut | 16" OC | 1.90 lbs |
| High-Humidity (Pool Enclosures) | Glass-Mat Gypsum Ceiling | Georgia-Pacific DensArmor Plus | 16" OC | 2.10 lbs |
| Commercial Plenum Return | 5/8" Abuse & Moisture Resistant | USG Sheetrock Mold Tough Firecode X | 24" OC | 2.30 lbs |
Critical Framing and Fastening Details
The framing substrate dictates the long-term integrity of the ceiling plane. For steel framing, 25-gauge 1-5/8" furring channels are standard for direct attachment, but suspended ceilings require 1-1/2" 16-gauge cold-rolled channels (CRC) cross-furred with 25-gauge hat channels. Wood framing must be kiln-dried to a moisture content of 19% or less before boarding.
Fastener Penetration and Spacing Rules
Improper fastener selection and spacing cause 'nail pops' (screw heads breaking through the joint compound) as the lumber shrinks or trusses deflect. Follow these strict fastening parameters based on ASTM C840 standards:
- Fastener Type: Use ASTM C1002 Type S bugle-head coarse-thread screws for wood, and Type S fine-thread for light-gauge steel (up to 20-gauge).
- Length: 1-1/4" screws for single-layer 1/2" board; 1-5/8" screws for 5/8" board or the base layer of a two-layer system.
- Field Spacing: Maximum 12 inches OC on ceilings (compared to 16 inches OC on walls).
- Edge Spacing: Maximum 8 inches OC along all tapered edges and butt joints.
- Perimeter Fastening: Keep fasteners at least 3/8" from the panel edge to prevent blowout of the gypsum core.
Joint Treatment and Control Joint Placement
Ceiling joints are highly susceptible to shadowing under raking light (e.g., from skylights or perimeter cove lighting). To mitigate this, butt joints must be staggered by a minimum of 4 feet between adjacent rows. Never align four corners at a single intersection.
Control joints are non-negotiable in large expanses. According to the Gypsum Association application guidelines, perimeter control joints or expansion joints must be installed wherever the ceiling plane exceeds 30 feet in any direction, or at any change in ceiling elevation. Furthermore, the perimeter of the ceiling should not be hard-troweled tight to the wall. Instead, leave a 1/4-inch gap and fill it with a non-hardening acoustic sealant before applying trim, allowing the truss system to deflect independently of the wall partition.
"The most common ceiling failure we inspect isn't the board sagging; it's the perimeter tearing away from the wall because the installer used standard joint compound to seal the gap instead of elastomeric sealant, locking the ceiling to the wall and forcing the drywall to crack when the roof trusses experience seasonal uplift."
Acoustic and Fire-Rating Penetration Details
A ceiling assembly is only as strong as its weakest penetration. Recessed lighting, HVAC supply registers, and smoke detectors compromise the thermal, acoustic, and fire-rated continuity of the gypsum board. According to the Whole Building Design Guide (WBDG) acoustic standards, flanking noise through unsealed ceiling penetrations can degrade an STC 50 ceiling assembly to STC 35 or lower.
To maintain assembly integrity:
- Recessed Lighting: Use IC-rated (Insulation Contact) airtight fixtures, and enclose non-IC fixtures in 5/8" Type X gypsum board 'hats' or manufactured fire-rated enclosures to maintain the fire-resistive rating and prevent acoustic leakage.
- HVAC Registers: Line the inside of the duct boots with 1-inch acoustic duct liner and use mastic sealant at the collar where the boot meets the gypsum board cutout.
- Electrical Boxes: Offset ceiling junction boxes from wall junction boxes by at least 24 inches to prevent direct sound transmission paths through the putty pads.
Frequently Asked Troubleshooting Questions
Q: Why are the ceiling joints ridging after the first coat of mud?
A: Joint ridging (where the joint compound pushes up above the panel surface) is caused by truss uplift or lumber shrinkage compressing the board edges. Ensure you are using a flexible joint tape (like USG Sheetrock Paper Tape) rather than rigid fiberglass mesh on butt joints, and apply the first coat with moderate pressure to avoid overfilling the taper.
Q: Can I install 1/2" standard drywall on 24" OC ceiling joists?
A: No. Standard 1/2" drywall is only rated for 16" OC ceiling framing. If your joists are spaced at 24" OC, you must either step up to 5/8" standard board, or use a specialized 1/2" sag-resistant ultra-light panel engineered specifically for 24" spans.
Q: How do I detail a ceiling-to-wall corner to prevent cracking?
A: Avoid taping inside ceiling-to-wall corners if the roof trusses are prone to seasonal uplift. Instead, use a proprietary tear-away corner bead or an L-shaped vinyl slip track that allows the ceiling panel to float independently above the wall panel, hiding the gap with a trim flange while preventing stress cracks.
Written by
James ThorntonJames Thornton is a construction industry veteran with 25 years of hands-on experience in wood framing, lumber grading, and residential building codes. He started as a framing carpenter in rural Oregon, earned his ICC Residential Building Inspector certification, and eventually became a senior plan reviewer for the City of Portland Bureau of Development Services. James holds a B.S. in Wood Science & Technology from Oregon State University and is a certified lumber grader through the West Coast Lumber Inspection Bureau (WCLIB). He has inspected over 3,000 residential construction sites and authored the city's internal guide on advanced framing techniques (2x6 at 24" O.C.). James lives in Bend, OR, where he builds custom timber-frame cabins and competes in lumberjack sports.
More from James Thornton
View all
Insulation
Best Home Insulation Materials: Complete 2026 Guide
Compare top home insulation materials for 2026. Find R-values, installed costs per square foot, and best uses for fiberglass, spray foam, and mineral wool.
Aug 4, 2026

Sustainable Building
Certify Your Green Building Material for LEED and WELL
Step-by-step guide to certifying a green building material for LEED v5 and WELL v2. Master EPDs, HPDs, and VOC limits for 2026 project specifications.
Aug 4, 2026

Stone & Masonry
Veneer Stacked Stone Panels: Interior Design & Style Showcase
Discover how veneer stacked stone panels transform interiors. Explore modern design profiles, material pairings, and technical installation specs.
Aug 4, 2026