Flawless 1/2 Inch Gypsum Board Installation Techniques
Learn pro installation techniques for 1/2 inch gypsum board on walls and ceilings. Includes framing specs, fastener schedules, and finishing tips.
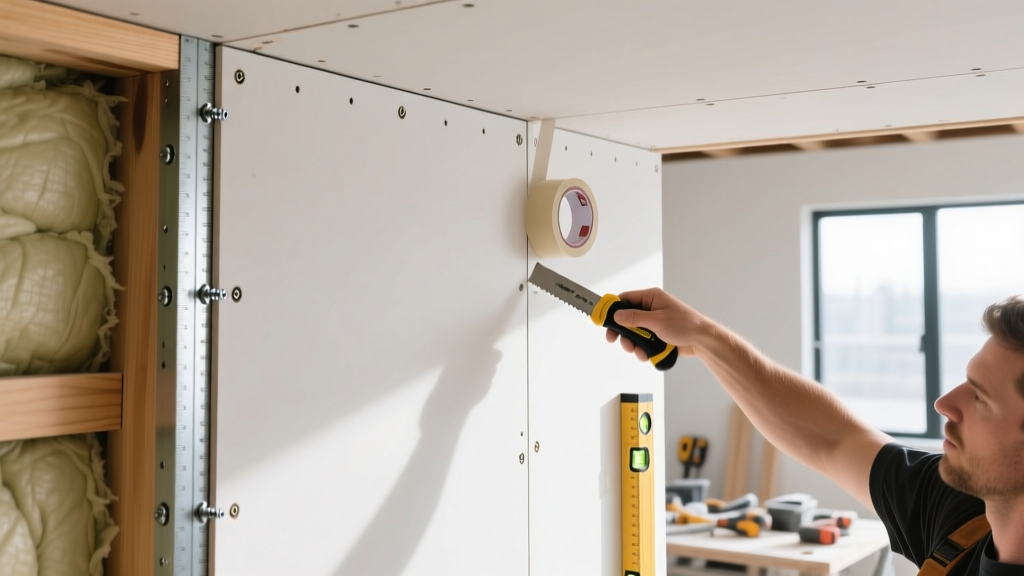
The 1/2 Inch Standard: Why Thickness Dictates Technique
In residential and commercial interior construction, 1/2 inch gypsum board remains the undisputed baseline for wall and ceiling assemblies. While the thickness itself is a universal standard, the installation techniques required to achieve a Level 5 finish have evolved significantly. Modern ultra-light 1/2 inch panels—weighing approximately 1.2 pounds per square foot compared to the traditional 1.6 pounds—have altered handling dynamics, fastener penetration requirements, and adhesive compatibility. Mastering the installation of 1/2 inch gypsum board requires moving beyond basic nailing and adopting a systems-based approach to framing tolerances, fastener scheduling, and joint management.
Framing Tolerances and Substrate Preparation
The most common cause of 1/2 inch gypsum board failure is not the panel itself, but the substrate to which it is attached. According to application standards published by the Gypsum Association, framing members must be aligned to within 1/8 inch in any 8-foot span. When framing exceeds this tolerance, the 1/2 inch panel is forced to bridge gaps or bend over high spots, storing kinetic energy that inevitably releases as fastener pops or joint ridging.
Before hanging any 1/2 inch gypsum board, pull a mason's string diagonally across the wall or ceiling framing. Measure the gap between the string and the center studs. If the deviation exceeds 1/8 inch, plane down high wood studs or adjust the web of light-gauge steel studs using a stud crimper or aviation snips. Do not rely on the drywall to straighten the wall.
Wood vs. Light-Gauge Steel Framing
For 1/2 inch wall applications, wood studs (minimum 2x4) should be spaced at 16 inches on center (o.c.) or 24 inches o.c. if using panels specifically rated for 24-inch spacing. Light-gauge steel studs (minimum 25-gauge for non-loadbearing, 20-gauge for loadbearing) are highly susceptible to thermal expansion and acoustic vibration. When hanging 1/2 inch gypsum board over steel, applying a continuous bead of acoustical sealant to the top and bottom tracks prevents flanking noise and reduces the likelihood of edge cracking.
Fastener Matrix: Wood vs. Light Gauge Steel
Selecting the correct fastener is critical. Type W (coarse thread) screws are mandated for wood framing, while Type S (fine thread, self-drilling) screws are required for steel framing up to 25-gauge. For heavier steel (20-gauge to 14-gauge), Type S-12 screws with a drill point are necessary. The screw length for 1/2 inch gypsum board must penetrate the framing member by a minimum of 5/8 inch.
| Application | Framing Type | Fastener Specification | Minimum Length | Edge Spacing | Field Spacing |
|---|---|---|---|---|---|
| Walls | Wood Studs | Type W (Coarse) | 1-1/4" | 8" o.c. | 8" o.c. |
| Walls | Steel Studs (25ga+) | Type S (Fine) | 1" | 8" o.c. | 12" o.c. |
| Ceilings | Wood Joists | Type W (Coarse) | 1-1/4" | 7" o.c. | 7" o.c. |
| Ceilings | Steel Joists | Type S (Fine) | 1" | 8" o.c. | 12" o.c. |
Fasteners must be driven to a depth of 1/32" to 1/16" below the panel surface. If the screw breaks the paper face of the 1/2 inch gypsum board, it loses its holding power entirely. Abandon the fastener, leave it in place, and drive a new screw 2 inches away. Never attempt to fill a broken-paper screw hole with joint compound alone; it will telegraph through the final paint layer.
The Hanging Sequence: Ceilings Before Walls
Proper sequencing ensures structural integrity and minimizes visible seams. Always install 1/2 inch gypsum board on ceilings before addressing the walls. The wall panels will then butt tightly against the ceiling panels, providing physical support and hiding the ceiling edge seams.
- Ceiling Layout: Run 1/2 inch ceiling panels perpendicular to the joists. Stagger end joints by a minimum of 4 feet in adjacent rows to avoid creating a weak "cross" seam that is highly prone to cracking.
- Adhesive Application: For superior sag resistance and sound dampening, apply a 3/8-inch bead of drywall adhesive to the joists before lifting the panel. This reduces the required field fasteners by up to 50% and locks the panel to the framing.
- Wall Layout: Install wall panels horizontally whenever possible. Horizontal installation reduces the total linear footage of seams by roughly 25% compared to vertical hanging and aligns the tapered edges with the eye level for easier finishing.
- Bottom Gap Management: Maintain a 1/2-inch gap between the bottom edge of the wall panel and the subfloor. This prevents moisture wicking from concrete slabs and allows for structural settling. Cover this gap later with baseboard trim.

Troubleshooting Common 1/2 Inch Installation Failures
Even with premium materials, environmental factors and poor technique can compromise the assembly. USG Corporation technical bulletins frequently highlight the following field failures and their precise remedies.
| Failure Mode | Primary Cause | Corrective Action |
|---|---|---|
| Screw Pops | Friction heat from driving screws too fast, or framing lumber shrinking as it dries (moisture content >19%). | Use a screw gun with an adjustable depth clutch. Ensure framing lumber is kiln-dried (max 19% moisture). Pre-condition the building with HVAC before hanging. |
| Joint Ridging | Compression of the panel edges due to structural racking or thermal expansion of steel studs pushing panels together. | Leave a 1/8-inch gap between panel edges. Do not force panels tight together. Use flexible joint tape and setting-type compound for the first coat. |
| Paper Blistering | Applying joint compound over a dusty surface, or applying a second coat before the first coat has fully dried (trapping moisture). | Sweep panels with a dry brush before taping. Allow setting-type compounds to cure chemically, and drying-type compounds to dry via evaporation (24 hours minimum). |
| Ceiling Sag | Using standard 1/2 inch wall board on ceilings with 24-inch o.c. joist spacing, or exposing panels to high humidity before painting. | Use only sag-resistant 1/2 inch ceiling board for 24-inch spacing. Prime the back side of the panels if the attic space is unconditioned and humid. |
Taping and Finishing to ASTM C840 Standards
The installation of the 1/2 inch gypsum board is only half the battle; the finishing process dictates the final aesthetic. The industry benchmark, ASTM C840, outlines the rigorous requirements for a Level 4 or Level 5 finish. For high-gloss paints or areas with severe natural lighting, a Level 5 finish is mandatory to prevent joint photographing.
The Three-Coat System
- First Coat (Taping): Embed paper tape into a continuous bed of setting-type joint compound (e.g., 45-minute or 90-minute durabond). Setting compounds are chemically cured, offering superior shrinkage resistance and tensile strength compared to air-drying pre-mixed compounds. Wipe the joint tightly to squeeze out excess compound and ensure full tape encapsulation.
- Second Coat (Filler): Apply a wider layer of all-purpose or lightweight pre-mixed compound over the tape and cover all screw dimples. Feather the edges outward to a minimum width of 10 inches. The goal is to build the joint flush with the tapered edge of the panel.
- Third Coat (Finish): Apply a final, thin layer of topping compound, feathering the edges out to 14-16 inches. Topping compound has high workability and sands easily, allowing for a seamless transition between the joint and the panel face.
"The transition from hanging to finishing is where most callbacks originate. Installers must recognize that 1/2 inch gypsum board is a system. If the framing is out of plumb, no amount of joint compound will hide the shadow lines under LED lighting."
— Best practices guidelines referenced via Fine Homebuilding drywall masterclasses.
Environmental Controls and Material Acclimation
In 2026, modern building envelopes are tighter than ever, making interior climate control a critical installation variable. 1/2 inch gypsum board is highly hygroscopic. If panels are stored in a damp environment and then installed in a heated, dry building, the rapid loss of moisture will cause the panels to shrink, pulling the joints apart and tearing the tape.
Always deliver 1/2 inch gypsum board to the site only after the building is fully enclosed, the roof is sealed, and wet trades (concrete, plaster, masonry) have completed their work and dried. Maintain the interior temperature between 55°F and 70°F for at least 48 hours before, during, and after installation and finishing. Proper acclimation and strict adherence to fastener schedules will ensure a flawless, durable assembly that meets the highest industry standards.
Written by
James ThorntonJames Thornton is a construction industry veteran with 25 years of hands-on experience in wood framing, lumber grading, and residential building codes. He started as a framing carpenter in rural Oregon, earned his ICC Residential Building Inspector certification, and eventually became a senior plan reviewer for the City of Portland Bureau of Development Services. James holds a B.S. in Wood Science & Technology from Oregon State University and is a certified lumber grader through the West Coast Lumber Inspection Bureau (WCLIB). He has inspected over 3,000 residential construction sites and authored the city's internal guide on advanced framing techniques (2x6 at 24" O.C.). James lives in Bend, OR, where he builds custom timber-frame cabins and competes in lumberjack sports.
More from James Thornton
View all
Insulation
Best Home Insulation Materials: Complete 2026 Guide
Compare top home insulation materials for 2026. Find R-values, installed costs per square foot, and best uses for fiberglass, spray foam, and mineral wool.
Aug 4, 2026

Sustainable Building
Certify Your Green Building Material for LEED and WELL
Step-by-step guide to certifying a green building material for LEED v5 and WELL v2. Master EPDs, HPDs, and VOC limits for 2026 project specifications.
Aug 4, 2026

Stone & Masonry
Veneer Stacked Stone Panels: Interior Design & Style Showcase
Discover how veneer stacked stone panels transform interiors. Explore modern design profiles, material pairings, and technical installation specs.
Aug 4, 2026