How to Remove Drywall Anchors by Brand and Fastener Type
Learn how to remove drywall anchors from major brands like Hillman and TOGGLER without damaging gypsum board, with exact repair steps.
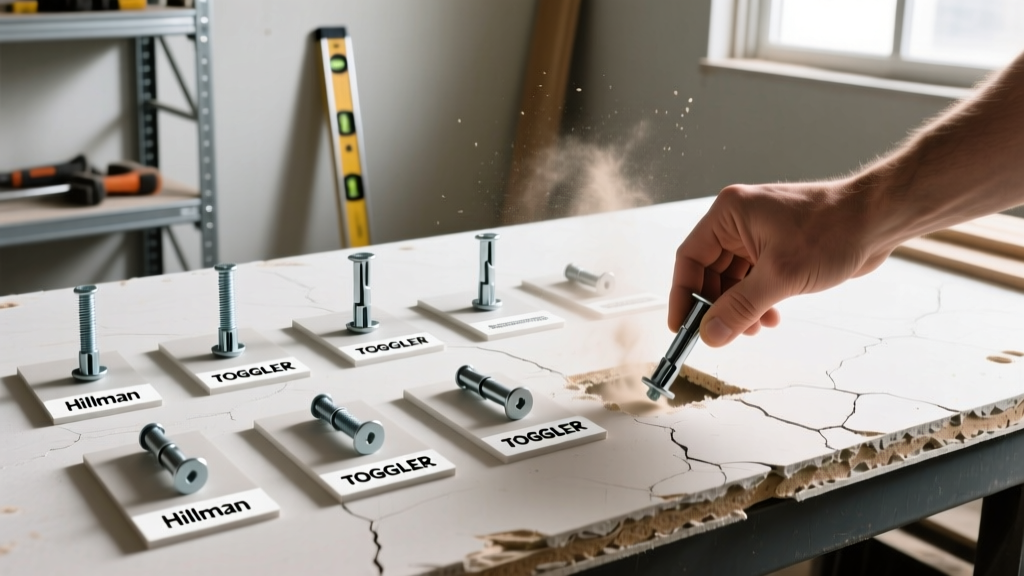
The Mechanics of Gypsum Board Anchor Failure
Removing a drywall anchor is not a one-size-fits-all process; the extraction method depends entirely on the specific brand, product line, and the structural composition of the gypsum board it penetrates. Standard 1/2-inch gypsum panels, such as USG Sheetrock UltraLight Panels, rely on the tensile strength of the front paper face to maintain anchor integrity. The gypsum core itself has virtually zero pull-out resistance. When an anchor is improperly removed, the paper face delaminates from the core, resulting in a blown-out crater that requires extensive patching.
Conversely, 5/8-inch Type X fire-rated gypsum boards (like USG Sheetrock Firecode X) feature a denser, fiberglass-reinforced core designed to resist heat. While this denser core provides higher initial pull-out strength for heavy-duty anchors, it also creates higher friction during extraction, increasing the risk of the anchor shearing off inside the wall cavity if excessive torque is applied.
Brand & Product Line Extraction Matrix
The following matrix breaks down the exact removal protocols for the most prevalent anchor product lines on the market, detailing the specific tools and techniques required to preserve the surrounding gypsum matrix.
| Brand & Product Line | Anchor Type | Primary Removal Method | Resulting Hole Size | Gypsum Repair Required |
|---|---|---|---|---|
| TOGGLER SnapToggle® | Strap-Toggle (Metal Bar) | Cut straps, push steel channel into cavity | 1/2 inch | Mesh tape + 2 coats compound |
| ITW Buildex E-Z Ancor® Twist-N-Lock | Metal Self-Driller | Reverse thread out with #2 Phillips bit | 5/16 inch | 1 coat spackle/compound |
| Hillman Ribbed Plastic Anchors | Plastic Expansion | Punch inward with nail set; do not pull | 3/16 inch (if pushed) | Dab of joint compound |
| Fischer DuoPower | Dual-Material (Nylon/Plastic) | Extract with needle-nose pliers or push in | 5/16 inch | 1 coat spackle/compound |
Deep Dive: Removing TOGGLER SnapToggle® Heavy-Duty Anchors
The TOGGLER SnapToggle is engineered for extreme load-bearing applications in hollow walls, utilizing a zinc-plated steel channel that rests flat against the back of the gypsum board. Because the steel channel is wider than the installation hole, it cannot be pulled back through the drywall. Attempting to pry it out will instantly shatter the gypsum core.
Extraction Protocol:
- Remove the Fastener: Unscrew the machine bolt and remove the fixture. Leave the plastic cap and zip-straps in place.
- Detach the Channel: Using a pair of flush-cut diagonal pliers, snip the heavy-duty nylon zip-straps as close to the plastic cap as possible. Alternatively, you can push the metal channel to one side of the hole, grab the strap, and snap it off at the channel's break-point.
- Clear the Cavity: Push the plastic cap and the detached steel channel through the 1/2-inch hole so they fall safely into the wall cavity. (The steel channel is small enough and the wall cavity large enough that this poses no structural or electrical hazard).
- Prep for Repair: You are now left with a clean 1/2-inch hole. Because this exceeds the 1/4-inch threshold for simple spackling, you must use a self-adhesive fiberglass mesh patch before applying joint compound.
Deep Dive: Extracting ITW Buildex E-Z Ancor® Metal Self-Drillers
Metal self-drilling anchors, such as the ITW Buildex E-Z Ancor line, cut their own threads directly into the gypsum core. To remove them without stripping the hole, you must reverse the installation process with controlled torque.
- Tool Selection: Use a manual #2 Phillips screwdriver or a cordless drill set to the lowest torque clutch setting. Do not use impact drivers; the percussive force will pulverize the fragile gypsum threads.
- Extraction Technique: Apply firm inward pressure while turning counter-clockwise. The anchor will back out along its original cut path, leaving a relatively clean 5/16-inch hole.
- Failure Mode (Stripped Core): If the anchor spins freely without backing out, the gypsum core threads have failed. Do not continue spinning the anchor, as the metal threads will act like a router bit and widen the hole. Instead, use a flathead screwdriver to gently pry the anchor head upward while turning, or simply push the entire anchor into the wall cavity with a nail punch.
Deep Dive: Pulling Standard Plastic Expansion Anchors (Hillman / Confast)
Standard ribbed plastic anchors are the most common and the most frequently mishandled. When a screw is driven into a plastic expansion anchor, the anchor expands outward, compressing the gypsum core. Over time, this compression causes the gypsum to deform and lock the anchor in place.
The industry-standard best practice for removing these anchors is the Push-In Method. Using a 3/16-inch nail set or a blunt punch, tap the center of the plastic anchor until it breaks free of the compressed core and falls into the wall cavity. This leaves the original 3/16-inch pilot hole completely intact, requiring only a quick swipe of lightweight spackle to render it invisible. If you must pull the anchor out (e.g., if it is protruding too far to punch in), grip the collar with needle-nose pliers and pull straight out with a slow, steady motion—never twist, as twisting will shear the plastic ribs and leave fragments embedded in the gypsum.
Gypsum Board Restoration Protocol: Matching the Patch to the Hole
Once the anchor is removed, the repair methodology must scale with the resulting hole diameter. According to the USG Gypsum Panel Products Installation Manual, improper patching leads to visible flashing under paint due to differences in porosity between the patching compound and the gypsum paper face.
Micro-Holes (1/8' to 1/4') - Spackle Only
Left behind by removed screws or pushed-in plastic anchors. Use a vinyl-based lightweight spackle (e.g., Red Devil Zipwall Lightweight Spackling). Apply with a 2-inch putty knife, overfilling slightly to account for shrinkage. Sand with 220-grit aluminum oxide sandpaper once dry.
Medium Holes (5/16' to 1/2') - Compound and Tape
Left behind by metal self-drillers and SnapToggles. Spackle will crack and sink in holes this size.
- Apply a 2-inch self-adhesive fiberglass mesh tape (such as FibaTape Perfect Finish) over the hole.
- Apply a first coat of setting-type joint compound (e.g., USG Sheetrock Easy Sand 20) using a 4-inch taping knife. Setting compounds undergo chemical curing rather than drying, eliminating shrinkage.
- Once cured, apply a thin skim coat of pre-mixed all-purpose compound (USG Sheetrock Plus 3) with a 6-inch knife to feather the edges into the surrounding paper face.
- Sand lightly with a 220-grit sanding sponge.
Troubleshooting Edge Cases in Anchor Extraction
Even with the correct brand-specific protocol, older gypsum boards or improperly installed anchors can present unique extraction challenges. Here is how to handle the most common edge cases.
Edge Case 1: The Spinning Metal Anchor
Symptom: An E-Z Ancor or similar metal toggle spins endlessly when turned counter-clockwise. Cause: The gypsum core has been entirely pulverized, and the anchor's toggle mechanism is spinning freely in the wall cavity without engaging the back of the drywall. Solution: Insert a flathead screwdriver under the lip of the anchor head. Apply upward prying pressure while simultaneously turning the anchor counter-clockwise with a Phillips driver. The upward leverage forces the toggle to catch against the back of the gypsum board, allowing the threads to back out.
Edge Case 2: Delaminated Paper Face
Symptom: The paper face of the drywall tears away from the gypsum core during extraction, leaving a fuzzy, exposed brown paper layer. Cause: The anchor was installed too close to the edge of the board, or the board has suffered historical moisture damage, weakening the paper-to-core adhesive bond. Solution: Do not apply joint compound directly to the torn paper; it will bubble and blister. First, seal the exposed brown paper with a coat of oil-based primer or a dedicated sealer like Guardz Problem Surface Sealer. Once the sealer dries, it locks the paper fibers down, allowing you to skim-coat with joint compound without blistering.
Edge Case 3: Anchor Flush with Painted Surface
Symptom: A plastic anchor is painted over and sits perfectly flush with the wall, offering no lip for pliers to grip. Solution: Take a utility knife and score a 1/4-inch circle around the anchor head to cut through the paint film. Then, use a 1/4-inch drill bit to carefully drill out the center of the plastic anchor. Once the core of the anchor is hollowed out, the remaining plastic shell will easily collapse inward and can be pushed into the wall cavity with a nail set.