Advanced 5/8 Gypsum Board Installation Techniques
Master 5/8 gypsum board installation. Learn exact fastener schedules, framing spacing, sag prevention, and fire-rated assembly techniques for pros.

Material Properties and Handling Logistics
Installing 5/8-inch gypsum board requires a fundamentally different approach than standard 1/2-inch panels. A standard 4x8-foot sheet of 1/2-inch drywall weighs approximately 52 pounds, whereas a 4x8-foot sheet of 5/8 gypsum board weighs roughly 70 to 74 pounds (about 2.2 to 2.3 pounds per square foot). This 40% increase in mass drastically alters handling logistics, lifting requirements, and fastener shear loads.
For ceiling installations, a mechanical drywall lift is non-negotiable for 5/8-inch panels. Attempting to deadlift 70-pound sheets overhead with a two-person crew leads to rapid fatigue, compromised edge alignment, and an increased risk of panel breakage along the tapered seams. When storing materials on-site, stack 5/8-inch boards flat on a level surface; leaning them against framing can cause the heavier core to snap under its own weight before installation even begins.
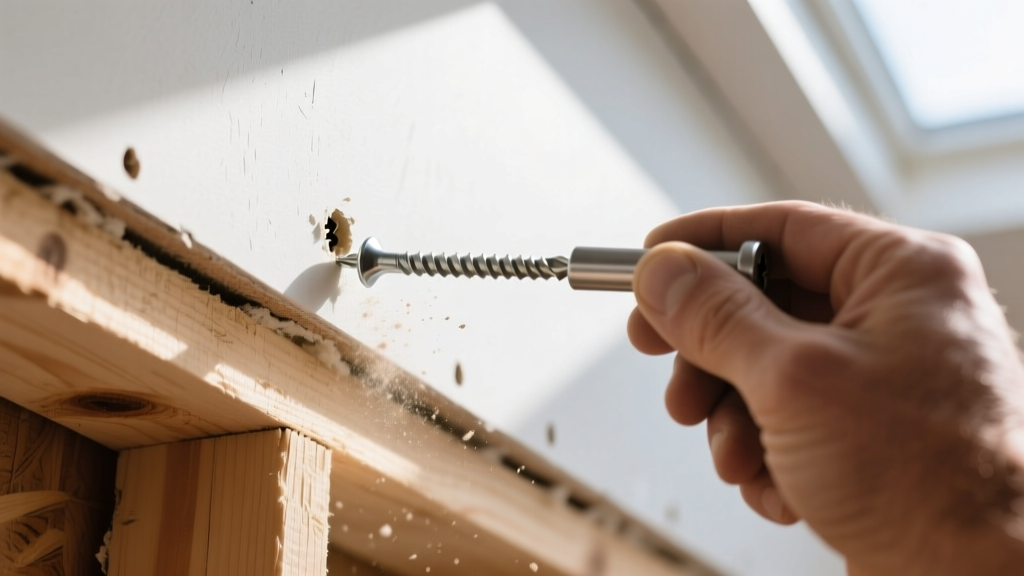
Framing Requirements and Substrate Preparation
The structural rigidity of 5/8-inch panels allows for wider framing spacing compared to thinner alternatives, but strict adherence to spacing limits is critical to prevent deflection.
Wood vs. Steel Framing Spacing
- Ceilings: 5/8-inch gypsum board can be installed perpendicular to wood framing spaced up to 24 inches on center (O.C.). However, for steel framing, the maximum spacing remains 24 inches O.C. only if the board is applied perpendicular to the joists. Parallel application requires 16-inch O.C. spacing regardless of material.
- Walls: Standard wall framing should be spaced at 16 inches O.C. for both wood and steel studs. While the panel can technically span 24 inches O.C. on walls, 16-inch spacing is mandated by most commercial building codes to ensure adequate impact resistance and to support the heavier weight of the finished assembly.
Because 5/8-inch panels are frequently used in commercial and multi-family residential projects requiring fire or acoustic ratings, you must install solid wood blocking or steel backer channels at all horizontal joints, ceiling perimeters, and where heavy fixtures (like cabinetry or grab bars) will be mounted. Relying solely on the gypsum core for screw withdrawal in high-load areas will result in catastrophic pull-through.
Fastener Selection and Drive Depth Precision
Using the correct fastener type and length is critical. The fastener must penetrate the framing member by a minimum of 5/8 inch for wood and 3/8 inch for steel.
Screw Specifications
- Wood Framing: Use 1-5/8-inch Type W (coarse-thread) drywall screws. The aggressive thread pitch bites into the wood grain, providing high withdrawal resistance.
- Steel Framing (Up to 20 gauge): Use 1-5/8-inch Type S (fine-thread) screws with a drill point. The fine threads prevent stripping the thin steel flange.
- Steel Framing (16 to 12 gauge): Use 1-5/8-inch Type S-12 screws, which feature a self-drilling tek-point to penetrate heavier structural steel studs.
Drive depth is where most installation failures occur. The screw head must create a dimple in the face paper, depressing it approximately 1/32 to 1/16 of an inch below the surface. If the screw is driven too shallow, it will protrude and make taping impossible. If driven too deep, the screw head will break the face paper, destroying the panel's tensile strength at that attachment point. When the paper is broken, the screw provides zero holding power and must be abandoned, with a new screw driven 2 inches away.
Fastener Schedule Matrix
The Gypsum Association outlines strict fastener schedules in their GA-216 guidelines to ensure structural integrity and fire-rating compliance. Below is the standard schedule for single-layer 5/8-inch applications.
| Application | Framing Type | Fastener Type | Edge Spacing | Field Spacing |
|---|---|---|---|---|
| Ceilings | Wood (16" or 24" O.C.) | 1-5/8" Type W Screw | 7 inches | 12 inches |
| Ceilings | Steel (16" or 24" O.C.) | 1-5/8" Type S Screw | 8 inches | 12 inches |
| Walls | Wood (16" O.C.) | 1-5/8" Type W Screw | 8 inches | 16 inches |
| Walls | Steel (16" or 24" O.C.) | 1-5/8" Type S Screw | 8 inches | 12 inches |
Note: When using nails for wood framing walls, use 1-1/2-inch ring-shank drywall nails spaced 7 inches on edges and 16 inches in the field. However, screws are heavily preferred for 5/8-inch panels due to the superior pull-out resistance required for the heavier material.
Ceiling Installation: Beating the Sag
Gravity is the primary adversary in ceiling installations. Even though 5/8-inch panels are highly resistant to sagging compared to 1/2-inch panels, improper installation sequence will cause visible joint deflection over time.
The Perimeter-First Technique
- Adhesive Application: Apply a continuous 3/8-inch bead of ASTM C557-compliant drywall adhesive to the face of the framing members. This reduces the number of required fasteners by up to 50% and creates a monolithic bond that virtually eliminates nail pops and sagging.
- Edge Fastening: Push the panel tight against the wall and fasten the perimeter edges first. This locks the panel's geometry in place.
- Field Sweeping: Work from the center of the panel outward toward the edges, driving field screws. This forces any trapped air or slight bowing out to the perimeter rather than trapping it in the center of the ceiling.
Before hanging 5/8-inch ceiling panels, allow them to acclimate to the interior temperature and humidity of the building for at least 48 hours. Installing cold, damp panels from an unheated warehouse directly into a climate-controlled space will cause the gypsum core to expand slightly, leading to ridged seams once the material dries and contracts.
Fire-Rated and Acoustic Assemblies
A primary reason contractors specify 5/8-inch board—specifically Type X—is to achieve 1-hour or 2-hour fire-resistance ratings. According to testing standards referenced by USG and Underwriters Laboratories (UL), a single layer of 5/8-inch Type X gypsum board on each side of standard 2x4 wood studs yields a 1-hour fire rating (e.g., UL Design U305).
Installation Rules for Rated Assemblies
When building a rated assembly, the installation technique shifts from standard cosmetic hanging to strict code compliance:
- Joint Treatment: All joints, angles, and fastener heads must be covered with a minimum of two coats of joint compound and embedded tape. Unfinished joints compromise the fire barrier.
- Penetrations: Electrical boxes on opposite sides of a rated wall must be separated by a minimum horizontal distance of 24 inches. If they are closer, they must be wrapped in fire-rated putty pads or enclosed in fire-rated enclosures.
- Acoustic Decoupling: For STC (Sound Transmission Class) ratings above 50, 5/8-inch panels should be mounted on resilient channels or staggered-stud framing. When using resilient channels, fasten the channels perpendicular to the studs at 24 inches O.C., and then attach the 5/8-inch drywall to the channels using 1-1/8-inch Type S screws, ensuring the drywall screws do not penetrate through the channel into the stud, which would create a sound flanking path.
Finishing Heavy Panels: Taping and Mudding
The tapered edges on 5/8-inch panels are deeper and wider than those on 1/2-inch panels to accommodate the thicker core. This requires a modified finishing approach to achieve a Level 5 smooth finish.
Use a 10-inch taping knife for the embedding coat (second coat) and step up to a 12-inch or 14-inch knife for the final skim coat. The wider knife is necessary to feather the compound out over a broader area, hiding the recessed joint. Because 5/8-inch boards are typically used in high-traffic commercial spaces or luxury residential builds, applying a continuous skim coat over the entire surface (Level 5 finish) is highly recommended to eliminate joint photographing under harsh LED or natural side-lighting.
For expert guidance on finishing tolerances, the Northwest Wall and Ceiling Bureau provides detailed visual standards for acceptable joint visibility under various lighting conditions, which is critical when signing off on large-scale commercial 5/8-inch installations.
Written by
David NakamuraDavid Nakamura is a licensed architect (AIA) and construction technology writer focused on sustainable building methods, mass timber engineering, and high-performance building envelopes. He holds a Master of Architecture from the University of Washington and is a certified Passive House Consultant (CPHC). David spent eight years at the Seattle firm Mithun, where he led the design of three LEED Platinum projects, before founding his own practice specializing in net-zero residential design. He serves on the editorial advisory board of GreenBuilder Magazine and has authored peer-reviewed papers on cross-laminated timber (CLT) connections for the Journal of Structural Engineering. In his spare time, David teaches woodworking at Pratt Fine Arts Center and kayaks the Puget Sound.
More from David Nakamura
View all
Construction Cost
Labor Cost to Build a Deck Per Sq Ft: 2026 Installation Guide
Discover the exact labor cost to build a deck per sq ft in 2026. This installation guide breaks down contractor rates, complexity factors, and hidden fees.
Aug 4, 2026

Construction Cost
How Much Does It Cost to Build a 3 Bedroom House? Financing Guide
Learn exactly how much it costs to build a 3 bedroom house and explore 2026 financing options, construction loan types, and budget frameworks for your build.
Aug 4, 2026

Construction Cost
Cost to Build a Tennis Court: 2026 Guide
How much does it cost to build a tennis court in 2026? Breakdowns for asphalt, concrete, and synthetic surfaces plus fencing and lighting.
Jul 30, 2026