Master Sheetrock Drywall Installation: Pro Hanging Guide
Master Sheetrock drywall installation with pro framing, fastening, and 3-coat finishing techniques for flawless Level 4 and Level 5 walls.
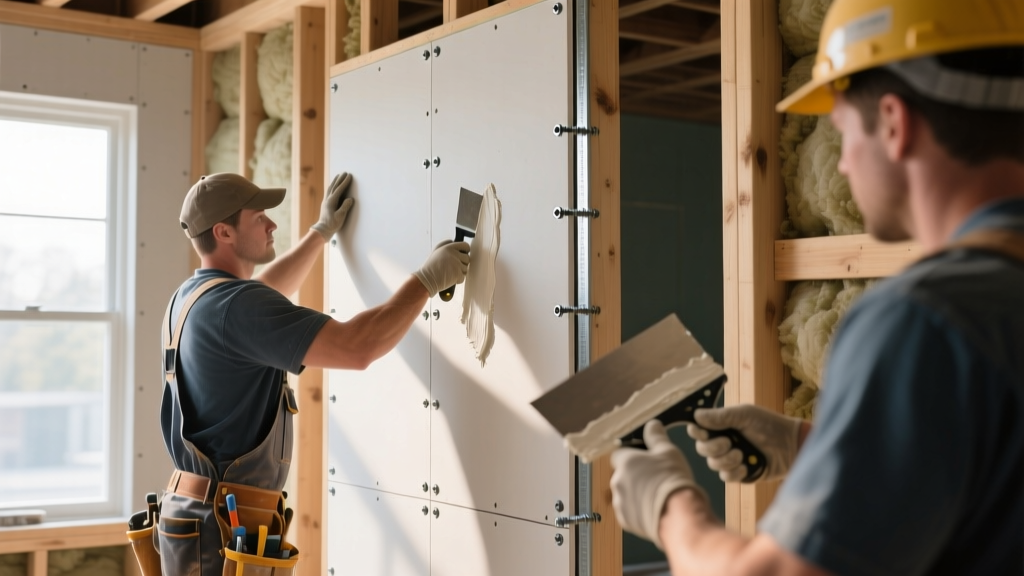
Pre-Installation: Framing Tolerances and Acclimation
Flawless Sheetrock installation begins long before the first panel is lifted. The structural integrity of the framing dictates the longevity of the finished wall. According to the Gypsum Association's GA-216 guidelines, wood framing members must be straight, properly sized, and spaced to support the specific panel thickness. For standard 1/2-inch gypsum board, wall studs must be spaced a maximum of 16 inches on center (OC), while ceiling joists require 16-inch OC spacing to prevent sagging. However, if you are utilizing advanced products like USG Sheetrock Brand UltraLight Panels, the engineered core allows for 24-inch OC spacing on ceilings without compromising sag resistance, significantly reducing framing material costs.
Acclimation is a frequently skipped step that leads to catastrophic joint ridging later. Sheetrock panels and joint compounds must acclimate to the interior environment for at least 48 hours before installation. The building must be enclosed, with HVAC systems maintaining a minimum temperature of 55°F (13°C) and relative humidity below 85%. Installing panels in a damp, unconditioned structure guarantees core expansion and subsequent joint failure once the building dries out.
The Hanging Sequence: Ceilings Before Walls
Professional drywallers universally follow a top-down hanging sequence. Installing the ceiling first allows the wall panels to push up tightly against the ceiling edge, creating a structural lock that hides the ceiling-to-wall joint and prevents cracking caused by truss uplift.
- Measure and Cut: Score the face paper with a utility knife, snap the gypsum core, and cut the back paper. Always cut panels 1/4-inch shorter than the ceiling span to allow for maneuvering and to prevent edge blowout.
- Lift and Position: Use a drywall lift for ceilings. Press the panel firmly into the corner. For walls, leave a strict 1/2-inch gap between the bottom of the panel and the subfloor to prevent moisture wicking and allow for floor settlement.
- Stagger the Joints: Never align vertical butt joints in a continuous line. Stagger end joints by at least 24 inches in a random or step pattern to distribute structural stress and minimize visible seams.
- Detail the Openings: Cut window and door openings after the panel is secured to the wall. Use a rotary cutout tool with a drywall bit to trace the inside edge of the framing, ensuring a tight, precise fit that requires minimal mud to fill.
Factory edges are tapered, but cut ends (butt joints) are not. When two butt joints meet, they create a natural hump. To hide this, you must float the joint out over a 24-inch to 32-inch width using a 12-inch trowel. Whenever possible, plan your panel layout to land butt joints over windows or doors where the break in the wall plane naturally disguises the transition.
Fastening Matrix: Screw Types and Spacing
Nails are obsolete in modern commercial and high-end residential Sheetrock applications due to their susceptibility to popping as wood dries and shrinks. Use USG Sheetrock Brand Screws or equivalent ASTM C1002 compliant fasteners. The screw head must dimple the paper face exactly 1/32-inch deep without breaking the paper surface. A broken paper face means the screw has zero holding power and must be abandoned, with a second screw placed 2 inches away.
| Board Thickness | Framing Type | Screw Type & Length | Max Spacing (Edges / Field) |
|---|---|---|---|
| 1/2 inch | Wood Studs | Type W (Coarse), 1-1/4" | 7" / 12" |
| 1/2 inch | Steel Studs (up to 20 ga) | Type S (Fine), 1-1/4" | 7" / 12" |
| 5/8 inch | Wood Studs | Type W (Coarse), 1-5/8" | 7" / 12" |
| 5/8 inch (Ceiling) | Wood Joists | Type W (Coarse), 1-5/8" | 12" / 12" |
The 3-Coat Finishing System
Achieving a Level 4 or Level 5 finish requires strict adherence to a three-coat system. Attempting to finish a wall in two coats results in joint banding, visible seams under critical lighting, and excessive shrinkage cracks. Always reference the USG technical documentation for specific compound compatibilities.
Coat 1: Taping and Bedding
Use a setting-type compound (like USG Sheetrock Brand Durabond 90) for pre-filling large gaps, followed by a high-strength air-drying compound like Sheetrock Brand All Purpose Joint Compound (Green Lid) for embedding paper tape. The All Purpose formula contains high vinyl and starch content, providing the tensile strength necessary to lock the tape into the tapered edges. Apply a 1/8-inch bed of mud, press the tape firmly with a 6-inch taping knife to squeeze out excess compound, and leave the joint slightly crowned.
Coat 2: The Filler Coat
Once the first coat is bone dry (typically 24 hours under ideal conditions), scrape off any ridges or debris with a 6-inch knife. Apply the second coat using All Purpose or Sheetrock Brand Lightweight All Purpose (Purple Lid). Use a 10-inch broad knife to feather the edges outward. This coat bridges the transition between the tape and the raw drywall paper. The goal is to build width, not thickness.
Coat 3: The Topping Coat
The final coat dictates the sandability and final appearance. Use Sheetrock Brand Topping Joint Compound (Blue Lid). Topping compound has low shrinkage, sands effortlessly, and leaves a dense, glass-like surface. Apply with a 12-inch finishing trowel, pulling the mud tight and feathering the edges to zero. For Level 5 finishes, follow this with a skim coat of USG Sheetrock Brand First Coat or a dedicated Level 5 skim material applied across the entire surface to equalize the porosity between the paper face and the joint compound.
Troubleshooting Common Sheetrock Failures
- Joint Ridging: A visible ridge running parallel to the joint. Cause: Framing lumber shrinking and pulling the fasteners, or panels installed tightly edge-to-edge without a 1/8-inch expansion gap. Fix: In severe cases, cut the joint open with a router, insert backing, and retape. In minor cases, float the joint out an additional 8 inches on both sides.
- Tape Blisters: Air pockets trapped under the paper tape. Cause: Insufficient mud under the tape or taping over a dusty surface. Fix: Slice the blister with a utility knife, inject setting-type compound behind the tape with a putty knife, and apply a patch coat.
- Screw Pops: Circular fractures in the mud over fasteners. Cause: Lumber twisting or panels not pulled tight to the stud before driving the screw. Fix: Drive a new screw 2 inches above or below the popped screw to secure the board, then patch the old divot with setting compound.
- Photographing (Joint Banding): Joints visible through flat paint. Cause: Differences in paint absorption between the porous drywall paper and the dense joint compound. Fix: This is a Level 5 issue. You must apply a drywall sealer/primer (not standard PVA) and, if severe, apply a full skim coat to unify the surface texture.
Frequently Asked Questions
Can I use mesh tape instead of paper tape for Sheetrock joints?
Fiberglass mesh tape is highly resistant to blistering and speeds up the taping process, but it lacks the tensile strength of paper tape. If you use mesh tape, you must use a high-strength setting-type compound (like Durabond or Easy Sand) for the first coat. Standard air-drying All Purpose compound does not have the shear strength to prevent mesh tape from stretching and cracking over time.
How long should I wait between mudding coats?
Under standard conditions (70°F and 50% relative humidity), air-drying compounds require 24 hours between coats. Do not rely on the surface feeling dry to the touch; the core of the mud must be fully cured. Applying a new coat over damp mud traps moisture, leading to delayed shrinkage, cracking, and foul odors as trapped water breeds bacteria.
What is the best sanding technique for a flawless finish?
Use a pole sander equipped with a 150-grit or 180-grit sanding screen. Sanding screens are vastly superior to sandpaper because they resist clogging with gypsum dust. Sand in a circular motion, focusing on the feathered edges to blend them into the board. Never sand the center of the joint aggressively, as you risk cutting through the paper tape. Always use a bright LED work light held at a sharp angle to the wall (raking light) to identify ridges and divots before priming.