How to Cut Drywall for Maintenance Access and Clean Repair Patches
Master how to cut drywall for maintenance access, plumbing repairs, and water damage excision with precision tools and dust containment protocols.
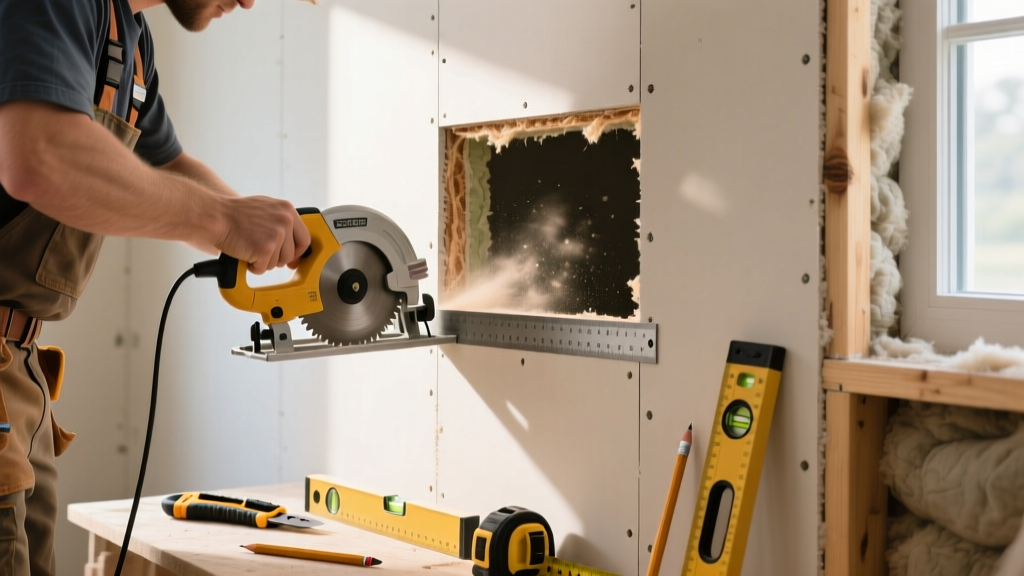
The Maintenance Mindset: Surgical Excision vs. New Construction
When learning how to cut drywall for maintenance, repair, or facility upkeep, the objective shifts dramatically from new construction. In new builds, cuts are often hidden behind baseboards, crown molding, or overlapping sheets. In maintenance scenarios—such as excising water-damaged sections, accessing leaking PEX plumbing, or creating HVAC inspection portals—every cut edge remains visible and must mate perfectly with a patch. A jagged or blown-out edge transforms a simple 30-minute patch job into a multi-day Level 5 finishing nightmare.
Maintenance cutting requires a surgical approach. The goal is to remove the compromised gypsum board while preserving the structural integrity of the surrounding paper face, minimizing dust contamination, and avoiding catastrophic strikes to hidden electrical or plumbing infrastructure. This playbook details the exact protocols, tool selections, and cleanup strategies required for professional-grade drywall excision.
Tool Selection Matrix for Drywall Excision
Choosing the wrong tool is the primary cause of blown-out edges and excessive silica dust. Below is a decision matrix for selecting the right cutting implement based on your specific maintenance scenario.
| Tool | Best Maintenance Use | Edge Quality | Dust Generation |
|---|---|---|---|
| Utility Knife (Hook Blade) | Scoring and snapping large water-damage sections | Excellent (Factory edge) | Minimal |
| Oscillating Multi-Tool | Plunge cuts for access panels and outlet retrofits | Very Good | Moderate |
| Drywall Keyhole Saw | Rough excision of moldy, collapsed, or soft drywall | Poor (Jagged) | Low |
| Rotary Cut-Out Tool | Tracing around electrical boxes and pipes | Good (High risk of overcut) | Extreme |
Step-by-Step Playbook: Excising Water-Damaged Drywall
Water damage from roof leaks or burst supply lines compromises the gypsum core, turning it into a chalky, crumbling mess. You cannot patch over compromised drywall; it must be completely excised to the center of the framing.
Step 1: Map the Damage Perimeter
Do not rely on visual staining alone. Use a pinless moisture meter to scan the wall. Standard drywall should read below 12% Wood Moisture Equivalent (WME). Any area reading above 15% WME must be cut out. Mark the perimeter of the damage with a laser level and pencil, ensuring your horizontal lines land exactly on the center of the top and bottom wall plates or blocking.
Step 2: Frame Mapping and Utility Tracing
Locate the vertical studs bordering the damage. Your vertical cut lines must fall exactly on the centerline of these studs. If the damage spans a wide area without a central stud, you will need to cut the drywall back to the nearest studs on either side and install horizontal wood backing (cleats) to support the new patch.
Step 3: The Score and Snap Method
For large rectangular excisions, avoid power saws. Use a heavy-duty utility knife (like a Stanley 99E) equipped with a hook blade. Hook blades slice through the paper face and gypsum core without tearing the back paper.
- Place a metal T-square or straight edge along your pencil line.
- Score the face paper firmly. You only need to cut through the 1/16-inch paper layer; do not try to cut the entire 1/2-inch thickness in one pass.
- Score all four sides of your rectangle.
- Apply gentle outward pressure to the center of the damaged section to snap the gypsum core along the scored lines.
- Reach behind the board and slice the back paper with your utility knife to release the section.
Creating Clean Access Panels for HVAC and Plumbing
When facility maintenance requires recurring access to shut-off valves, cleanouts, or HVAC dampers, cutting a precise access panel is mandatory. Oscillating multi-tools (such as the Fein MultiMaster or Bosch Starlock models) are the industry standard for this task.
Equip the tool with a 2-inch bi-metal or carbide-tipped plunge blade. The carbide teeth resist the abrasive nature of the gypsum core, lasting up to 10 times longer than standard HSS blades. When plunge cutting, start at a 45-degree angle to pierce the face paper, then slowly level the tool out to horizontal. Let the tool's vibration do the work; forcing the blade causes the gypsum to crumble and creates a ragged edge that will be impossible to tape cleanly later.
The 1/8-Inch Reveal Rule
When cutting out a section for a permanent patch, always cut the opening 1/8-inch larger than your replacement piece on all sides. This 'reveal' provides a gap that prevents the new piece from binding or cracking the surrounding wall when forced into place. It also creates a perfect channel for pre-filling with setting-type joint compound (like USG Sheetrock Brand Durabond 45), which creates a structural bond far superior to standard taping mud.
Dust Containment and Cleanup Protocols
Cutting drywall generates respirable crystalline silica dust, which poses severe health risks and can infiltrate HVAC systems, contaminating the entire building. According to OSHA's Respirable Crystalline Silica standard, employers and contractors must implement strict engineering controls to limit exposure.
- Isolation: Erect zip-wall plastic barriers over doorways and seal HVAC return vents in the work area with painter's tape and plastic sheeting.
- Respiratory Protection: N95 masks are insufficient for prolonged drywall cutting. Use a half-face respirator equipped with P100 particulate filters.
- Vacuuming: Never sweep drywall dust. Sweeping aerosolizes the fine particles. Use a HEPA-filtered shop vacuum to capture dust directly at the source or immediately after cutting.
- Lead Precautions: If maintaining a facility built before 1978, drywall cutting may disturb lead-based paint layers. Consult the EPA's Renovation, Repair and Painting (RRP) Rule for mandatory containment and disposal protocols.
Common Cutting Failures and Troubleshooting
Even experienced maintenance technicians encounter issues when excising gypsum board. Here is how to troubleshoot the most common failures:
- Blown-Out Back Paper: Caused by using a dull blade or pushing too hard with a keyhole saw. Fix: Trim the torn back paper with a sharp utility knife and seal the exposed gypsum core with a primer/sealer (like Kilz Original) before applying joint compound, otherwise the mud will blister.
- Overcut Corners: Caused by rounding the corners with a rotary tool. Fix: Overcuts create stress points that guarantee future cracking. Apply self-adhesive fiberglass mesh tape over the corner cuts and embed it in a high-strength setting compound to reinforce the weak point.
- Crumbly Edges on Moisture-Resistant Board: Green or purple moisture-resistant drywall (Type MR) has a denser, wax-treated core that resists standard scoring. Fix: Score moisture-resistant board twice as deep, or use a fine-toothed drywall saw to ensure a clean break without crushing the core.
Mastering how to cut drywall in a maintenance context is about precision, utility awareness, and dust control. By selecting the correct tool for the specific excision type and adhering to strict cleanup protocols, you ensure that the subsequent patching and painting phases proceed seamlessly, leaving the facility looking as though the damage never occurred.