How to Clean and Maintain Soundproof Drywall Without Ruining Acoustics
Learn the exact cleaning and maintenance playbook for soundproof drywall. Protect STC ratings, avoid polymer damage, and seal acoustic leaks.
The Physics of Drywall Maintenance: Why Soundproofing Fails
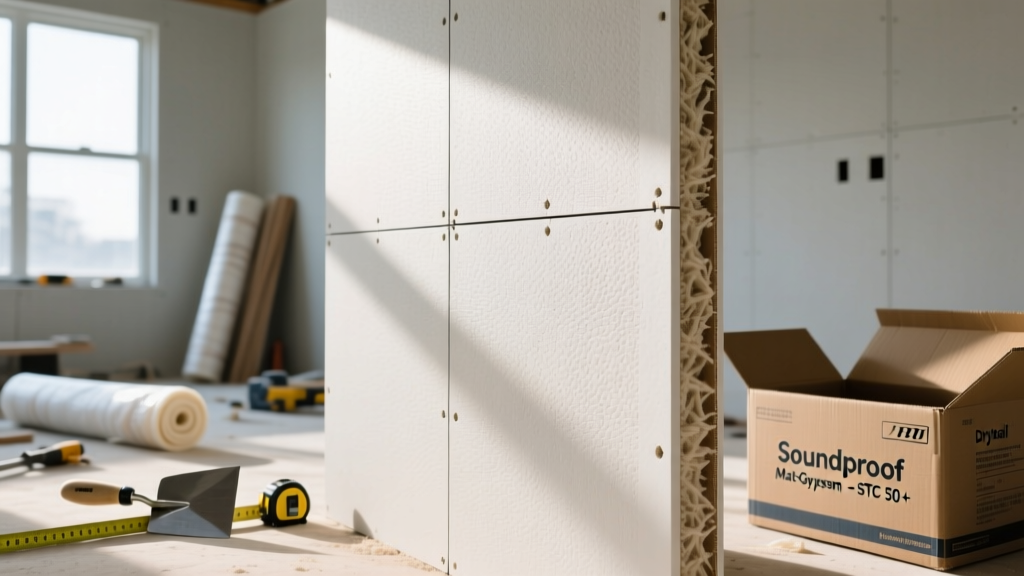
Soundproof drywall—technically known as constrained-layer damping (CLD) gypsum board—operates on fundamentally different physical principles than standard wallboard. Products like QuietRock, CertainTeed SilentFX, and National Gypsum SoundBreak utilize a viscoelastic polymer core sandwiched between two layers of high-density gypsum. This polymer converts acoustic vibrational energy into negligible amounts of heat, dramatically boosting the Sound Transmission Class (STC) rating of the assembly.
However, this multi-layer construction introduces unique maintenance vulnerabilities. Standard drywall maintenance protocols, when applied blindly to acoustic assemblies, can compromise the polymer core, create rigid sound bridges, or introduce flanking paths that degrade the wall's STC rating by 10 to 15 points. Maintaining soundproof drywall requires a specialized playbook focused on thermal protection, sealant integrity, and decoupled patching techniques.
Surface Cleaning Protocols for Constrained-Layer Gypsum
The paper facing on acoustic drywall is generally identical to standard Type X gypsum board, meaning it is susceptible to moisture degradation and physical abrasion. However, the underlying viscoelastic polymer introduces a critical thermal constraint that most facility managers and homeowners overlook.
The Thermal Danger of Steam Cleaning
Never use high-temperature steam cleaners on soundproof drywall. Viscoelastic polymers are temperature-sensitive; their damping coefficient is tuned to perform optimally at standard room temperatures (65°F to 75°F). Applying 212°F steam directly to the paper face transfers thermal energy through the 1/4-inch gypsum layer. While this will not melt the core, it can temporarily soften the polymer, altering its shear modulus and reducing its acoustic damping efficiency until the wall fully cools and the polymer re-stabilizes. Repeated thermal cycling can eventually lead to delamination between the gypsum and the polymer layer.
Approved Cleaning Agents and Methods
- Routine Dusting: Use a dry, electrostatic microfiber mop. Avoid stiff-bristled brushes that can micro-abrade the paper face, reducing its surface mass and slightly lowering high-frequency sound blocking.
- Stain Removal: Use a pH-neutral (7.0) non-ionic detergent mixed with lukewarm water. High-alkaline cleaners (pH > 9) can break down the sizing agents in the paper face, leading to fuzzing and degradation.
- Application: Dampen a cellulose sponge—never soak it. Wipe in a single direction to avoid working moisture into the micro-pores of the paper. Immediately dry the surface with a clean, lint-free cotton cloth.
Many soundproof walls utilize two layers of 5/8-inch acoustic board. If moisture breaches the top layer's paper face and becomes trapped between the two layers, it cannot easily evaporate. This trapped moisture can cause the inner layer to sag or harbor mold. Always ensure surface moisture is completely evacuated within 5 minutes of cleaning.
The Perimeter Sealant Inspection Playbook
The most common point of failure in a soundproof drywall system is not the board itself, but the perimeter joints. Acoustical sealants, such as OSI SC-175 or Tremco Acoustical Sealant, are applied at the floor, ceiling, and intersecting wall joints to prevent airborne sound leaks. According to the Gypsum Association, even a 1/8-inch continuous gap at the perimeter can reduce a wall's STC rating by up to 50% due to flanking noise.
Bi-Annual Sealant Integrity Testing
Buildings naturally settle, expand, and contract with seasonal temperature shifts. While acoustical sealants are designed to remain pliable and never fully harden, extreme structural movement can cause adhesion failure at the substrate interface.
- The Visual Scan: Inspect all perimeter joints, electrical box cutouts, and HVAC register penetrations with a high-lumen directional flashlight held at a 15-degree angle to the wall. Look for shadow lines indicating separation.
- The Tactile Test: Run a gloved finger along the sealant bead. It should feel rubbery and offer slight resistance. If it feels brittle, or if your finger easily pushes the sealant away from the drywall edge, adhesion has failed.
- The Re-Seal Protocol: Do not simply apply new sealant over failed material. Use a utility knife to excise the degraded sealant, vacuum the joint to remove gypsum dust (which prevents adhesion), and apply a fresh 1/4-inch to 3/8-inch bead of non-hardening acoustical sealant.
Patching Impact Damage Without Creating Sound Bridges
When soundproof drywall is penetrated or dented, standard patching methods will ruin the local acoustic isolation. Standard joint compound (mud) cures into a rigid, high-density mass. If you use standard mud to fill a hole in a decoupled acoustic wall, you create a rigid 'sound bridge' that directly transmits vibrational energy through the patch, bypassing the viscoelastic core.
The Decoupled Patching Method
To repair a hole (up to 4 inches in diameter) while maintaining the STC rating, follow this specialized protocol:
- Clean the Cavity: Cut the damaged area into a clean square using a drywall saw. Vacuum all dust from the exposed cavity and the edges of the existing board.
- Insert a Backing Block: Slide a piece of 1/2-inch plywood into the hole, securing it to the back of the intact drywall with construction adhesive. Crucial: Do not use drywall screws that penetrate through the face of the soundproof board, as the metal screws will act as acoustic short-circuits.
- Apply the Acoustic Infill: Instead of standard joint compound, use an acoustic patching compound or pack the cavity with high-density mineral wool (e.g., Rockwool Safe'n'Sound) cut slightly larger than the hole to create a friction fit.
- Seal the Perimeter: Apply a 1/8-inch bead of acoustical sealant around the inside edge of the cutout before pressing the replacement piece of soundproof drywall into place.
- Finish with Flexibility: Tape and finish the joint using a flexible, polymer-modified joint compound rather than standard setting-type hot mud. Sand smooth and prime with a high-build PVA drywall primer.
Hardware Mounting and Flanking Path Prevention
Hanging heavy objects on soundproof drywall requires careful planning. Every screw that penetrates the drywall and anchors into the wood or metal stud behind it creates a mechanical flanking path, allowing structure-borne noise to bypass the damping core.
| Mounting Scenario | Recommended Hardware | Acoustic Impact & Mitigation |
|---|---|---|
| Lightweight Decor (< 15 lbs) | Adhesive hooks or picture wire | Zero impact. Avoids penetration entirely. |
| Medium Loads (15 - 50 lbs) | Strap toggles or snap toggles | Low impact. Anchors in the drywall cavity, avoiding the stud. Seal the screw hole with acoustic putty. |
| Heavy Loads (> 50 lbs, TVs, Cabinets) | Structural blocking installed before drywall | High risk if retrofitted. If mounting post-installation, use neoprene isolation washers between the mount and the drywall face to dampen vibration transfer. |
Annual Maintenance Schedule and Checklist
To ensure your acoustic investment continues to perform to its published manufacturer specifications, implement this annual maintenance checklist. This is particularly critical in environments with high acoustic demands, such as home theaters, recording studios, and multi-family residential units.
- Q1 (Spring): Inspect all perimeter acoustical sealants for adhesion failure following winter structural contraction. Re-seal any separated joints.
- Q2 (Summer): Check all electrical outlet covers and switch plates. Ensure acoustic putty pads are still firmly adhered to the back of the cover plates and that no gaps exist around the junction boxes.
- Q3 (Fall): Inspect the baseboards. If baseboards were installed with finish nails penetrating the soundproof drywall into the bottom plate, apply a continuous bead of paintable acoustical sealant along the top edge of the baseboard to seal the flanking path.
- Q4 (Winter): Perform a thorough surface cleaning using pH-neutral agents. Inspect for any impact damage or hairline cracks in the joint compound, which can indicate structural movement compromising the decoupling clips or resilient channels behind the board.
By treating soundproof drywall as a precision acoustic instrument rather than standard building material, you preserve the integrity of the constrained-layer damping system. Adhering to strict thermal limits during cleaning, maintaining the pliability of perimeter sealants, and utilizing decoupled patching methods will ensure the assembly continues to deliver its rated STC performance for the lifespan of the structure.