How to Tape and Mud Drywall: A Flawless Finishing and Tool Maintenance Playbook
Master how to tape and mud drywall with our expert playbook. Learn pro application techniques, tool maintenance, and cleanup for flawless walls.
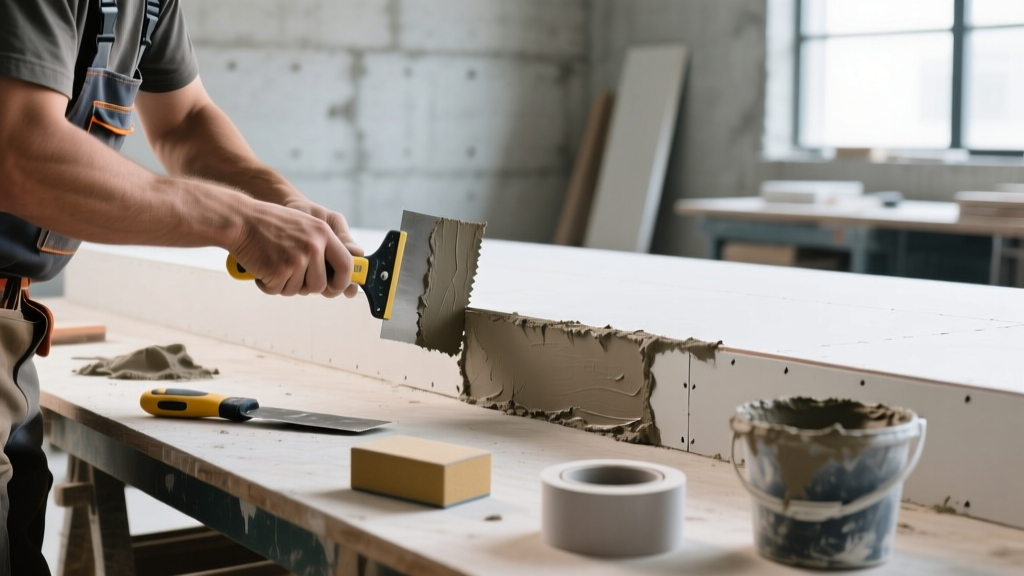
The Anatomy of a Flawless Drywall Finish
Achieving a Level 5 drywall finish requires more than just slapping mud on a seam. It demands a precise understanding of compound chemistry, blade mechanics, and rigorous tool maintenance. When professionals ask how to tape and mud drywall without encountering callbacks for cracking or nail pops, the answer lies in the intersection of proper application technique and strict job-site cleaning protocols. This playbook breaks down the exact materials, step-by-step application methods, and the often-overlooked maintenance routines that protect your tools and your finished walls.
Selecting the Right Compound for the Job
Using the wrong joint compound for a specific coat is the leading cause of shrinkage cracks and sanding nightmares. Modern formulations are highly specialized. According to the Gypsum Association, matching the compound to the coat phase ensures optimal adhesion and minimizes dimensional shrinkage.
| Compound Type | Best Use Case | Drying/Curing Time | Shrinkage & Sanding Profile |
|---|---|---|---|
| Setting-Type (e.g., USG Easy Sand 45) | First coat, embedding tape, filling deep gaps | 45-90 minutes (chemical cure) | Zero shrinkage; sands relatively easily |
| All-Purpose Drying (e.g., Sheetrock UltraLight) | Taping, second coat, texturing | 24 hours (evaporation) | Moderate shrinkage; sands smoothly |
| Topping Compound (e.g., Sheetrock UltraLight Topping) | Final skim coat, Level 5 finishes | 16-24 hours (evaporation) | Minimal shrinkage; sands to a fine powder |
Step-by-Step: How to Tape and Mud Drywall
The application process is a three-phase system. Each coat serves a distinct structural and aesthetic purpose. Do not rush the drying times between coats; trapping moisture behind a top layer guarantees future blistering.
Phase 1: Taping and the First Coat
For flat seams, use paper tape (such as USG Imperial). Paper tape features a factory crease for inside corners and offers superior tensile strength compared to fiberglass mesh, which is prone to stretching and bubbling over time.
- Pre-fill gaps: Any gap wider than 1/8-inch must be pre-filled with a setting-type compound and allowed to cure before taping.
- Apply the bed coat: Use a 6-inch stainless steel taping knife to apply a 1/16-inch thick layer of all-purpose mud over the seam.
- Embed the tape: Center the tape over the seam. Holding your knife at a strict 15-to-20-degree angle, draw it down the tape with firm, even pressure. You want to squeeze out excess mud from the edges, leaving the tape fully embedded but not starved of compound.
Phase 2: The Fill Coat and Feathering
Once the first coat is bone-dry, lightly knock off any ridges with your 6-inch knife. Do not sand yet. Switch to a 10-inch knife for the fill coat. Apply a wider band of mud, extending 2 to 3 inches beyond the edges of the first coat. The goal here is to build the joint up to the same plane as the drywall face, feathering the edges to zero thickness.
Phase 3: The Skim Coat and Final Sanding
For a Level 4 or Level 5 finish, the final coat requires a 12-inch or 14-inch knife and a lightweight topping compound. Thin the topping compound slightly with water until it resembles thick pancake batter. Apply it broadly over the entire joint, or skim the entire wall for Level 5. Once dry, sand using a 150-grit or 220-grit sanding screen attached to a pole sander.
The Maintenance Playbook: Tool Care and Site Cleanup
Knowing how to tape and mud drywall is only half the battle. The "Maintenance & Cleaning" aspect of drywall finishing is what separates professional contractors from amateurs. Dried compound on tools ruins finishes, and improper site cleanup leads to destroyed plumbing and health hazards.
Tool Maintenance: Protecting Your Blades and Pans
Stainless steel and blue steel taping knives are precision instruments. A micro-scratch on the blade edge will translate directly into a ridge on your drywall.
- Cleaning Mud Pans: Never use a metal putty knife to scrape dried mud out of a stainless steel mud pan. This gouges the pan, creating grooves that will tear your paper tape. Use a stiff nylon brush and warm water.
- Blade Storage: After washing and drying your knives, wipe the blades with a light coat of WD-40 or mineral oil to prevent flash rusting. Store them in dedicated canvas blade rolls; tossing them loose into a toolbox guarantees dinged edges.
- Mixer Paddles: Setting-type compounds cure like concrete. If you use a mixing paddle for Easy Sand 45, clean it immediately with a wire brush and water. If it cures, the paddle is ruined.
Dust Control and Silica Safety
Sanding drywall generates massive amounts of fine particulate matter. According to OSHA guidelines on silica and dust exposure, prolonged inhalation of drywall dust poses severe respiratory risks. Furthermore, dust settling on subfloors can ruin subsequent flooring installations.
Invest in a vacuum-assisted pole sander (such as the Hyde Dust-Free system) connected to a HEPA-filtered shop vac. This captures up to 95% of dust at the source. For site cleanup, never use a leaf blower or compressed air to clean floors; this embeds fine gypsum dust into the pores of the subfloor. Use a HEPA vacuum followed by a damp microfiber mop.
Troubleshooting Common Drywall Defects
Even with perfect technique, environmental factors can cause defects. Here is how to diagnose and fix the most common issues encountered during the finishing process.
| Defect | Root Cause | Maintenance & Repair Fix |
|---|---|---|
| Tape Blisters | Insufficient mud under the tape or applying the second coat before the first was fully dry. | Slit the blister with a utility knife, inject a thin layer of all-purpose mud with a putty knife, and smooth flat. Let dry and re-coat. |
| Edge Ridges | Dull taping knife or applying too much pressure on the leading edge of the blade. | Sand the ridge with a 120-grit sponge. Re-apply a thin topping coat using a 12-inch knife, ensuring the blade is perfectly straight and sharp. |
| Cracking at Butt Joints | Butt joints lack tapered edges, forcing a thick layer of mud that shrinks and cracks. | Use a setting-type compound for the first coat over butt joints to eliminate shrinkage. Feather the joint out to at least 24 inches wide. |
Sourcing and Final Inspection
Before priming, perform a critical light inspection. Hold a high-lumen LED work light flat against the wall to cast shadows across the seams. Any imperfection visible under raking light will be amplified by the sheen of your paint. For comprehensive product specifications on modern lightweight compounds and advanced tape systems, refer to the USG Joint Compound catalog.
Mastering how to tape and mud drywall is a discipline of patience, precise tool handling, and rigorous cleanup. By treating your tools with the same care you apply to the wall itself, you ensure a Level 5 finish that remains flawless for decades.