Master Corrugated Metal Roofing Installation: Pro Techniques
Master corrugated metal roofing installation with pro techniques for slope, fastener patterns, lap seams, and cutting to ensure a leak-proof steel roof.
Pre-Installation Planning and Slope Requirements
Installing corrugated metal roofing requires strict adherence to slope minimums and structural preparation. Unlike standing seam systems that accommodate ultra-low slopes, standard corrugated steel panels rely on gravity and overlapping seams to shed water. The absolute minimum roof slope for corrugated metal roofing is 3:12 (3 inches of vertical rise for every 12 inches of horizontal run) when using standard unsealed sidelaps. If your roof design dictates a slope between 1/2:12 and 3:12, you must transition to a specialized standing seam profile or apply a continuous bead of high-grade butyl sealant (such as Tremco or NovaFlex) under every sidelap and endlap.
Essential Tools and Material Specifications
Using the correct fasteners and materials is non-negotiable. In 2026, standard 26-gauge Galvalume (AZ55 coating) corrugated panels cost between $4.50 and $7.00 per square foot installed, while 29-gauge panels are slightly cheaper at $3.50 to $5.50. Always match the fastener metal to the panel to prevent galvanic corrosion.
| Component | Specification / Model | Cost Estimate (2026) | Application Notes |
|---|---|---|---|
| Panels | 26-Gauge Galvalume (AZ55) | $1.80 - $2.50 / linear ft | Superior rust resistance vs. G90 galvanized. |
| Fasteners | #10 x 1" Pancake Head Woodgrip | $45 / 1,000 count | Must feature EPDM sealing washers. Low-profile head prevents water pooling. |
| Underlayment | Synthetic (e.g., Tyvek Protec 120) | $0.15 - $0.20 / sq ft | Resists tearing and UV degradation better than 30lb asphalt felt. |
| Closure Strips | High-density polyurethane foam | $1.25 / linear ft | Required at eaves and ridges to block pests and wind-driven rain. |
| Sealant | Butyl Lap Sealant Tape (1/4" x 1/2") | $18 / 50ft roll | Apply between endlaps and sidelaps on slopes under 4:12. |
Step 1: Deck Preparation and Underlayment
Corrugated metal roofing can be installed over solid decking (OSB/plywood) or open purlins (battens). For residential applications with interior climate control, a solid deck is mandatory. Begin by sweeping the deck completely clean; even a single trapped wood chip or stray nail will telegraph through the metal or puncture the underlayment.
Install a synthetic roofing underlayment horizontally, starting from the eave and overlapping each successive course by a minimum of 4 inches. In climates prone to ice damming, apply a self-adhering ice and water shield membrane (minimum 36 inches wide) along the eaves, extending past the interior wall line. According to the MBCI Installation Manuals, ensuring the underlayment is pulled taut prevents wrinkling, which can cause the metal panels to sit unevenly and create oil-canning visual defects.
Step 2: Panel Cutting and Handling
Cutting corrugated steel generates heat and metal shavings (swarf). If swarf is left on the panel surface, it will quickly rust and stain the Galvalume coating, leading to premature failure.
When lifting panels to the roof, use a mechanical lift or a plank-and-rope pulley system. Dragging panels across the roof deck or over other panels will scrape the painted or clear-coated finish. Wear clean, soft-soled shoes when walking on the installed metal to prevent scuffing.
Step 3: Laying the First Panel and Sidelaps
The first panel dictates the alignment of the entire roof. Snap a chalk line square to the eave and rake edge before laying the first sheet. Allow a 1.5-inch overhang past the eave to ensure water drops directly into the gutter rather than wicking back under the fascia.
For sidelaps, the standard procedure is to overlap by 1.5 corrugations (one full ridge and the adjacent valley). This ensures that the fastener placed on the overlapping ridge is driven through two layers of steel and securely into the decking. If your region experiences high wind uplift (e.g., coastal hurricane zones), consult the Metal Construction Association (MCA) guidelines, which may require stitching screws (metal-to-metal fasteners) along the sidelap ridge every 12 to 24 inches to prevent the seam from unzipping under extreme negative pressure.
Step 4: Fastener Patterns and Endlaps
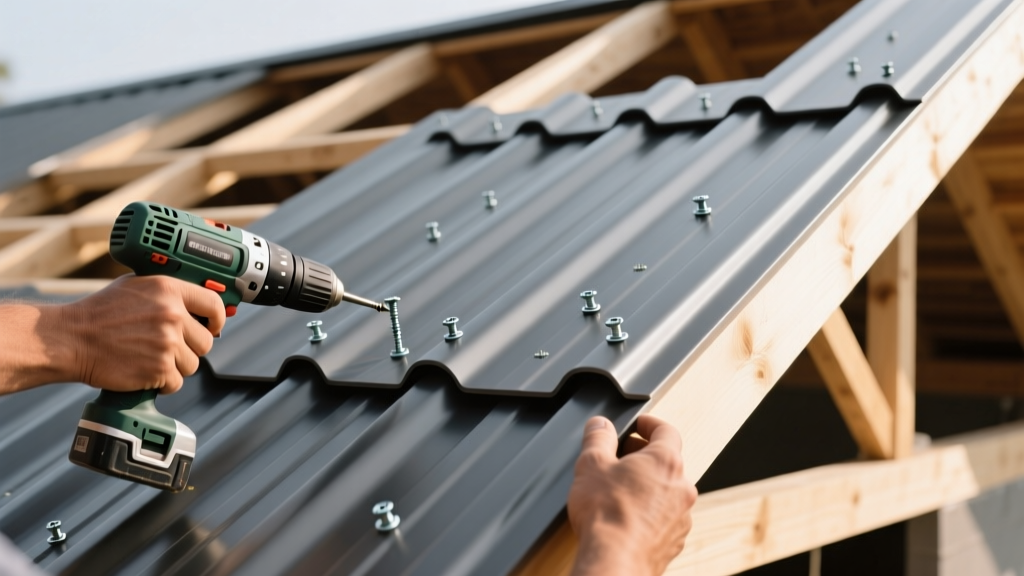
Fastener placement is where most DIY installations fail. Overdriving a screw compresses the EPDM washer until it extrudes and tears, while underdriving leaves a gap for water ingress. The correct drive depth is achieved when the EPDM washer just "kisses" the metal and forms a slight, uniform bulge around the perimeter of the washer head.
Field vs. Perimeter Fastening Matrix
- Eaves and Rakes (Perimeter): Drive a fastener into every corrugation valley. The perimeter experiences the highest wind uplift forces and requires maximum pull-out resistance.
- Field of the Roof: Drive fasteners into every 3rd corrugation valley (typically 24 inches on center for standard 7/8" corrugation profiles). Stagger the fasteners in adjacent rows to distribute stress evenly.
- Endlaps: Where two panels meet vertically, overlap them by 6 inches on slopes greater than 4:12, and 12 inches on slopes between 3:12 and 4:12. Fasten through every corrugation at the endlap to secure both layers tightly to the deck.
Flashing, Trim, and Ridge Cap Details
Panels shed water, but flashings seal the transitions. Install Z-flashing at any vertical wall intersections, ensuring the upper leg extends at least 4 inches up the wall and is sealed with polyurethane caulk (never use silicone, which loses adhesion to metal over time).
At the ridge, install high-density foam closure strips that match the exact profile of your corrugation. These strips compress into the valleys of the metal, blocking birds, insects, and wind-blown snow. Secure the ridge cap with #12 x 2" stitch screws or woodgrip screws driven through the top of the ridge cap, through the closure strip, and into the roof deck or purlin.
Common Installation Failures and Troubleshooting
FAQ: Corrugated Roofing Installation
Q: Why are my panels showing wavy reflections (oil-canning)?
A: Oil-canning is usually caused by uneven deck framing, over-tightening fasteners that pull the panel out of its natural plane, or installing panels during the heat of the day without accounting for thermal expansion. Always install panels in the morning when the steel is cool and contracted.
Q: Can I install corrugated metal directly over existing asphalt shingles?
A: While some local codes permit this, it is highly discouraged. Shingles create an uneven substrate that promotes oil-canning, and the trapped moisture between the shingles and the metal can accelerate deck rot. Always tear off old roofing to inspect the deck and install a fresh synthetic underlayment. For more on energy-efficient roofing retrofits, refer to the EPA Energy Star Roof Products guidelines.
Q: How do I handle thermal expansion and contraction?
A: Steel expands and contracts significantly with temperature shifts. While standing seam roofs use sliding clips to manage this, corrugated panels rely on the flexibility of the fastener shank. Never use oversized holes or slot the screw holes in the field; drive the #10 pancake screws straight and true to the manufacturer's specified torque, allowing the EPDM washer to maintain the seal while the panel shifts microscopically.