Horizontal Wood Fence Installation: Structural Guide & Steps
Master horizontal wood fence installation with our structural guide. Learn post spacing, wood species, hidden fasteners, and board spacing techniques.
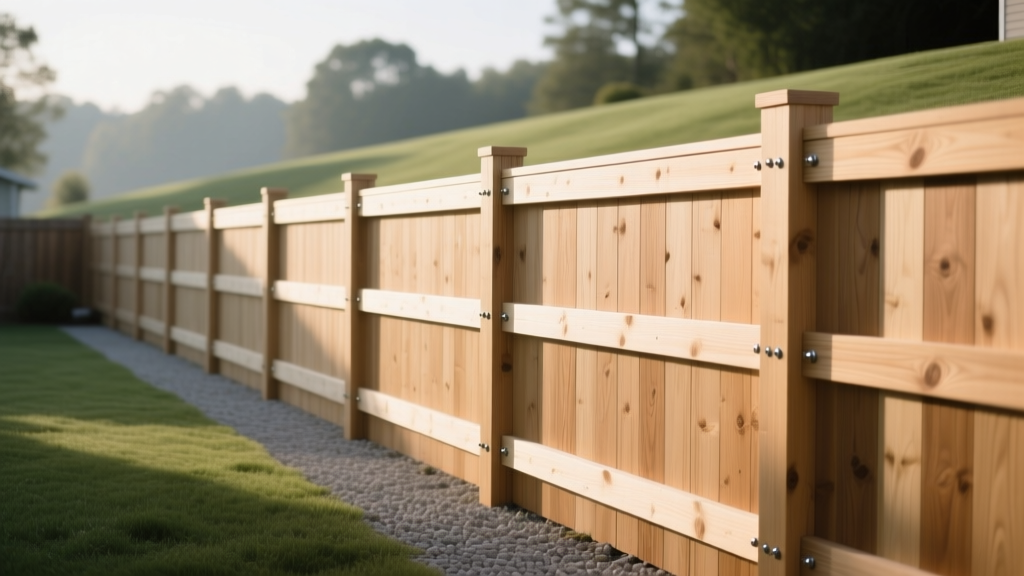
The Structural Reality of Horizontal Fencing
While horizontal wood fences offer a clean, contemporary aesthetic, they present unique structural challenges that standard vertical picket fences do not. In a vertical fence, the pickets transfer wind loads down to the ground and act independently. In a horizontal configuration, the boards span laterally between posts, creating a "sail effect" that concentrates lateral sheer force directly onto the post foundations. Furthermore, horizontal boards are prone to mid-span sagging due to gravity acting on their longest dimension.
Material Selection: Best Wood Species for Horizontal Runs
Horizontal boards highlight the grain and any natural defects. You must select species with high dimensional stability to prevent cupping, which is highly visible in horizontal orientations. As of 2026, premium clear-grade lumber and thermally modified woods dominate the high-end horizontal fence market.
| Wood Species | Dimensional Stability | Janka Hardness | Avg. Material Cost (per lin. ft.) |
|---|---|---|---|
| Western Red Cedar (Clear) | Excellent | 350 lbf | $12.00 - $18.00 |
| Coast Redwood (Construction Heart) | Very Good | 450 lbf | $15.00 - $24.00 |
| Thermally Modified Ash (e.g., Thermory) | Superior | 1,320 lbf | $22.00 - $30.00 |
| Cumaru / Ipe | Good (Heavy) | 3,300+ lbf | $28.00 - $45.00 |
The Western Red Cedar Lumber Association recommends using kiln-dried, clear-grade cedar for horizontal applications to minimize the twisting that occurs in green or lower-grade boards. If budget constraints require using pressure-treated Southern Yellow Pine, you must wait 60 to 90 days for the wood to dry and acclimate before installation to prevent massive shrinkage gaps.
Post Framing: Steel vs. Heavy Timber
The most common failure point in horizontal wood fences is post deflection. When horizontal boards shrink or expand, they pull and push against the posts. Traditional 4x4 wood posts will warp, ruining the straight horizontal lines.
The Steel Post Method (Industry Standard)
Professional contractors utilize galvanized steel C-channel posts, such as the Master Halco PostMaster Plus. These posts are driven or set in concrete, and the horizontal wood boards are screwed directly into the steel flanges. A secondary wood fascia board is then applied to the street-facing side of the steel post to hide the metal, maintaining the all-wood aesthetic while providing immovable structural integrity.
The Heavy Timber Method
If using wood posts, upgrade to 6x6 pressure-treated Douglas Fir or Southern Yellow Pine. Set the posts a minimum of 36 inches deep (or 12 inches below the local frost line) in a 12-inch diameter concrete footing. Maximum post spacing for 1x6 horizontal boards is 6 feet on-center. If you want 8-foot post spacing, you must use 2x6 nominal boards or install a horizontal steel mid-rail stiffener.
Step-by-Step Installation Procedure
- Layout and String Lines: Run a mason line at the top and bottom of your planned fence run. Mark post locations exactly 72 inches on-center (for 6-foot spans). Dig holes 36 inches deep using a powered auger.
- Setting the Posts: Drop steel or 6x6 wood posts into the holes. Brace them perfectly plumb in both directions. Pour 5000 PSI quick-setting concrete, sloping the top of the concrete away from the post at a 15-degree angle to shed water. Allow 24 hours to cure.
- Installing the Starter Rail: Snap a chalk line 2 inches above grade. Install your bottom board. This board must be perfectly level, as it dictates the alignment of every subsequent board. Fasten it using structural screws driven into the post centers.
- Spacing and Stacking: Place your spacer jig on the starter board. Lay the next horizontal board. Check for level every third board. If the boards have a slight bow, use a 2x4 and a mallet to tap them straight before fastening.
- Fastening the Boards: Drive fasteners at every post intersection. For a 6-foot span, this means two fasteners per board per post. If spanning 8 feet, add a mid-span fastener into a horizontal backing rail to prevent sagging.
- Top Cap and Trim: Install a 2x6 or custom-milled cap board over the top edge of the posts to shed water away from the end-grain of the horizontal boards and the post tops.
Fastening Systems: Face Screws vs. Hidden Clips
The choice of fastener dictates both the visual outcome and the longevity of the fence. Standard galvanized screws will react with the tannins in cedar and redwood, creating permanent black streaks down the face of the wood.
Pros of Hidden Fasteners
- Clean, uninterrupted horizontal lines.
- Allows for natural lateral wood expansion.
- Eliminates tannin bleed on the board face.
Recommended Tool: CAMO Marksman Pro with 2-3/8" 316 Stainless Steel screws.
Cons of Hidden Fasteners
- Higher material cost ($0.85 - $1.20 per fastener).
- Slower installation time (requires jig placement per board).
- Not suitable for dense hardwoods like Ipe without pre-drilling.
Alternative: Simpson Strong-Tie hidden fence clips.
If you opt for face-screwing, you must use 304 or 316 marine-grade stainless steel trim-head screws (such as the FastenMaster HeadLok system). The small head diameter leaves a minimal footprint, and the stainless alloy prevents tannin staining.
Managing Wood Movement and Board Spacing
Wood is hygroscopic; it absorbs and releases moisture based on ambient humidity. Horizontal boards expand and contract primarily across their width (tangential and radial shrinkage), not their length.
The 1/4-Inch Rule: Never install horizontal boards tight against one another. Even in the driest summer months, a 1x6 cedar board can expand up to 1/8 inch in width during winter humidity spikes. Use a consistent 1/4-inch to 3/8-inch gap between boards. A 16d common nail or a specialized plastic spacer jig works perfectly to maintain this gap during installation.
End-Grain Sealing
Where horizontal boards meet at a post, or where a board is cut to fit a gate opening, the exposed end-grain acts like a bundle of straws, wicking moisture deep into the board. This causes end-checking (splitting) and premature rot. Apply a penetrating end-grain sealer, such as Anchorseal, to every cut end immediately after making the cut, before the board is fastened to the fence.
Troubleshooting Common Installation Errors
- Sagging Mid-Span: Caused by spanning 1x material over 8 feet. Fix: Remove the sagging boards, install a horizontal 2x4 pressure-treated stiffener rail between the posts at mid-height, and reattach the boards using 2-inch screws into both the posts and the new mid-rail.
- Board Cupping: Occurs when the bark-side of the growth rings faces up, catching water. Fix: Always install boards with the bark-side (the side with tighter, concentric grain rings) facing down, or vertically edge-grain (quarter-sawn) if available.
- Post Leaning Over Time: Caused by shallow footings acting as a lever against wind load. Fix: Excavate behind the leaning post, install a concrete spur (a secondary wedge of concrete on the tension side of the post), and brace the post plumb while the spur cures.