Cement Board Screws Maintenance: Fixing Rust and Popped Heads
Diagnose and repair failing cement board screws. Learn extraction techniques, rust prevention, and waterproofing membrane restoration.
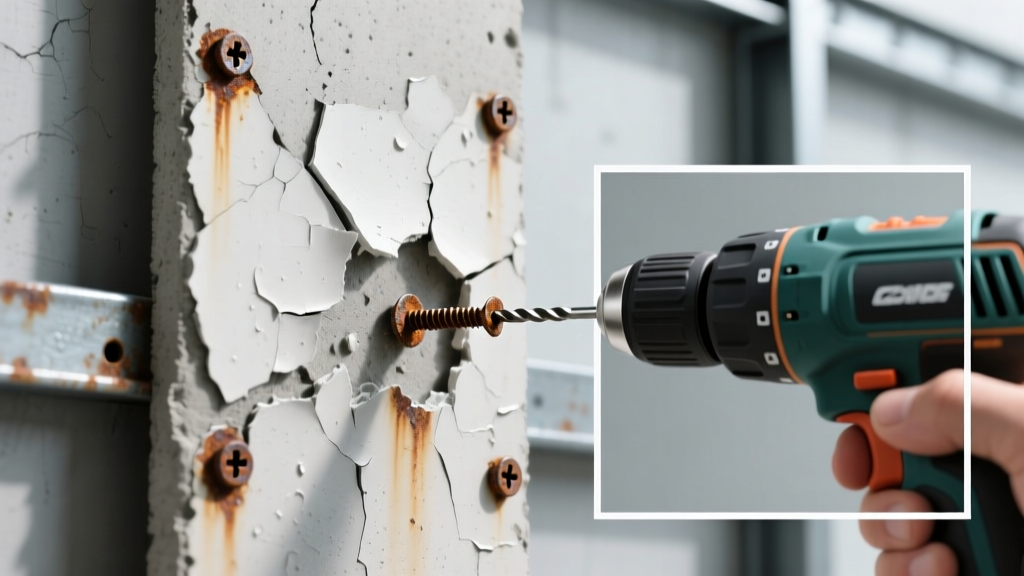
Cement board is the foundational substrate for wet-area and exterior tile installations, but its structural integrity relies entirely on the fasteners anchoring it to the framing. When cement board screws fail, the entire assembly is compromised. Because these fasteners are buried beneath thin-set, tile, and waterproofing membranes, they are often ignored until catastrophic failure occurs. This maintenance playbook details how to diagnose, extract, and replace failing fasteners without destroying the critical waterproofing envelope, ensuring your installation meets the rigorous standards outlined by the Tile Council of North America (TCNA).
The Alkaline Threat: Why Cement Board Screws Fail
Portland cement is highly alkaline, typically registering a pH between 12.5 and 13.5 when mixed with water. In wet environments like showers, steam rooms, or exterior facades, moisture continuously activates this alkalinity. Standard zinc-plated or electro-galvanized screws cannot survive this environment. The alkaline moisture strips the zinc coating, exposing the raw steel core to rapid oxidation.
As the steel rusts, it creates iron oxide, which expands to up to six times the volume of the original metal. This phenomenon, known as 'rust jacking,' exerts immense outward pressure on the screw head. The head pushes against the cement board, causing the board to deflect, tenting the overlying waterproofing membrane, and ultimately cracking the tile grout or popping the tile entirely off the substrate.
Diagnostic Playbook: Spotting Fastener Compromise
Identifying failing cement board screws early prevents widespread water damage and structural rot. Conduct a visual and tactile inspection of your tiled surfaces and exterior cladding using the following diagnostic criteria:
- Grout Discoloration (Rust Halos): Look for faint orange or brown staining radiating from the grout lines, particularly near the bottom courses of a shower wall or near the weep screed on exterior installations. This indicates rust bleeding through the porous grout.
- Membrane Tenting: Run your hand across the tiled surface. If you feel slight, localized ridges or bumps directly over stud locations, the screw heads are likely jacking outward and pushing the membrane and thin-set upward.
- Hollow Acoustic Signatures: Tap the tiles with a hardwood block or specialized acoustic hammer. A sharp, hollow sound indicates delamination. While this can be a thin-set failure, it is frequently caused by board movement resulting from stripped or corroded fastener shafts losing their grip in the framing.
- Exterior Weeping: On exterior cement board siding or soffits, inspect the bottom edges and weep holes for brown, alkaline leaching, which signals active fastener corrosion inside the wall cavity.
Surgical Extraction Protocol for Corroded Fasteners
When a cement board screw is severely corroded, the Phillips or square drive recess is often stripped or filled with hardened thin-set and rust. Brute-forcing the screw out will shatter the cement board core and tear the waterproofing membrane. Follow this surgical extraction protocol:
- Score the Perimeter: Use a grout saw to remove the grout surrounding the affected tile. If the tile must be sacrificed to reach the screw, carefully score the tile edges with a diamond blade on an angle grinder to prevent collateral cracking.
- Clear the Drive Recess: Use a rotary tool (like a Dremel) equipped with a 1/16-inch carbide burr to meticulously clean out the rust and thin-set from the screw head's drive recess. Do not use a standard drill bit, which will wander and damage the surrounding board.
- Cut a Relief Trench (If Stripped): If the head is completely stripped, swap the burr for a diamond cutting wheel. Cut a single, deep, straight slot across the screw head, effectively converting it into a flathead screw.
- Apply Penetrating Catalyst: Flood the screw head with a high-quality penetrating oil (such as PB Blaster or Liquid Wrench). Allow it to wick down the threads for 15 minutes to break the alkaline bond between the rust and the cement matrix.
- Extract with Downward Pressure: Seat a high-torque impact driver with the correct bit (or flathead) into the newly cut slot. Apply heavy downward physical pressure while pulsing the driver in reverse. The downward pressure prevents the bit from camming out and tearing the remaining metal.
Replacement Matrix: Selecting the Right Fastener
Once the compromised fastener is removed, you must select a replacement that can withstand the specific environmental conditions of the installation zone. The Custom Building Products and other industry leaders mandate specific corrosion-resistant coatings for wet areas.
| Fastener Type | Coating / Material | Best Application Zone | Est. Cost (per 100) | Wet-Zone Lifespan |
|---|---|---|---|---|
| Ceramic-Coated (e.g., Backer-On Rock-On) | Proprietary ceramic/epoxy blend | Interior dry / intermittent wet (kitchens, bath floors) | $5.00 - $7.00 | 10-15 Years |
| 410 Stainless Steel (e.g., Simpson SSV) | Martensitic stainless steel | Continuous wet zones (showers, steam rooms, pools) | $18.00 - $24.00 | 30+ Years |
| 304/316 Stainless Steel | Austenitic stainless steel | Exterior coastal, high-salinity, chemical exposure | $35.00 - $45.00 | 50+ Years |
Note: 410 stainless steel is magnetic and hard enough to self-drill through cement board without snapping, making it the industry standard for shower pan and wall remediation. 304/316 stainless is softer and may require pre-drilling a pilot hole through the dense cement matrix to prevent the screw head from shearing off during installation.
Restoring the Waterproofing Envelope
Removing a screw inherently compromises the waterproofing membrane beneath it. If you simply drive a new screw into the existing hole, you leave a direct pathway for moisture to reach the wood framing, leading to dry rot and mold. Restoring the envelope is non-negotiable.
According to installation guidelines published by Schluter Systems, any puncture in a sheet membrane that is not covered by a valid fastener seal must be patched. A leaking fastener hole will wick moisture into the stud cavity via capillary action, bypassing the primary drainage plane.
For Sheet Membranes (e.g., Kerdi, NobleSeal): Clean the area around the new screw head with isopropyl alcohol. Cut a 3-inch square patch of matching sheet membrane or specialized banding (like Kerdi-Band). Embed this patch over the screw head using the manufacturer's recommended unmodified thin-set mortar, ensuring a minimum 2-inch overlap on all sides of the puncture.
For Liquid Membranes (e.g., RedGard, Hydro Ban): If the liquid membrane was torn during extraction, apply a dab of polyurethane sealant directly over the new screw head to fill the void. Once cured, apply a layer of liquid membrane, embed a piece of alkaline-resistant fiberglass mesh tape over the screw, and apply two additional coats of the liquid membrane, allowing full cure time between coats.
Preventative Maintenance & Inspection Schedule
To prevent catastrophic fastener failure, integrate cement board screw inspections into your annual property maintenance routine, particularly for exterior cladding and high-use commercial wet areas.
- Annual Grout & Sealant Audit
- Inspect all grout lines and change-of-plane sealants (silicone caulking). If water is allowed to sit in cracked grout or failed caulk joints, it pools against the cement board, accelerating the corrosion of even high-grade ceramic-coated screws. Re-seal and re-grout immediately upon detecting micro-fractures.
- Exterior Weep Screed Clearance
- Ensure that soil, mulch, or debris is not piled against the bottom edge of exterior cement board installations. Ground moisture wicking into the bottom edge of the board will cause the lowest row of screws to rust-jack, pushing the entire bottom course of the board outward.
- Thermal Expansion Joint Check
- Verify that expansion joints in large-format tile installations over cement board are clear of debris. If thermal expansion is restricted, the sheer lateral force can cause the cement board to shift, stripping the threads of the fasteners out of the wood or metal framing.
By understanding the chemical vulnerabilities of cementitious substrates and employing surgical extraction and patching techniques, you can salvage failing installations and extend the lifecycle of your tile and cladding systems by decades.