Installing Clay Tile vs Concrete Tile: Roof Framing & Fastening
Compare clay tile vs concrete tile for roofing. Learn structural prep, underlayment, fastening methods, and weight load requirements for a flawless install.

The Core Material Differences Dictating Installation
While clay and concrete roof tiles share a similar aesthetic profile and overlapping installation methodology, their fundamental material properties require distinct approaches on the job site. Concrete tiles are extruded or pressed from a sand-cement mixture, resulting in a dense, slightly porous product that continues to cure and harden over time. Clay tiles are kiln-fired at temperatures exceeding 2,000°F, creating a vitrified, brittle, and highly water-resistant surface.
For roofing contractors, these differences translate directly into structural load calculations, fastening protocols, and cutting techniques. Misapplying concrete installation standards to a clay tile project will result in catastrophic breakage rates, while treating concrete with the delicate handling reserved for clay will severely inflate labor costs and project timelines. According to the Tile Roofing Institute (TRI), understanding these material-specific nuances is the primary factor in achieving a 50-year service life without premature fastener failure or deck degradation.
Structural Framing & Dead Load Preparation
Before the first batten is nailed, the roof deck must be engineered to support the specific dead load of the chosen tile. Concrete tiles are substantially heavier than their clay counterparts, demanding rigorous truss verification.
| Specification | Concrete Tile (Standard Profile) | Clay Tile (Standard Profile) |
|---|---|---|
| Weight per Square (100 sq ft) | 900 – 1,100 lbs | 600 – 850 lbs |
| Weight per Sq Ft (psf) | 9.0 – 11.0 psf | 6.0 – 8.5 psf |
| Standard Truss Spacing | 24 inches O.C. (requires engineered verification) | 24 inches O.C. (often allows 16 inches O.C. for complex geometries) |
| Decking Requirement | Minimum 5/8' CDX plywood or 1x6 solid sheathing | Minimum 1/2' CDX plywood or spaced sheathing (for historic retrofits) |
| Deflection Limit | L/240 minimum | L/240 minimum |
When replacing an existing asphalt shingle roof (~2.5 psf) with concrete tile (~10 psf), the existing trusses must be evaluated by a structural engineer. Failing to reinforce the load-bearing walls or add collar ties can lead to long-term truss sagging and drywall cracking in the living space below.
Underlayment and Batten System Configuration
The underlayment and batten system serves as the secondary water barrier and the primary ventilation matrix. Because concrete is mildly porous, it can absorb moisture during heavy rain and release it slowly. If installed directly to the deck without a batten, this moisture transfer can lead to deck rot and efflorescence (white mineral deposits on the tile surface).
Batten Spacing and Sizing
- Concrete Tiles: Typically require 1x2 or 2x2 treated wood battens spaced exactly to the tile's exposed length (usually 14' to 16' on center). A counter-batten system (vertical battens topped with horizontal nailers) is highly recommended in high-humidity climates to allow the concrete to dry evenly from both sides.
- Clay Tiles: Can be installed on 1x2 battens. Because clay is virtually impermeable, direct-deck installations (without battens) are sometimes permitted on steep pitches (8:12 or greater) using specialized self-adhering membranes, though battens remain the industry best practice for wind uplift resistance.
Fastening Protocols and Wind Uplift Resistance
Fastening is where the material divergence is most critical. The International Code Council Evaluation Service (ICC-ES) mandates strict wind uplift testing for tile systems, but the mechanical execution varies wildly between clay and concrete.
Mechanical Fastening (Nails and Clips)
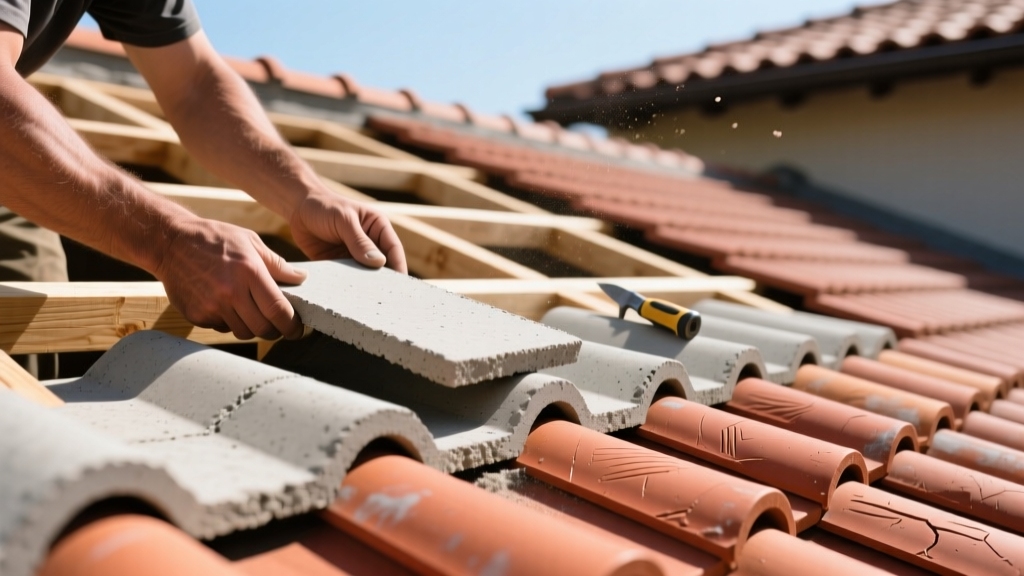
For concrete tiles, installers typically use a single 8d or 10d hot-dipped galvanized or stainless steel ring-shank nail driven through the pre-punched nail hole. Concrete's compression strength allows the nail head to sit flush without cracking the tile, provided the nail is not over-driven. In high-wind zones, a copper or stainless steel nose clip is added to the tail of the tile.
For clay tiles, the material's brittleness means driving a nail directly through the hole carries a high risk of micro-fracturing the nail flange. These micro-fractures may not be visible immediately but will cause the tile to slide off the batten years later. Installers must either:
- Use specialized wire-clipping systems that hook into the tile's top lug without penetrating the material.
- Pre-drill the nail holes with a masonry bit slightly larger than the nail shank to allow for thermal expansion and prevent stress cracking.
- Utilize two nails per tile instead of one, using a lighter gauge to distribute the holding force.
For both materials, two-part polyurethane foam adhesives (e.g., Polyset or Insta-Stick) are increasingly replacing mechanical clips in High-Velocity Hurricane Zones (HVHZ). Foam adhesive creates a flexible, monolithic bond that accommodates thermal expansion better than rigid metal clips. However, foam requires a clean, dust-free tile surface; concrete tiles often require a quick wire-brushing to remove release agents from the manufacturing mold before the foam will adhere properly.
On-Site Cutting, Handling, and Waste Management
Cutting roof tiles for hips, ridges, and valleys generates significant dust and requires specific tooling to maintain structural integrity and job site safety.
| Parameter | Concrete Tile Execution | Clay Tile Execution |
|---|---|---|
| Primary Cutting Tool | Gas-powered masonry saw or electric wet saw | Electric wet saw or angle grinder with specialized blade |
| Blade Specification | Segmented diamond rim blade (10' to 14') | Continuous rim turbo diamond blade (prevents chipping) |
| Waste Factor Expectation | 5% to 8% (higher breakage during transport/nailing) | 8% to 12% (higher breakage during cutting and handling) |
| Silica Dust Mitigation | Wet cutting mandatory; OSHA PEL compliance required | Wet cutting mandatory; clay dust is highly abrasive |
When cutting concrete, the aggregate (sand and small stone) will quickly dull standard masonry blades. Segmented blades allow for heat dissipation and faster cutting through the dense matrix. When cutting clay, the primary concern is edge spalling. A continuous rim blade provides a smoother cut, preventing the glazed surface from chipping, which is highly visible on the finished roof line.
Installation Labor & Cost Matrix
Labor rates and installation timelines differ based on the handling requirements and fastening complexity of each material. The following estimates reflect 2026 national averages for professional roofing crews.
- Concrete Tile Install: 3.5 to 5.0 labor hours per square. Total installed cost ranges from $9.50 to $16.00 per sq ft.
- Clay Tile Install: 5.0 to 7.5 labor hours per square. Total installed cost ranges from $14.00 to $25.00+ per sq ft.
Clay demands a higher labor premium due to the slower handling speeds, pre-drilling requirements, and the necessity of sorting tiles by color variation (a natural occurrence in kiln-fired products) to ensure a uniform aesthetic blend across the roof plane.
Expert Troubleshooting: Avoiding Post-Install Failures
Issue: Efflorescence on Concrete Tiles
Cause: Moisture trapped beneath the tile dissolves soluble salts in the cement, drawing them to the surface.
Fix: Ensure proper batten ventilation. Do not apply sealants to the top surface of the tile, as this traps moisture inside. Allow natural weathering to wash the salts away over 12-18 months.
Issue: Slipping Clay Tiles on Steep Pitches
Cause: The top lugs of the clay tile are resting on the batten, but thermal expansion has pushed the tile upward, disengaging the nail head.
Fix: Verify batten thickness. If the batten is too thick, it alters the interlock geometry. Reduce batten size or implement a head-nailing protocol with pre-drilled holes rather than relying solely on lug-hanging.
Written by
James ThorntonJames Thornton is a construction industry veteran with 25 years of hands-on experience in wood framing, lumber grading, and residential building codes. He started as a framing carpenter in rural Oregon, earned his ICC Residential Building Inspector certification, and eventually became a senior plan reviewer for the City of Portland Bureau of Development Services. James holds a B.S. in Wood Science & Technology from Oregon State University and is a certified lumber grader through the West Coast Lumber Inspection Bureau (WCLIB). He has inspected over 3,000 residential construction sites and authored the city's internal guide on advanced framing techniques (2x6 at 24" O.C.). James lives in Bend, OR, where he builds custom timber-frame cabins and competes in lumberjack sports.
More from James Thornton
View all
Insulation
Best Home Insulation Materials: Complete 2026 Guide
Compare top home insulation materials for 2026. Find R-values, installed costs per square foot, and best uses for fiberglass, spray foam, and mineral wool.
Aug 4, 2026

Sustainable Building
Certify Your Green Building Material for LEED and WELL
Step-by-step guide to certifying a green building material for LEED v5 and WELL v2. Master EPDs, HPDs, and VOC limits for 2026 project specifications.
Aug 4, 2026

Stone & Masonry
Veneer Stacked Stone Panels: Interior Design & Style Showcase
Discover how veneer stacked stone panels transform interiors. Explore modern design profiles, material pairings, and technical installation specs.
Aug 4, 2026