Types of Concrete Curbs: Mix Designs, Profiles, and Structural Specs
Explore the structural types of concrete curbs, from barrier to monolithic profiles, and the exact mix designs required for extruded, precast, and CIP methods.

The Engineering Behind Concrete Curb Classifications
When specifying the types of concrete curbs for municipal, commercial, or highway projects, contractors and engineers must look beyond the visible profile. The structural classification of a curb dictates not only its traffic-handling capabilities but also the precise rheology of the concrete mix required to form it. A mix design optimized for cast-in-place (CIP) formed curbs will catastrophically fail when run through a slipform extruder. Understanding the intersection of curb geometry and concrete mix design is critical for preventing slumping, surface tearing, and premature freeze-thaw degradation.
Structural Curb Profiles and Their Applications
Concrete curbs are categorized by their cross-sectional profile, which determines how they interact with vehicle tires and surface water runoff. Selecting the correct profile is the first step in the specification process.
| Curb Type | Profile Geometry | Primary Function | Typical Dimensions |
|---|---|---|---|
| Barrier | Vertical or near-vertical face | Prevents vehicles from leaving the roadway; restricts pedestrian crossing. | 6 to 8 inches high, 6 to 12 inches wide at base. |
| Mountable | Sloped face (usually 45 degrees) | Allows vehicles to cross into driveways or parking areas without damaging tires. | 4 to 6 inches high, 12 to 18 inches wide. |
| Rollover | Low, rounded, or gently sloped | Defines edges for landscaping or pedestrian zones; easily driven over if necessary. | 2 to 4 inches high, 6 to 10 inches wide. |
| Monolithic | Integral with the gutter or slab | Provides structural edge support for the pavement slab; eliminates the cold joint between curb and gutter. | Varies; typically 8 to 12 inches total depth including gutter pan. |
Mix Design Parameters by Forming Method
The forming method is the single most important variable in curb mix design. According to the Portland Cement Association's guidelines on mixture design, the water-cementitious ratio, aggregate gradation, and slump must be tightly controlled to match the placement technology.
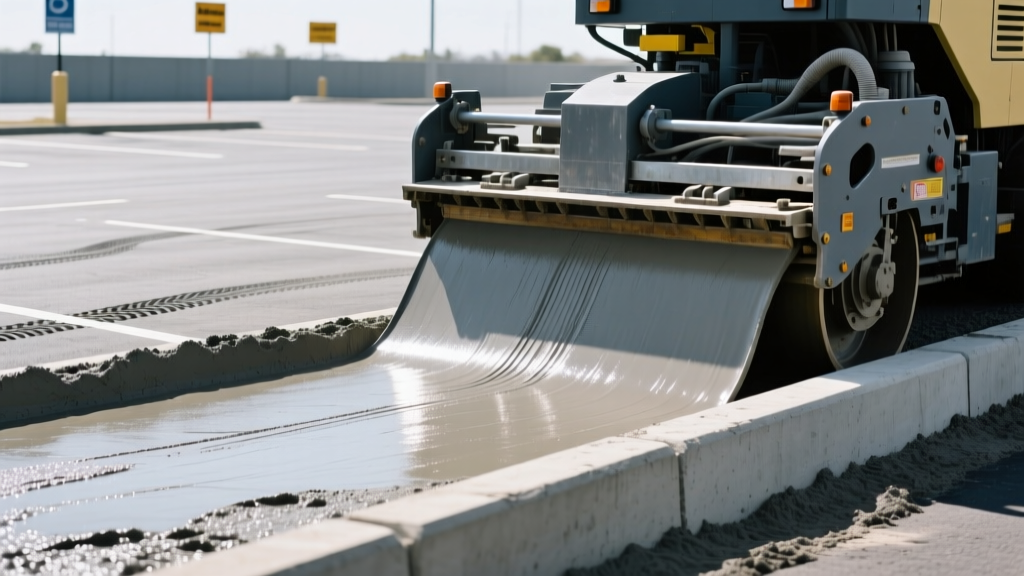
Extruded (Slipform) Curb Mix Design
Extrusion is the standard for long, linear runs of barrier and mountable curbs. The concrete is fed into a hopper and forced through a steel die. Because there is no external formwork to hold the concrete in place after it exits the die, the mix must possess zero-slump characteristics.
- Slump: 0 to 1 inch. Field superintendents often use the 'ball-in-hand' test: a handful of concrete should squeeze together without dripping water and hold its shape when the hand is opened.
- Aggregate Size: Maximum 3/8 inch (No. 8 or No. 9 gradation). Using standard 3/4 inch aggregate causes the stones to catch on the extrusion die, resulting in severe surface tearing and 'bug holes'.
- Cementitious Content: High, typically 550 to 600 lbs per cubic yard, to provide the paste volume necessary for lubrication through the die.
- Admixtures: Viscosity Modifying Admixtures (VMAs) like Welan gum or cellulose ethers are frequently added at 3 to 5 oz per cwt to increase cohesion and prevent the curb from slumping under its own weight immediately after extrusion.
Cast-in-Place (CIP) Curb Mix Design
CIP curbs are used for short runs, tight radius curves, or complex intersections where extruders cannot maneuver. Because the concrete is placed into wood, steel, or plastic forms, it requires a workable consistency.
- Slump: 3 to 5 inches. Higher slumps risk formwork blowouts and excessive bleeding.
- Aggregate Size: Standard 3/4 inch (No. 57 or No. 8) is acceptable, as the forms contain the material.
- Water-Cement Ratio: Maximum 0.45 to ensure durability and minimize shrinkage cracking upon form removal.
Precast Concrete Curbs
Precast curbs are manufactured in a controlled plant environment and transported to the site. This method is ideal for projects requiring immediate traffic access or complex architectural finishes.
- Strength: High early strength is mandatory. Mixes are designed to achieve 4,000 PSI within 12 to 18 hours to allow for stripping and handling.
- Cement Type: Type III (High Early Strength) Portland cement, or Type I/II supplemented with non-chloride accelerators (e.g., calcium nitrate).
- Curing: Steam curing or heated enclosure curing is standard to accelerate the hydration process.
Admixture Protocols for Freeze-Thaw Durability
Regardless of the curb type, any concrete exposed to de-icing salts and freezing temperatures requires a robust air-void system. The Federal Highway Administration's slipform paving guidelines emphasize that extruded curbs are particularly vulnerable to air-void collapse due to the high shear forces inside the extrusion auger.
Common Failure Modes and Mix Adjustments
Understanding how and why concrete curbs fail allows engineers to proactively adjust the mix design.
Surface Scaling and Spalling
The Failure: The top 1/8 to 1/4 inch of the curb face flakes off after the first winter, exposing the aggregate. This is almost always caused by a poor air-void system at the surface or finishing practices that trap bleed water, creating a high w/c ratio at the surface.
The Fix: Strictly prohibit the addition of water to the surface during finishing. Apply a white-pigmented, wax-based curing compound (meeting ASTM C309) at a rate of 200 square feet per gallon immediately after final finishing to lock in moisture and ensure proper hydration of the surface paste.
Transverse Cracking
The Failure: Random vertical cracks appearing every 15 to 30 feet in extruded barrier curbs.
The Fix: This is a jointing issue, not strictly a mix issue, but the mix's shrinkage potential plays a role. Extruded curbs must be saw-cut to a depth of 1/4 the curb height. For a 6-inch curb, saw-cut 1.5 inches deep. Cuts must be made within 4 to 12 hours of placement. Delaying saw-cutting allows tensile stresses from drying shrinkage to exceed the concrete's early tensile strength, resulting in uncontrolled cracking.
Extrusion Slump (Loss of Definition)
The Failure: The top corners of the curb round off or the vertical face bulges outward immediately after exiting the die.
The Fix: Increase the fine aggregate fraction. Adjust the sand-to-total-aggregate ratio to between 40% and 45%. If the sand is too coarse, the mix lacks the fines required to create a rigid, cohesive matrix. Incorporating 10% to 15% Class F fly ash can also improve extrudability and shape retention without adding excess water.
Cost Breakdown: Extruded vs. Precast vs. CIP
Project budgets heavily influence the selection of curb types. The following table outlines current estimated costs for standard commercial and municipal applications, factoring in material, labor, and equipment mobilization.
| Forming Method | Material Cost (per CY) | Installed Cost (per Linear Foot) | Best Use Case |
|---|---|---|---|
| Extruded (Slipform) | $160 - $190 | $4.50 - $8.00 | Long, straight runs; parking lot perimeters; highway medians. |
| Cast-in-Place (CIP) | $180 - $220 | $14.00 - $22.00 | Tight radii, intersections, short runs where mobilizing a paver is cost-prohibitive. |
| Precast | N/A (Priced by LF) | $18.00 - $28.00 | Architectural finishes, areas requiring immediate traffic opening, retrofit projects. |
Note: Installed costs for extruded curbs drop significantly on high-volume projects (e.g., over 5,000 linear feet) due to the amortization of slipform paver mobilization fees, which can range from $2,500 to $5,000.
Specification Checklist for Contractors
Before pouring or extruding, verify the following parameters with your ready-mix supplier and site superintendent:
- Verify Aggregate Gradation: Confirm the batch ticket shows a maximum aggregate size of 3/8 inch for extrusion, or 3/4 inch for CIP.
- Check Air Content at the Truck: Perform an air test (ASTM C231) on the first truck. If extruding, target 6.5% to account for the 1% to 2% air loss that typically occurs through the paver's auger.
- Monitor Slump Strictly: Reject any truck arriving with a slump greater than 1 inch for extrusion. Do not allow the driver to add water at the site to 'make it flow better'—this will guarantee a slumped, unusable curb.
- Plan the Saw-Cut Schedule: Ensure the saw-cutting crew is scheduled and on-site with early-entry dry-cut saws. The window for cutting zero-slump extruded concrete is remarkably short compared to flatwork.
- Protect from Rain: Extruded curbs are highly vulnerable to rain damage in the first 4 hours before the curing compound sets. Have polyethylene sheeting and weighted lath ready to cover fresh extrusions if storms threaten.
Written by
David NakamuraDavid Nakamura is a licensed architect (AIA) and construction technology writer focused on sustainable building methods, mass timber engineering, and high-performance building envelopes. He holds a Master of Architecture from the University of Washington and is a certified Passive House Consultant (CPHC). David spent eight years at the Seattle firm Mithun, where he led the design of three LEED Platinum projects, before founding his own practice specializing in net-zero residential design. He serves on the editorial advisory board of GreenBuilder Magazine and has authored peer-reviewed papers on cross-laminated timber (CLT) connections for the Journal of Structural Engineering. In his spare time, David teaches woodworking at Pratt Fine Arts Center and kayaks the Puget Sound.
More from David Nakamura
View all
Construction Cost
Labor Cost to Build a Deck Per Sq Ft: 2026 Installation Guide
Discover the exact labor cost to build a deck per sq ft in 2026. This installation guide breaks down contractor rates, complexity factors, and hidden fees.
Aug 4, 2026

Construction Cost
How Much Does It Cost to Build a 3 Bedroom House? Financing Guide
Learn exactly how much it costs to build a 3 bedroom house and explore 2026 financing options, construction loan types, and budget frameworks for your build.
Aug 4, 2026

Construction Cost
Cost to Build a Tennis Court: 2026 Guide
How much does it cost to build a tennis court in 2026? Breakdowns for asphalt, concrete, and synthetic surfaces plus fencing and lighting.
Jul 30, 2026