Concrete Wire Mesh Maintenance: Cleaning Rust Stains & Spall Repair
Learn how to clean rust stains from shallow concrete wire mesh, repair spalled slabs, and maintain stored mesh on-site with this expert playbook.
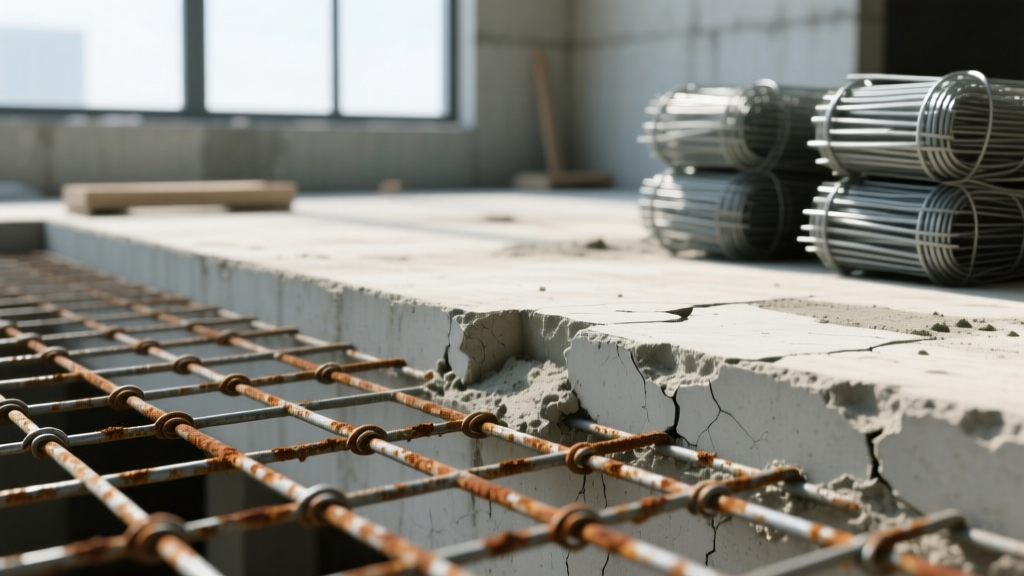
The Hidden Culprit: Why Concrete Wire Mesh Causes Surface Staining
When embedded metals corrode, the resulting iron oxide expands up to six times its original volume. In a properly engineered slab, concrete wire mesh (WWM) is positioned with a minimum 2-inch concrete cover to protect it from moisture and chlorides. However, poor site practices—such as failing to use rebar chairs or pulling the mesh too high during the screeding process—often leave the mesh within 1/2 inch of the surface.
This shallow placement leads to two distinct maintenance nightmares: rust bleed (unsightly orange streaks migrating through the pores of intact concrete) and spalling (the physical fracturing and flaking of the concrete surface above the rusting wire). This playbook provides exact protocols for cleaning surface stains, executing structural spall repairs, and maintaining stored mesh inventory on active 2026 job sites.
Playbook Phase 1: Cleaning Rust Bleed from Intact Concrete
If the concrete surface is structurally sound but marred by orange streaks originating from shallow wire mesh, chemical extraction is required. Mechanical scrubbing alone will not remove stains that have penetrated the capillary network of the cement paste.
The Phosphoric Acid Extraction Protocol
- Surface Prep: Sweep the area and pre-wet the surrounding concrete with clean water to prevent the cleaner from migrating into unaffected zones.
- Chemical Application: Apply a 10% to 15% phosphoric acid solution (e.g., PROSOCO Sure Klean 600 or a dedicated commercial rust remover). Avoid muriatic (hydrochloric) acid, which can aggressively etch the cement paste and leave behind chlorides that accelerate future corrosion.
- Dwell and Agitate: Allow the solution to dwell for 5 to 8 minutes. Agitate vigorously using a stiff nylon bristle brush. Never use a steel wire brush on the surface, as it will embed microscopic steel particles that will rust and create new stains.
- High-Pressure Rinse: Neutralize and rinse the area using a pressure washer rated at 3,000 PSI equipped with a 15-degree white nozzle. Maintain a consistent 12-inch distance from the surface.
Chemical cleaning only removes the visible iron oxide stain. If the wire mesh remains shallow and exposed to moisture, the rust bleed will return within 3 to 6 months. For permanent resolution, the surface must be sealed with a penetrating silane/siloxane water repellent after cleaning to starve the shallow mesh of oxygen and moisture.
Playbook Phase 2: Repairing Spalled Concrete with Exposed Mesh
When rust expansion exceeds the tensile strength of the concrete cover (typically around 500 psi), the surface spalls, exposing the wire mesh directly to the elements. According to the International Concrete Repair Institute (ICRI), simply troweling mortar over a rusting wire is a guaranteed failure point. The mesh must be prepped and primed before patching.
Step-by-Step Spall Remediation
1. Saw-Cut and Demolition: Use a 4.5-inch diamond blade grinder to saw-cut the perimeter of the spall to a depth of 1/4 inch. This creates a clean, straight edge and prevents feather-edging the patch. Chip out the loose concrete using a cold chisel and hammer until you reach sound substrate.
2. Mesh Excavation or Priming: If the exposed wire mesh is less than 3/4 inch below the final desired surface, it will continue to rust and blow the new patch. Use a die grinder or diamond blade to cut the shallow wire away entirely. If the mesh is deep enough to remain, mechanically clean it to bright metal using a wire cup brush, then coat it with a zinc-rich primer like SikaTop Armatec 110 EpoCem to halt corrosion.
3. Patch Application: Dampen the substrate (SSD condition—saturated surface dry) and apply a polymer-modified structural patching mortar. Trowel flush and finish to match the surrounding texture.
2026 Patching Compound Selection Matrix
| Product Type | Best Application | Min. Thickness | Est. Cost (2026) | Cure Time to Foot Traffic |
|---|---|---|---|---|
| Vinyl Concrete Patcher (e.g., Quikrete) | Shallow spalls, non-structural driveways | 1/4 inch | $18 - $22 / 50lb bag | 24 Hours |
| Polymer-Modified Structural Mortar (e.g., Sika MonoTop) | Deep spalls, load-bearing slabs, vertical edges | 1/2 inch | $35 - $45 / 50lb bag | 12 - 18 Hours |
| Epoxy-Based Concrete Repair (e.g., Simpson Strong-Tie) | Chemical exposure zones, heavy forklift traffic | 1/8 inch | $60 - $85 / 2-gallon kit | 6 - 8 Hours |
When saw-cutting and grinding concrete spalls, you must comply with OSHA's respirable crystalline silica standards. Use a grinder equipped with a HEPA-filtered dust shroud and wear a N95 or P100 half-face respirator to avoid severe pulmonary penalties and health risks.
Playbook Phase 3: Site Maintenance and Prep for Stored Wire Mesh
Maintenance of concrete wire mesh isn't just about fixing finished slabs; it also involves managing material inventory on active job sites. W1.4/W1.4 (6x6) welded wire mesh is highly susceptible to atmospheric corrosion when stored outdoors before a pour.
Evaluating Surface Rust: Mill Scale vs. Flaky Corrosion
- Light Surface Rust (Mill Scale): A tight, orange-brown film is actually beneficial. Research indicates that light surface rust increases the surface roughness of the wire, improving the mechanical bond between the steel and the cement paste. Action: Leave it alone and pour.
- Flaky, Scaled Rust: If the rust flakes off when rubbed with a gloved hand, it has penetrated deep enough to reduce the wire's cross-sectional area and weaken the bond. Action: Mechanical cleaning required.
Site Storage and Cleaning Protocol
- Elevation: Never store wire mesh directly on soil. Elevate bundles at least 4 inches off the ground using timber dunnage to prevent ground-moisture wicking.
- Covering: If the pour is delayed by more than 14 days, cover the bundles with 6-mil polyethylene sheeting, leaving the ends open for ventilation to prevent condensation buildup (the "greenhouse effect" which accelerates rusting).
- Mechanical Descaling: For heavily rusted mesh that must be salvaged, run the sheets through a mechanized wire-brush descaler, or use a 7-inch angle grinder with a knotted wire cup brush. Follow immediately with a pour to prevent flash-rusting.
Diagnostic FAQ: Wire Mesh vs. Rebar Corrosion
Accurately identifying the source of the rust dictates the repair strategy. Use this diagnostic framework before ordering materials.
Q: How can I tell if the rust stain is from wire mesh or structural rebar?
A: Look at the stain pattern. Wire mesh (typically W1.4/W1.4 or W2.9/W2.9) will produce a repeating grid pattern of stains spaced exactly 4 or 6 inches apart. Rebar stains usually appear as long, continuous linear streaks spaced 12 to 18 inches apart, often accompanied by deep longitudinal cracking along the rebar's path.
Q: Can I just paint over the rust stain with an opaque concrete sealer?
A: No. Iron oxide will bleed through most acrylic and epoxy sealers within weeks. You must chemically extract the stain using phosphoric acid first. If the stain persists due to an active, shallow wire, you must cut out the concrete above the wire, remove the wire segment, and patch the void before sealing.
Q: Does adding calcium chloride (accelerator) to the concrete mix cause wire mesh to rust?
A: Yes. Calcium chloride introduces free chloride ions into the cement matrix, which destroy the passive alkaline oxide layer that protects embedded steel. For slabs containing wire mesh, strictly use non-chloride accelerators (NCAs) like calcium nitrate if cold-weather pouring is required.