Epoxy Floor vs Polished Concrete: Repair & Troubleshooting
Compare epoxy floor vs polished concrete repair costs, failure modes, and troubleshooting steps. Expert guide to fixing peeling, spalling, and dulling.

Failure Mode Matrix: Epoxy vs. Polished Concrete
When evaluating an epoxy floor vs polished concrete for long-term facility management, the deciding factor is rarely the initial installation cost—it is the troubleshooting and repair protocol required when the system inevitably degrades. Epoxy relies on a chemical bond and a sacrificial wear layer, while polished concrete relies on the mechanical densification and micro-abrasion of the cementitious matrix itself. Understanding their distinct failure modes is the first step in accurate diagnosis.
| Failure Symptom | Epoxy Coating Root Cause | Polished Concrete Root Cause |
|---|---|---|
| Surface Peeling / Flaking | Moisture vapor transmission (MVT) exceeding 3 lbs/1000 sq ft/24 hrs; inadequate mechanical profiling. | Rare. Indicates a topical guard failure or severe freeze-thaw delamination of the cream layer. |
| Loss of Gloss / Dulling | UV degradation (if non-aliphatic); micro-scratching from silica grit in traffic lanes. | Depletion of the penetrating chemical guard; micro-abrasion from unsealed aggregate exposure. |
| Impact Damage | Brittle chipping exposing the raw concrete substrate; lack of flexible elastomeric base. | Spalling or pop-outs; usually tied to hard-troweling delamination or aggregate fracture. |
| Tire Marks / Staining | Hot tire pickup (plasticizer migration softening the epoxy resin). | Oil or chemical penetration due to insufficient lithium silicate densifier application. |
Troubleshooting Epoxy Floor Failures
Epoxy systems are essentially thick, cross-linked plastic membranes. When they fail, they rarely fail gracefully; they delaminate, chip, or blister. Repairing these defects requires addressing the substrate environment, not just the visual symptom.
Delamination and Moisture Vapor Blistering
If an epoxy floor is peeling in large sheets or forming fluid-filled blisters, the culprit is almost always hydrostatic pressure or Moisture Vapor Transmission (MVT). Standard 100% solids epoxies will saponify (turn to soap) when exposed to high alkalinity and moisture.
The Repair Protocol: 1. Saw-cut the perimeter of the failed area to prevent feather-edging. 2. Shot-blast the exposed concrete to a CSP-3 (Concrete Surface Profile) standard. 3. Apply a moisture-mitigating primer, such as Sikafloor-81 EpoCem or Mapei Primer SN, which can tolerate up to 100% RH. 4. Trowel a high-build 100% solids epoxy mortar (e.g., Sikafloor-264) to match the surrounding elevation. 5. Broadcast quartz sand into the wet mortar for slip resistance and topcoat with an aliphatic polyurethane to prevent future UV yellowing.
Hot Tire Pickup and Chemical Softening
In automotive bays or residential garages, epoxy floors often develop permanent, sticky tire marks. This occurs when plasticizers in hot rubber tires migrate into the epoxy, breaking down the cross-link density. The Fix: You cannot simply paint over this. The softened epoxy must be scraped away, the substrate solvent-wiped with xylene, and recoated with a highly cross-linked polyaspartic or polyurethane topcoat (such as VersaFlex FSS 45), which is chemically immune to tire plasticizers.
Troubleshooting Polished Concrete Defects
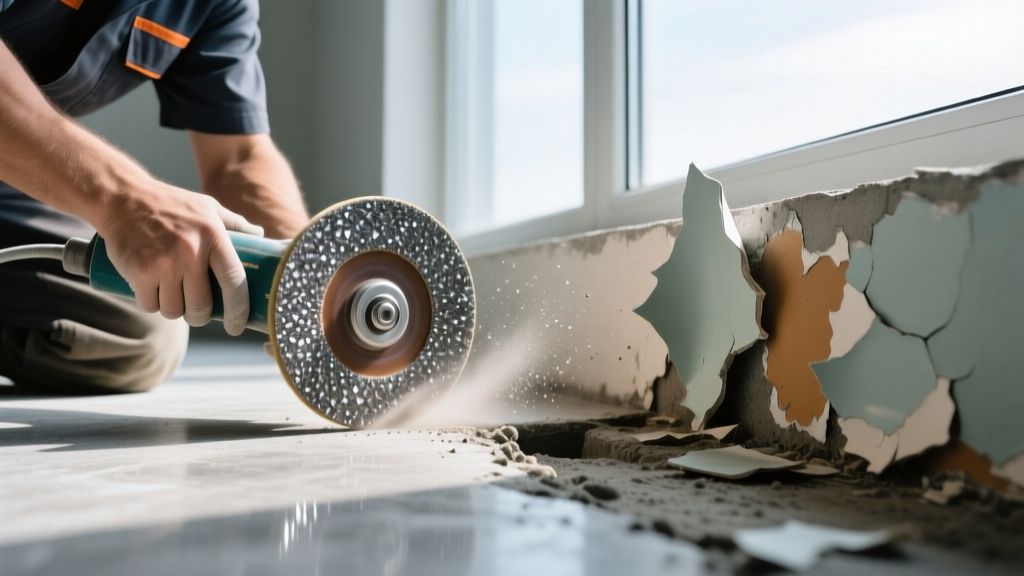
Polished concrete is not a coating; it is the slab itself, densified and mechanically refined. Therefore, troubleshooting requires masonry and lapidary techniques rather than coating applications. For comprehensive industry standards on polishing, refer to the guidelines published by the American Society of Concrete Contractors (ASCC).
Micro-Scratching and Gloss Depletion
When a polished floor loses its mirror-like reflectivity and looks hazy, the topical stain guard (often a fluorochemical or silicone-based sealer) has worn away, exposing the micro-pores of the concrete to dirt and abrasion.
The Repair Protocol: 1. Deep clean the floor using an alkaline cleaner and an autoscrubber with a red or white pad to strip embedded soils. 2. Re-apply a penetrating lithium silicate densifier (e.g., Prosoco Consolideck LS). The lithium ions react with free lime (calcium hydroxide) in the concrete to form calcium silicate hydrate (C-S-H), permanently hardening the surface. 3. Burnish the floor with a high-speed propane or electric burnisher (1,500 to 2,100 RPM) fitted with a diamond-impregnated maintenance pad (3,000-grit equivalent). The friction heat melts the microscopic silica into a glass-like finish.
Spalling, Pop-Outs, and Aggregate Fracture
Spalling (shallow craters) on a polished floor is a structural defect, often caused by freeze-thaw cycles in exterior applications or aggressive hard-troweling during the original pour that trapped bleed water just below the surface.
The Fix: Use a rapid-setting, polymer-modified cementitious repair mortar tinted to match the slab's aggregate color (e.g., Euco EucoRepair). After the patch cures (usually 2 to 4 hours), you must integrate it into the surrounding floor. Use a planetary grinder (like a Husqvarna PG 820RC) starting with a 100-grit metal bond diamond to flatten the patch, then step through 200-grit, 400-grit, and 800-grit resin bonds to blend the gloss seamlessly.
2026 Repair Cost & Protocol Comparison
Budgeting for floor maintenance requires understanding the lifecycle costs. The table below outlines current market rates for professional remediation.
| Metric | Epoxy Floor Remediation | Polished Concrete Remediation |
|---|---|---|
| Spot Repair (per sq ft) | $8.00 - $14.00 (High prep/labor intensity) | $3.50 - $7.00 (Grinding and densifying) |
| Full Surface Restoration | $4.50 - $7.50 / sq ft (Tear-off and recoat) | $1.50 - $3.00 / sq ft (Honing and burnishing) |
| Downtime / Cure Time | 24 to 72 hours before heavy traffic | 0 to 2 hours (Immediate traffic upon burnishing) |
| Expected Repair Lifespan | 3 to 7 years (Depending on UV and MVT) | 10 to 15+ years (Permanent matrix alteration) |
Decision Framework: When to Repair vs. Replace
Facility managers and homeowners often face the dilemma of patching a failing floor versus tearing it out. Use this diagnostic framework to make the correct capital decision, aligned with the structural repair principles outlined by the International Concrete Repair Institute (ICRI) and the American Concrete Institute (ACI).
- Choose Spot Repair (Epoxy) if: The failure is isolated to high-impact zones (e.g., forklift drop zones), the substrate RH is below 75%, and the surrounding coating still exhibits strong cross-hatch adhesion (ASTM D3359 Class 4B or 5B).
- Choose Full Replacement (Epoxy) if: More than 30% of the floor is delaminating, or if widespread MVT blistering indicates a missing or failed vapor retarder beneath the slab. Spot repairs will simply shift the hydrostatic pressure to adjacent weak points.
- Choose Maintenance Restoration (Polished) if: The floor is merely dull, stained, or micro-scratched. Polished concrete almost never requires full 'replacement' unless the slab itself is structurally compromised.
- Choose Deep Grinding and Densification (Polished) if: The floor suffers from widespread pop-outs or hard-trowel delamination. Grind past the weak cream layer (typically 1/16 to 1/8 inch deep) to expose the structural 'salt and pepper' aggregate, then re-densify and polish.
Ultimately, when comparing an epoxy floor vs polished concrete from a pure troubleshooting perspective, polished concrete offers a vastly superior long-term maintenance profile. While epoxy provides a seamless, chemical-resistant barrier, it is a finite wear layer that will eventually require complete tear-off. Polished concrete, by contrast, is a permanent substrate modification that can be endlessly restored to its original specification with minimal downtime and lower lifecycle costs.
Written by
David NakamuraDavid Nakamura is a licensed architect (AIA) and construction technology writer focused on sustainable building methods, mass timber engineering, and high-performance building envelopes. He holds a Master of Architecture from the University of Washington and is a certified Passive House Consultant (CPHC). David spent eight years at the Seattle firm Mithun, where he led the design of three LEED Platinum projects, before founding his own practice specializing in net-zero residential design. He serves on the editorial advisory board of GreenBuilder Magazine and has authored peer-reviewed papers on cross-laminated timber (CLT) connections for the Journal of Structural Engineering. In his spare time, David teaches woodworking at Pratt Fine Arts Center and kayaks the Puget Sound.
More from David Nakamura
View all
Construction Cost
Labor Cost to Build a Deck Per Sq Ft: 2026 Installation Guide
Discover the exact labor cost to build a deck per sq ft in 2026. This installation guide breaks down contractor rates, complexity factors, and hidden fees.
Aug 4, 2026

Construction Cost
How Much Does It Cost to Build a 3 Bedroom House? Financing Guide
Learn exactly how much it costs to build a 3 bedroom house and explore 2026 financing options, construction loan types, and budget frameworks for your build.
Aug 4, 2026

Construction Cost
Cost to Build a Tennis Court: 2026 Guide
How much does it cost to build a tennis court in 2026? Breakdowns for asphalt, concrete, and synthetic surfaces plus fencing and lighting.
Jul 30, 2026