Repairing Cracks Across Different Types of Concrete Blocks
Learn how to diagnose and repair masonry failures based on the specific types of concrete blocks used, including hollow, split-face, and AAC units.

Identifying Your Block: The First Step in Troubleshooting
Applying a universal repair approach to masonry failures is a primary cause of recurring damage. The physical properties, vapor permeability, and structural capacity of concrete masonry units (CMUs) vary drastically depending on their manufacturing process and aggregate composition. Before selecting a sealant, mortar, or injection resin, you must accurately identify the specific block type comprising the failing wall.
| CMU Type | Visual / Physical Identifiers | Weight (Nominal 8x8x16) | Primary Vulnerability |
|---|---|---|---|
| Hollow Loadbearing (Normal Weight) | Smooth or scored gray face; two or three hollow cores; dense aggregate. | 28 - 35 lbs | Stepped cracking at mortar joints; differential settlement. |
| Split-Face Architectural | Rough, fractured, jagged exterior face; often colored with integral pigments. | 30 - 38 lbs | Moisture intrusion; severe efflorescence; freeze-thaw spalling. |
| Autoclaved Aerated Concrete (AAC) | Chalky white or light gray; completely solid but highly porous; can be cut with a standard wood saw. | 10 - 15 lbs | Impact spalling; moisture retention; parge coat delamination. |
| Solid Loadbearing | No hollow cores; extremely heavy; used in high-load piers or retaining walls. | 45 - 55 lbs | Thermal expansion cracking; horizontal shear failures. |
Failure Mode 1: Stepped Cracking in Hollow Loadbearing Blocks
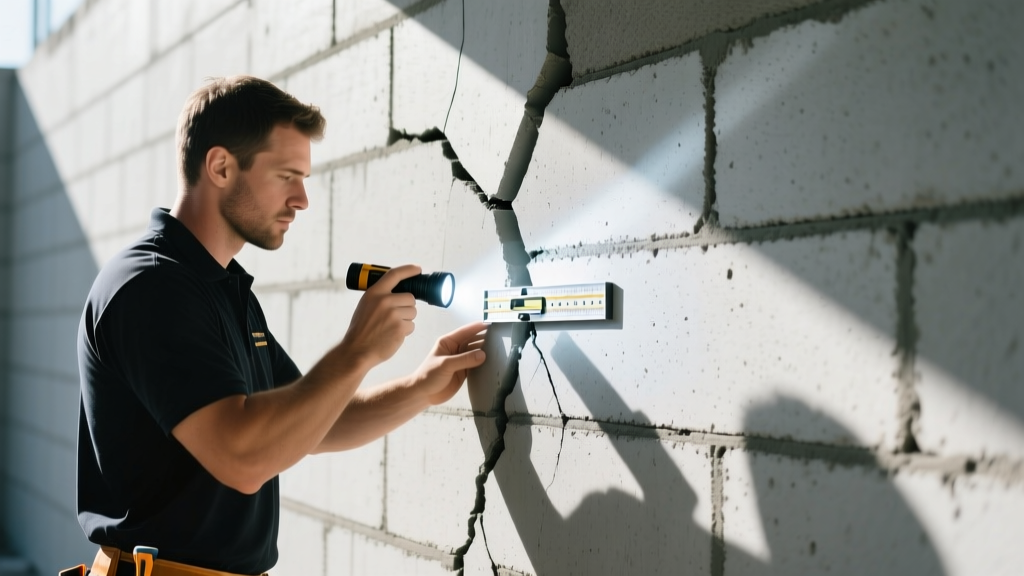
Stepped cracking that follows the mortar joints in standard hollow CMU walls is typically caused by differential foundation settlement or thermal expansion and contraction. Because the blocks themselves are stronger than the mortar joints, the mortar acts as a sacrificial fuse. The repair strategy depends entirely on whether the crack is active (still moving) or dormant.
Dormant Cracks: Epoxy Injection
If the settlement has stabilized (verified by installing brittle glass tell-tales across the crack for 60 days), use a high-modulus structural epoxy to restore the wall's tensile strength.
- Routing: Use a diamond-tipped angle grinder to rout the crack to a minimum depth of 3/4 inch and a width of 1/2 inch, creating a V-shaped profile.
- Surface Sealing: Apply an epoxy paste surface seal over the routed crack, embedding plastic injection ports every 8 to 12 inches.
- Injection: Once the paste cures (usually 4-6 hours at 70°F), inject a low-viscosity structural epoxy (such as Sika Sikadur-52) starting from the lowest port. Stop injecting when epoxy flows from the adjacent port above it.
- Cost Expectation: Professional epoxy injection typically ranges from $12 to $18 per linear foot in 2026, depending on wall thickness and access difficulty.
Active Cracks: Polyurethane Sealant
If the crack is active due to seasonal thermal cycling, rigid epoxy will simply crack again. Instead, use a high-movement polyurethane sealant.
- Rout the joint to a uniform 1/2 inch width and 3/4 inch depth.
- Insert a closed-cell polyethylene backer rod, ensuring it is compressed by 25% to 50% to create an hourglass shape in the sealant profile. This prevents three-sided adhesion, which causes sealant tearing.
- Apply a primer if required by the manufacturer, then tool a Class 25 or Class 50 polyurethane sealant (e.g., Tremco Dymonic FC) into the joint.
Failure Mode 2: Moisture Intrusion and Efflorescence in Split-Face Blocks
Split-face blocks are notoriously vulnerable to water penetration. The fractured surface dramatically increases the masonry's exposed surface area, creating microscopic pockets that trap wind-driven rain. When this moisture migrates to the interior and evaporates, it leaves behind white, crystalline salt deposits known as efflorescence.
Never apply film-forming acrylic sealers to split-face masonry. Acrylics trap moisture vapor inside the block. When temperatures drop below freezing, the trapped water expands, causing the architectural face to spall and delaminate in large chunks.
The Silane/Siloxane Repair Protocol
To waterproof split-face blocks without trapping vapor, you must use a penetrating silane/siloxane water repellent. These chemicals react with the free lime and silica in the concrete to form a hydrophobic resin within the pores, allowing water vapor to escape while blocking liquid water.
- Efflorescence Removal: Dry-brush the wall with a stiff natural-bristle brush. For heavy deposits, apply a diluted masonry cleaner (like PROSOCO Sure Klean Vana-Trol) and rinse with a low-pressure (under 800 PSI) power washer. High pressure will erode the mortar joints.
- Drying Time: Allow the wall to dry completely for a minimum of 72 hours. Siloxane will not penetrate damp pores.
- Application: Flood-coat the wall with a silane/siloxane blend (such as PROSOCO Siloxane PD). Apply from the bottom up to prevent streaking. The material must be applied to the point of refusal, ensuring deep penetration into the jagged split-face profile.
Failure Mode 3: Spalling and Crumbling in Lightweight AAC Blocks
Autoclaved Aerated Concrete (AAC) is a lightweight, precast foam concrete. While it offers superior thermal insulation (R-value of roughly 1.25 per inch), its high porosity and low compressive strength make it highly susceptible to impact damage and freeze-thaw spalling if the exterior parge coat is compromised.
Standard Portland cement-based patching compounds have a vapor permeability (perm rating) of less than 1.0, while AAC requires materials with a perm rating greater than 10.0. Using standard cement on AAC traps moisture behind the patch, leading to catastrophic freeze-thaw failure of the surrounding block. Always use AAC-specific repair mortars.
AAC Patching Procedure
- Preparation: Use a masonry rasp or coarse sandpaper to remove all crumbled and friable AAC material until you reach a solid, firm substrate. Bevel the edges of the repair area slightly inward to create a mechanical lock.
- Priming: Brush away all dust and apply an AAC-specific primer or a diluted acrylic bonding agent to the exposed pores. This prevents the dry AAC from sucking the moisture out of the repair mortar too quickly, which would cause plastic shrinkage cracking.
- Patching: Mix an AAC-compatible polymer-modified repair mortar (such as Hebel or Ytong patching compound). Trowel the material into the void in layers no thicker than 1/2 inch. If the damage is deeper, allow each layer to set for 2 hours before applying the next.
- Finishing: While the final layer is thumbprint-hard, use a float or rasp to texture the patch to match the surrounding block profile before applying a breathable, mineral-based exterior silicate paint.
Decision Matrix: Matching Repair Material to Block Type
Use this diagnostic matrix to quickly select the correct chemical and physical repair strategy based on your field assessment. For comprehensive industry standards on masonry repair, refer to the National Concrete Masonry Association (NCMA) TEK Bulletins and the Masonry Advisory Council Technical Resources.
| Block Type | Primary Failure Symptom | Diagnostic Tool Required | Approved Repair Material | Material Cost (2026) |
|---|---|---|---|---|
| Hollow Loadbearing | Horizontal mid-wall cracking | Crack width gauge & laser level | Carbon fiber reinforcement strips + structural epoxy | $25 - $40 / linear ft |
| Hollow Loadbearing | Stepped joint cracking (dormant) | Glass tell-tales (60-day monitor) | Low-viscosity injection epoxy (Modulus > 100,000 psi) | $12 - $18 / linear ft |
| Split-Face | Severe efflorescence & damp interior | Moisture meter & visual inspection | Silane/Siloxane penetrating water repellent | $0.45 - $0.85 / sq ft |
| AAC | Localized impact spalling | Visual & tap test (hollow sound) | Polymer-modified AAC repair mortar (High perm rating) | $55 - $75 / 55lb bag |
| Solid Loadbearing | Vertical thermal expansion cracks | Plumb bob & transit level | Compression sealant & expansion joint retrofit | $15 - $22 / linear ft |
Advanced Diagnostics: When to Abandon Repair and Call an Engineer
Not all masonry damage can be resolved with surface repairs or injections. Certain failure modes indicate severe structural compromise that requires immediate evaluation by a licensed structural engineer. Do not attempt to seal or patch the following conditions:
- Excessive Lateral Deflection: If a loadbearing CMU wall bows inward more than 1/2 inch over an 8-foot vertical span (exceeding the standard L/600 deflection limit), the wall has lost its axial load capacity.
- Wide Shear Cracks: Any diagonal crack wider than 1/4 inch that extends from the top corner of a window or door opening down to the foundation indicates active shear failure or severe differential settlement.
- Crushed Block Edges: If the top courses of a hollow block wall show crushing, spalling, or flaking at the bearing surface under a steel beam, the wall is being overloaded beyond its compressive strength (typically 1,500 to 2,000 psi for standard CMU). This requires immediate shoring and structural reinforcement.
- Rust Jacking: If horizontal cracks are accompanied by rust staining and the mortar joint is actively pushing outward, the internal steel joint reinforcement or bond beam rebar is corroding. The expanding rust (which occupies up to 7 times the volume of the original steel) will eventually shatter the block face. This requires selective demolition and rebar replacement, not surface patching.
Accurately diagnosing masonry damage requires understanding the distinct material science behind the different types of concrete blocks. By matching the repair material's modulus of elasticity, vapor permeability, and compressive strength to the specific CMU type, you ensure a durable, long-lasting restoration that addresses the root cause of the failure rather than merely masking the symptom.
Written by
Sarah WhitfieldSarah Whitfield is a chartered quantity surveyor (MRICS) and construction cost analyst with 15 years of experience in material pricing, procurement strategy, and project budgeting. She earned her degree in Construction Management from the University of Reading (UK) and has worked on projects ranging from $2M custom homes to $180M mixed-use developments across North America and Europe. Sarah currently leads cost estimating for BuildMat Insight, maintaining a proprietary database of 4,000+ material price points updated quarterly. She is a frequent contributor to RSMeans cost data panels and has presented at the International Cost Engineering Council (ICEC) congress. Based in Denver, CO, Sarah is an avid trail runner and volunteer mentor for Women in Construction.
More from Sarah Whitfield
View all
Wood & Lumber
What Are the Different Types of Wood? A Builder's Guide
Compare structural softwoods, finish hardwoods, and engineered lumber. Analyze Janka ratings, MOE values, and 2026 pricing for construction.
Aug 4, 2026

Walls & Panels
Steel Framing vs Wood Framing: Corrosion and Moisture Defense
Compare steel framing vs wood framing for moisture resistance. Learn about galvanized coatings, condensation risks, and corrosion protection strategies.
Jul 21, 2026

Stone & Masonry
How to Cut Stone Veneer: Wet Saw vs Grinder Comparison
Compare the best tools for cutting stone veneer. We review wet saws, angle grinders, and chop saws to help you achieve clean, chip-free cuts.
Jul 21, 2026