Fiberglass vs Concrete Pools: Installation Guide & Timelines
Compare fiberglass vs concrete pools installation. Discover timelines, excavation costs, structural prep, and backfill protocols for your 2026 project.

The Core Installation Divergence: Drop-In vs. Built-Up
When evaluating fiberglass vs concrete pools, homeowners often focus on surface textures and long-term maintenance. However, the most profound differences emerge during the installation phase. Fiberglass pools are manufactured off-site in controlled factory environments and delivered as a single, monolithic shell. Concrete pools (specifically shotcrete or gunite) are built entirely in-situ, requiring complex formwork, steel reinforcement, and pneumatic application of the concrete mix. Understanding this fundamental divergence—drop-in versus built-up—is critical for assessing site feasibility, project timelines, and true installation costs.
Site Preparation, Access, and Excavation Realities
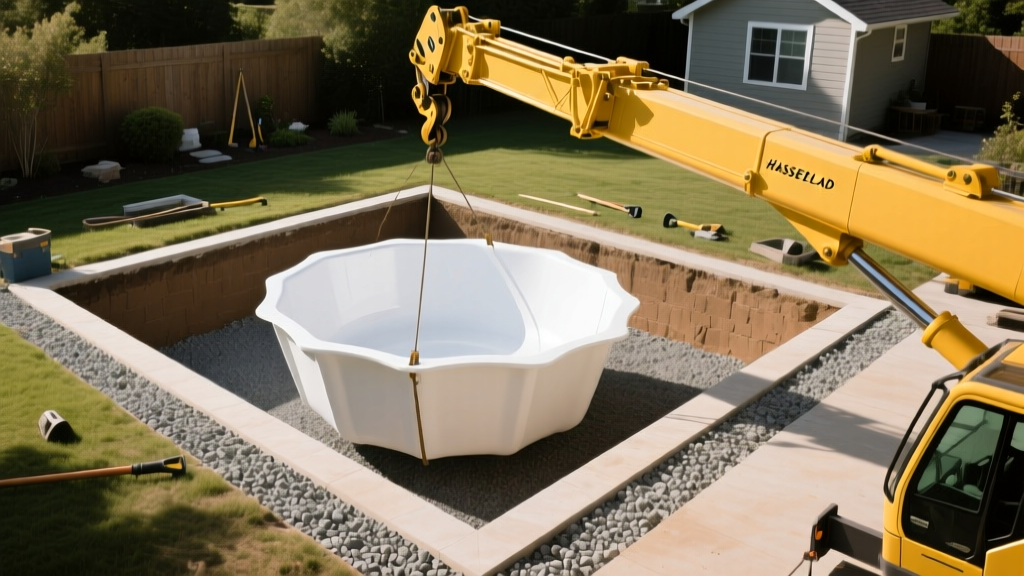
The physical footprint of your yard and the access points from the street will immediately dictate which pool type is viable. Fiberglass shells are massive, one-piece structures that cannot be disassembled. Delivering and setting a 16x32 foot fiberglass shell requires a 100-ton hydraulic crane with a boom reach that often extends over your house or neighboring structures.
Conversely, concrete pools require standard access for heavy machinery. A compact track loader (like a Bobcat) and dump trucks only need an 8 to 10-foot wide path. However, concrete pools generate significantly more excavation spoils. Because concrete walls are typically 8 to 12 inches thick (plus a 6-inch gunite layer and exterior working space), the excavated hole must be 2 to 3 feet wider on all sides than the final waterline dimension. A fiberglass shell, with walls only 3/8 to 1/2 inch thick, requires a much tighter excavation envelope, resulting in 30% to 40% less dirt removal.
Step-by-Step Installation Timelines
The timeline disparity between the two materials is staggering. While a fiberglass pool can be filled with water in a matter of days, a concrete pool requires weeks of curing before water is even introduced.
| Phase | Fiberglass Pool | Concrete (Gunite) Pool |
|---|---|---|
| Excavation & Prep | 1 - 2 Days | 3 - 5 Days |
| Structural Shell Setting | 1 Day (Crane Lift) | 5 - 7 Days (Steel & Gunite) |
| Plumbing & Backfill | 2 - 3 Days | 2 - 3 Days (Rough-in) |
| Curing / Settling Time | None (Immediate fill) | 28 Days (Moisture curing) |
| Decking & Coping | 3 - 5 Days | 5 - 7 Days |
| Plaster & Final Fill | N/A (Gelcoat is factory-set) | 2 - 3 Days |
| Total Time to Swim | 2 - 4 Weeks | 8 - 12 Weeks |
Structural Support and Backfill Protocols
The most critical phase of any pool installation is managing the earth and hydrostatic pressures surrounding the shell. The protocols for fiberglass vs concrete pools are entirely different, and improper execution here leads to catastrophic structural failures.
Fiberglass: The Hydrostatic Equalization Mandate
A fiberglass shell is incredibly strong when filled with water, but highly vulnerable to external pressure when empty. According to guidelines published by the Pool & Hot Tub Alliance (PHTA), the backfill material for a fiberglass pool must be clean, 3/8-inch crushed limestone or granite. Sand is strictly prohibited because it retains water and can cause frost heave, while pea gravel shifts too easily and fails to lock into place.
During installation, the pool must be filled with water and backfilled with stone simultaneously. The water level inside the shell must never be more than 12 to 18 inches lower than the backfill level outside the shell. This equalizes the hydrostatic pressure. If a contractor backfills the shell without filling it with water, the lateral earth pressure will cause the fiberglass walls to bow inward, permanently ruining the pool's structural integrity.
Concrete: Steel Reinforcement and Pneumatic Application
Concrete pools rely on a rigid, engineered skeleton. The excavation is lined with a grid of No. 4 (1/2-inch) steel rebar, typically tied on 10-inch centers. The concrete mix is pneumatically projected onto this steel cage at high velocity (gunite) or mixed with water at the nozzle (shotcrete). The American Concrete Institute (ACI) mandates that structural shotcrete achieve a minimum compressive strength of 4,000 PSI at 28 days. Because the shell is highly porous immediately after application, it must be kept continuously moist for at least 7 to 14 days to ensure proper hydration and prevent shrinkage cracking before the interior plaster is applied.
2026 Installation Cost Breakdown
While the base price of a fiberglass shell often appears lower than a concrete pool, the heavy machinery and specialized materials required for installation can narrow the gap. Below is a breakdown of specific installation variables for a standard 16x32 foot pool in 2026.
| Installation Variable | Fiberglass Pool Cost | Concrete Pool Cost |
|---|---|---|
| Crane Rental & Rigging | $1,800 - $3,500 | $0 |
| Excavation & Dirt Hauling | $3,500 - $5,500 | $5,500 - $8,500 |
| Backfill Material (Stone vs. Dirt) | $2,500 - $4,000 (Clean Stone) | $500 - $1,200 (Native Soil) |
| Steel Rebar & Gunite Application | $0 | $12,000 - $18,000 |
| Interior Finish (Plaster vs. Gelcoat) | $0 (Included in shell) | $5,500 - $11,000 |
Plumbing, Coping, and Deck Integration
The way the pool connects to the surrounding hardscape differs significantly. Fiberglass pools feature a manufactured top lip, often called a bullnose or cantilever edge. The concrete deck is typically poured directly over this lip (cantilever deck) or pavers are set using a specialized mastic joint to allow for independent expansion and contraction. If the deck settles, it can pull away from the fiberglass shell, but the shell itself remains intact.
Concrete pools utilize a structural bond beam—the top 12 inches of the pool wall. Coping (stone, brick, or precast concrete) is mortared directly to this bond beam. The decking is then tied into the coping. Because concrete pools and concrete decks share similar thermal expansion rates and structural rigidity, they can be integrated more seamlessly. However, if the underlying soil shifts, the rigid connection can cause the coping to crack or separate from the bond beam, requiring expensive masonry repairs.
Decision Framework: Which Installation Fits Your Site?
Use this practical framework to determine which installation method aligns with your property's physical constraints and your project timeline.
- Choose Fiberglass Installation If: You have wide, unobstructed overhead access for a crane; your backyard soil is highly expansive clay or sandy (where the flexible fiberglass shell can withstand minor ground movement without cracking); and you require a rapid installation timeline to swim within a month.
- Choose Concrete Installation If: Your yard has tight access gates, overhead power lines, or mature trees that block crane access; you require a custom, non-rectangular shape or specific built-in features (like deep tanning ledges or integrated spas) that factory molds cannot accommodate; and you are willing to wait 2 to 3 months for the curing and finishing process.
Ultimately, the choice between fiberglass vs concrete pools is dictated as much by the dirt in your yard and the airspace above it as it is by the water inside it. Evaluating your site's access and soil conditions with a qualified geotechnical or pool engineering perspective will prevent costly mid-project change orders and ensure a structurally sound installation.
Written by
James ThorntonJames Thornton is a construction industry veteran with 25 years of hands-on experience in wood framing, lumber grading, and residential building codes. He started as a framing carpenter in rural Oregon, earned his ICC Residential Building Inspector certification, and eventually became a senior plan reviewer for the City of Portland Bureau of Development Services. James holds a B.S. in Wood Science & Technology from Oregon State University and is a certified lumber grader through the West Coast Lumber Inspection Bureau (WCLIB). He has inspected over 3,000 residential construction sites and authored the city's internal guide on advanced framing techniques (2x6 at 24" O.C.). James lives in Bend, OR, where he builds custom timber-frame cabins and competes in lumberjack sports.
More from James Thornton
View all
Insulation
Best Home Insulation Materials: Complete 2026 Guide
Compare top home insulation materials for 2026. Find R-values, installed costs per square foot, and best uses for fiberglass, spray foam, and mineral wool.
Aug 4, 2026

Sustainable Building
Certify Your Green Building Material for LEED and WELL
Step-by-step guide to certifying a green building material for LEED v5 and WELL v2. Master EPDs, HPDs, and VOC limits for 2026 project specifications.
Aug 4, 2026

Stone & Masonry
Veneer Stacked Stone Panels: Interior Design & Style Showcase
Discover how veneer stacked stone panels transform interiors. Explore modern design profiles, material pairings, and technical installation specs.
Aug 4, 2026