Grout Caulk Selection: Scenario Matching for Tile, Concrete, and Wet Areas
Master grout caulk selection with our scenario guide. Learn when to use rigid grout, flexible silicone, or color-matched caulk for tile and concrete joints.
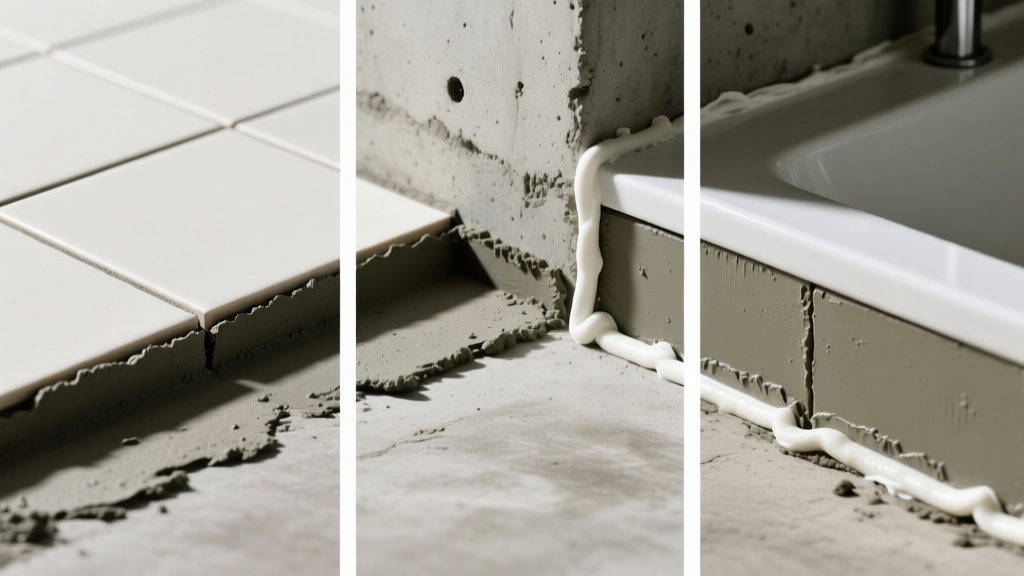
The Core Divergence: Rigidity vs. Flexibility in Joint Management
The fundamental error in tile and concrete installation is treating all gaps as identical voids requiring the same filler. In reality, joint management requires a strict bifurcation between rigid fillers (grout) and flexible sealants (caulk). Understanding the material physics of each is the prerequisite for proper scenario matching.
Cementitious and Epoxy Grouts are designed for compressive strength and structural locking. Cementitious grout (ANSI A118.6) achieves compressive strengths exceeding 2,500 psi but possesses virtually zero elongation capacity (typically less than 1%). Epoxy grouts (ANSI A118.3) offer superior chemical resistance and tensile strength but remain fundamentally rigid. Their purpose is to transfer load between adjacent tiles and prevent edge chipping.
Caulks and Sealants, conversely, are engineered for elongation and adhesion. 100% silicone sealants can elongate 300% to 600% before failure, while polyurethanes offer 400% elongation with higher tear resistance. They do not provide structural support; they provide environmental sealing and accommodate dynamic movement.
The term grout caulk has emerged in the building materials market to describe a hybrid category: flexible acrylic or silicone-based sealants that are factory-pigmented to match specific grout color palettes (e.g., Custom Building Products Polyblend or Laticrete Color-Sil). While aesthetically seamless, these products must be deployed strictly according to movement joint requirements, not merely as a substitute for difficult grout application.
Scenario Matching Matrix: Where to Apply Grout, Caulk, or Grout Caulk
The Tile Council of North America (TCNA) and the American Concrete Institute (ACI) mandate specific materials based on the geometric and structural nature of the joint. Use the following matrix to dictate material selection on the job site.
| Joint Location / Scenario | Required Material | Technical Rationale |
|---|---|---|
| Tile Field (Wall-to-Wall, Floor-to-Floor) | Cementitious or Epoxy Grout | Requires compressive strength to lock tiles; planes move uniformly. |
| Inside Corners (Wall-to-Floor, Wall-to-Wall) | 100% Silicone or Grout Caulk (Silicone) | Planes move independently; requires elongation to prevent fracture. |
| Shower Pan to Wall Transition | 100% Silicone (Mildew-Resistant) | Constant water exposure and high structural deflection; acrylics will fail. |
| Countertop to Backsplash | Color-Matched Acrylic or Silicone | Countertops deflect under live loads; backsplash remains static. |
| Concrete Slab Expansion Joints | Polyurethane Sealant + Backer Rod | High thermal expansion; requires deep, flexible, UV-resistant seal. |
| Tile Perimeter (Against Drywall/Casing) | Acrylic Latex Caulk or Grout Caulk | Aesthetic finish required; low moisture exposure; paintability needed. |
Failure Mode Analysis: Why Grout Cracks at Changes of Plane
When cementitious grout is erroneously applied to an inside corner (a change of plane), failure is not a possibility; it is a mathematical certainty. The physics of this failure operate on two axes:
- Thermal Expansion: A 10-foot tiled wall and a 10-foot tiled floor will expand and contract at different rates due to variations in ambient temperature, direct sunlight, and substrate moisture. Because they are framed on independent joist and stud systems, their movement vectors are perpendicular.
- Live Load Deflection: When a 250 lb load steps onto a floor, the floor joists deflect downward. The wall studs do not. This creates a shearing force at the wall-to-floor intersection.
When rigid grout fractures at a change of plane, it creates a micro-fissure (often less than 1/32nd of an inch). In wet areas, water infiltrates this fissure, becoming trapped behind the tile assembly. This leads to efflorescence (mineral deposits pushed to the surface) and creates an anaerobic environment ideal for black mold growth beneath the waterproofing membrane. Never use cementitious grout in inside corners of wet areas.
Deep Dive: Selecting the Right 'Grout Caulk' Chemistry
Not all color-matched grout caulks are chemically identical. The binder chemistry dictates the application scenario. In 2026, the market is dominated by three distinct chemistries for color-matched sealants:
1. Acrylic Latex with Silicone Additives
Products like standard sanded ceramic tile caulk fall into this category. They are water-cleanup, paintable, and contain a sanded aggregate to mimic the texture of cementitious grout. Limitation: They shrink upon curing and degrade rapidly under standing water or constant UV exposure. Use Case: Dry-area perimeter joints, kitchen backsplashes, and baseboard transitions.
2. 100% Silicone (Color-Matched)
Premium lines (such as Laticrete Latasil or custom-colored silicone from specialized suppliers) offer pure siloxane chemistry. They do not shrink, possess extreme elongation, and are entirely impervious to water. Limitation: They cannot be painted, require solvent cleanup (denatured alcohol or mineral spirits), and the sanded variants can feel slightly rubbery compared to true cement. Use Case: Shower pans, steam rooms, bathtub surrounds, and exterior wet-area transitions.
3. Polyurethane / MS Polymer Hybrids
Often used in commercial concrete and heavy-duty tile installations, MS (Modified Silane) polymers offer the adhesion of polyurethane with the UV stability of silicone. Use Case: Exterior concrete patios, commercial kitchen floors, and heavy-traffic expansion joints.
Concrete Expansion Joints vs. Tile Movement Joints
It is critical to differentiate between tile movement joints and structural concrete expansion joints. The term 'grout caulk' is never applicable to structural concrete.
For concrete slabs, control joints and expansion joints must accommodate massive volumetric changes. According to guidelines published by the National Tile Contractors Association (NTCA) and ACI standards, concrete joints wider than 1/4 inch require a two-part sealing system:
- Closed-Cell Backer Rod: A foam rope inserted into the joint to control the depth of the sealant. This prevents 'three-sided adhesion' (where the sealant sticks to the bottom and both sides of the joint, restricting its ability to stretch).
- Polyurethane Sealant: A self-leveling or non-sag polyurethane (e.g., SikaFlex-1A) applied over the backer rod. The ideal depth-to-width ratio for concrete joints is 1:2 (e.g., a 1/2 inch wide joint should be filled to a depth of 1/4 inch).
Attempting to fill a concrete expansion joint with an acrylic 'grout caulk' will result in immediate cohesive failure, as the material lacks the tear strength to withstand the thermal cycling of a concrete slab.
Step-by-Step Protocol: Applying Color-Matched Grout Caulk
Achieving a crisp, professional finish with sanded grout caulk requires a specific methodology. Unlike cementitious grout, which is forced into a joint with a float, caulk relies on surface tension and tooling.
- Substrate Preparation: The joint must be entirely free of dust, thinset mortar, and moisture. Use a vacuum and wipe the joint with denatured alcohol. Any residual thinset in the corner will act as a bond-breaker for the caulk.
- Masking: Apply high-quality painter's tape (e.g., FrogTape) exactly 1/16th of an inch away from the joint edge on both planes. This ensures a perfectly straight edge and prevents smearing on textured tiles.
- Application: Cut the caulk tube nozzle at a 45-degree angle. The opening should be slightly smaller than the joint width. Apply a continuous, steady bead, ensuring the material makes contact with both planes.
- Tooling the Joint: Do not use a wet finger to tool sanded grout caulk; the friction will pull the aggregate out of the binder, leaving a rough, pitted finish. Instead, use a specialized silicone shaping tool or a plastic spoon. For pure silicone, lightly mist the tool with a 50/50 mix of water and dish soap or denatured alcohol to create a frictionless glide.
- Tape Removal: Pull the tape away at a 45-degree angle immediately after tooling, before the material begins to skin over (usually within 5 to 10 minutes).
2026 Material Cost & Yield Breakdown
Budgeting for joint management requires understanding the cost-per-linear-foot differences between traditional grouts and specialized sealants. The following table reflects average retail and contractor pricing for 2026.
| Material Type | Packaging | Average Cost | Approximate Yield |
|---|---|---|---|
| Standard Cementitious Grout (Sanded) | 25 lb Bag | $22.00 - $28.00 | 100 - 150 sq ft (1/8' joints) |
| Premium Epoxy Grout | 2 Gallon Kit | $95.00 - $130.00 | 60 - 90 sq ft (1/8' joints) |
| Acrylic Latex Grout Caulk (Sanded) | 10.5 oz Tube | $7.50 - $10.00 | 30 linear ft (1/4' bead) |
| 100% Silicone Color-Matched | 10.1 oz Cartridge | $12.00 - $18.00 | 25 linear ft (1/4' bead) |
| Polyurethane Concrete Sealant | 10.1 oz Cartridge | $11.00 - $16.00 | 12 linear ft (1/2' x 1/4' depth) |
While color-matched silicone grout caulk is significantly more expensive per linear foot than cementitious grout, the cost of replacing cracked grout, remediating mold, and re-waterproofing a failed shower pan exponentially outweighs the initial material premium. Specify 100% silicone for all wet-area changes of plane, and reserve acrylic grout caulks strictly for dry, low-movement perimeter transitions.