Exposed Aggregate vs Stamped Concrete: Installation Guide & Costs
Compare exposed aggregate vs stamped concrete for your patio or driveway. Expert installation steps, mix designs, sealing, and 2026 cost breakdowns.

The Core Difference: Surface Treatment vs. Surface Replacement
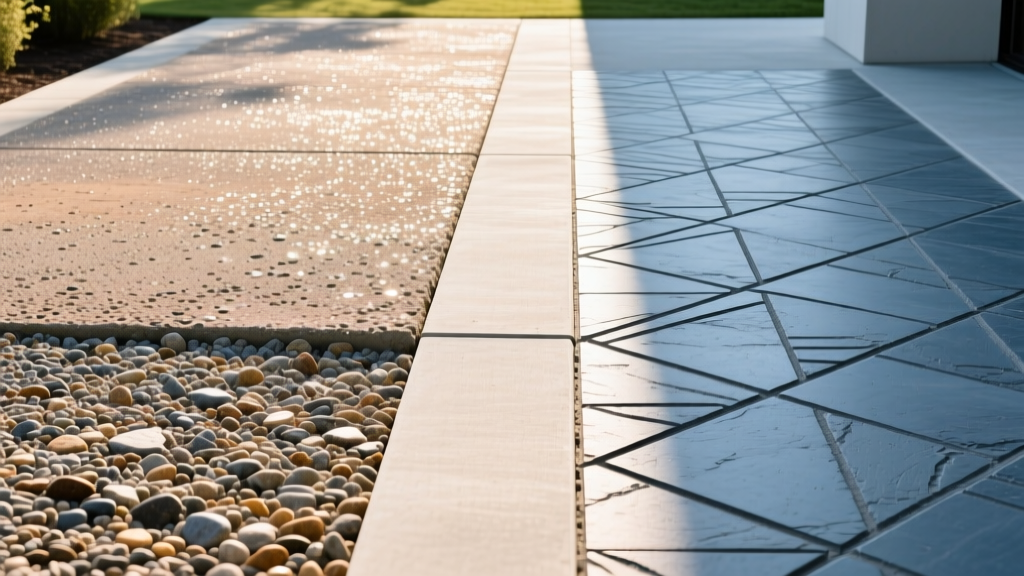
When evaluating exposed aggregate vs stamped concrete, contractors and homeowners are fundamentally choosing between two distinct surface manipulation techniques. Exposed aggregate relies on washing away the top layer of cement paste to reveal the natural beauty of the underlying stone (usually 3/8-inch pea gravel). Stamped concrete, conversely, involves pressing polyurethane mats into the surface of freshly placed, color-treated concrete to mimic materials like slate, brick, or natural stone.
From an installation perspective, exposed aggregate is a subtractive process, while stamped concrete is an additive and formative process. Both require a minimum 4,000 psi compressive strength base and proper subgrade compaction, but their placement windows, chemical treatments, and finishing timelines diverge sharply.
Installation Decision Matrix: Which Finish Fits Your Site?
Before ordering ready-mix, evaluate your site conditions against this technical matrix to determine the most viable installation method.
| Site Variable | Exposed Aggregate | Stamped Concrete |
|---|---|---|
| Slope / Grade | Excellent for steep driveways (high slip resistance) | Poor for steep grades (stamps can slip, color hardener washes off) |
| Climate (Freeze-Thaw) | Requires strict 5-7% air entrainment; prone to pop-outs if poorly mixed | Highly durable if sealed correctly; de-icing salts will destroy the sealer |
| Installation Window | Forgiving (washing can occur 12-24 hours post-placement) | Extremely tight (stamping must occur within a 1-2 hour window) |
| Labor Skill Required | Moderate (relies heavily on ready-mix consistency and washing technique) | High (requires artistic detailing, mat alignment, and color blending) |
Exposed Aggregate Installation Protocol
Mix Design & Placement
The success of exposed aggregate hinges entirely on the ready-mix design. Specify a 4,000 psi mix with a maximum aggregate size of 3/8-inch (pea gravel) or 1/2-inch for a coarser look. The slump should be strictly controlled between 4 and 5 inches. According to the National Ready Mixed Concrete Association (NRMCA), maintaining a consistent slump is critical; if the truck adds water on-site to increase workability, the aggregate will sink, making it impossible to expose evenly.
Place and strike off the concrete using a vibratory screed. Do not overwork the surface with a bull float, as this pushes the aggregate too deep into the paste.
Washing & Exposing the Aggregate
Once the concrete has taken its initial set (usually when it can support a person's weight on knee boards without sinking more than 1/4 inch), apply a chemical surface retarder. Products like Sika® Separol® or Butterfield Color® Surface Retarder delay the hydration of the top 1/8 inch of cement paste.
Pro Tip: Apply the retarder using a pump-up garden sprayer at a rate of 200-300 square feet per gallon. Do not let the retarder dry on the surface; it must remain wet until you are ready to wash.
Washing typically occurs 12 to 24 hours after placement, depending on ambient temperature. Use a pressure washer with a 1500 to 2000 PSI rating and a 25-degree fan tip. Keep the wand at least 12 inches from the surface to avoid blasting the aggregate out of the matrix.
Curing & Sealing
After washing, the slab must cure for a minimum of 28 days before sealing. For exposed aggregate, use a water-based acrylic sealer (e.g., SureCrete DS-18 or Prosoco SureKlean). Water-based sealers penetrate the porous surface without creating a slippery, high-gloss film on the stones, preserving the natural slip resistance of the finish.
Stamped Concrete Installation Protocol
Base Prep & Color Integration
Stamped concrete requires a 4,000 psi mix with a 4-inch slump. Fiber mesh reinforcement is highly recommended to control plastic shrinkage cracking, which is highly visible in stamped patterns. Color is typically introduced via broadcast color hardener rather than integral color, as hardener yields a denser, more durable surface.
Broadcast the color hardener in two passes. The first pass requires approximately 60 lbs per 100 square feet. Hand-float the hardener into the surface, then apply the second pass (approx. 30 lbs per 100 sq ft) to ensure uniform color saturation. The Portland Cement Association (PCA) emphasizes that dry-shake hardeners must be floated, not troweled, to avoid trapping water beneath the crust.
Stamping Execution
Before stamping, broadcast an antique release agent (powder or liquid) to prevent the polyurethane mats from sticking to the concrete. The stamping window is incredibly tight. Perform the 'thumbprint test': press your thumb into the concrete. If it leaves an imprint about 1/4 inch deep and pulls out clean, it is ready to stamp.
Critical Warning: Never stamp concrete that is too wet. If the mats sink deeper than 1/4 inch, the release agent will be pushed into the joints, and the concrete will squeeze up through the mat seams, ruining the pattern definition and requiring extensive hand-detailing to fix.
Use rigid mats for the field and flexible 'floppy' mats near edges and walls. Align the mats carefully to avoid 'double stamping' (overlapping lines), which instantly reveals the installation as artificial.
Detailing & Sealing
Wait 24 hours, then wash off the excess release agent with a pressure washer, leaving about 20% of the release in the low points to create an antiqued, natural stone look. After 28 days of curing, seal with a solvent-based acrylic sealer. Solvent-based sealers 'wet out' the colors, providing the rich, dark look expected of stamped concrete. Always mix an anti-slip additive (like SureGrip) into the final sealer coat, as solvent sealers become dangerously slick when wet.
2026 Cost & Maintenance Breakdown
When comparing exposed aggregate vs stamped concrete, budget is often the deciding factor. The following data reflects average 2026 installed costs for a standard 500-square-foot residential patio, assuming standard subgrade preparation and a 4-inch slab thickness.
| Cost Factor | Exposed Aggregate | Stamped Concrete |
|---|---|---|
| Material & Ready-Mix | $4.50 - $6.00 / sq ft | $5.50 - $7.50 / sq ft (includes color & release) |
| Labor & Finishing | $5.00 - $8.00 / sq ft | $8.00 - $13.00 / sq ft (highly skill-dependent) |
| Sealing & Detailing | $1.00 - $1.50 / sq ft | $1.50 - $2.50 / sq ft |
| Total Installed Cost | $10.50 - $15.50 / sq ft | $15.00 - $23.00 / sq ft |
| Resealing Frequency | Every 3-4 years | Every 2-3 years (high traffic areas) |
Critical Failure Modes & How to Avoid Them
As noted by experts in Concrete Construction Magazine, decorative concrete failures are rarely structural; they are almost always aesthetic and tied to poor installation practices.
Exposed Aggregate: Aggregate Pop-Outs
The Problem: Stones loosen and fall out of the matrix within the first year, leaving ugly craters.
The Cause: Over-washing during the exposure phase, or using a mix with too much sand and not enough cement paste to bind the aggregate.
The Fix: Strictly monitor the pressure washer PSI during washing. Ensure the ready-mix supplier guarantees a minimum 564 lb/yd³ cementitious content for the exposed mix.
Stamped Concrete: Flaking and Delamination
The Problem: The colored top layer flakes off, revealing the gray concrete beneath.
The Cause: Troweling the color hardener when the surface was too wet, trapping bleed water under the hardener crust.
The Fix: Patience. Wait for all bleed water to evaporate before broadcasting the first pass of color hardener. Never trowel the surface to dry it out.
Both Finishes: Efflorescence
The Problem: A white, powdery residue appears on the surface after sealing.
The Cause: Sealing the slab before it has fully outgassed, or sealing over a damp slab, trapping moisture and soluble salts inside.
The Fix: Use a moisture meter to ensure the slab's internal moisture is below 4% before applying any sealer. If efflorescence occurs, strip the sealer with a chemical stripper, clean the slab with a mild muriatic acid solution, and reseal only when bone dry.
Written by
David NakamuraDavid Nakamura is a licensed architect (AIA) and construction technology writer focused on sustainable building methods, mass timber engineering, and high-performance building envelopes. He holds a Master of Architecture from the University of Washington and is a certified Passive House Consultant (CPHC). David spent eight years at the Seattle firm Mithun, where he led the design of three LEED Platinum projects, before founding his own practice specializing in net-zero residential design. He serves on the editorial advisory board of GreenBuilder Magazine and has authored peer-reviewed papers on cross-laminated timber (CLT) connections for the Journal of Structural Engineering. In his spare time, David teaches woodworking at Pratt Fine Arts Center and kayaks the Puget Sound.
More from David Nakamura
View all
Construction Cost
Labor Cost to Build a Deck Per Sq Ft: 2026 Installation Guide
Discover the exact labor cost to build a deck per sq ft in 2026. This installation guide breaks down contractor rates, complexity factors, and hidden fees.
Aug 4, 2026

Construction Cost
How Much Does It Cost to Build a 3 Bedroom House? Financing Guide
Learn exactly how much it costs to build a 3 bedroom house and explore 2026 financing options, construction loan types, and budget frameworks for your build.
Aug 4, 2026

Construction Cost
Cost to Build a Tennis Court: 2026 Guide
How much does it cost to build a tennis court in 2026? Breakdowns for asphalt, concrete, and synthetic surfaces plus fencing and lighting.
Jul 30, 2026