How to Mix and Pour a Concrete Bag for Structural Footings
Learn the exact mixing ratios, pouring techniques, and curing timelines to turn a standard concrete bag into a high-strength structural footing.
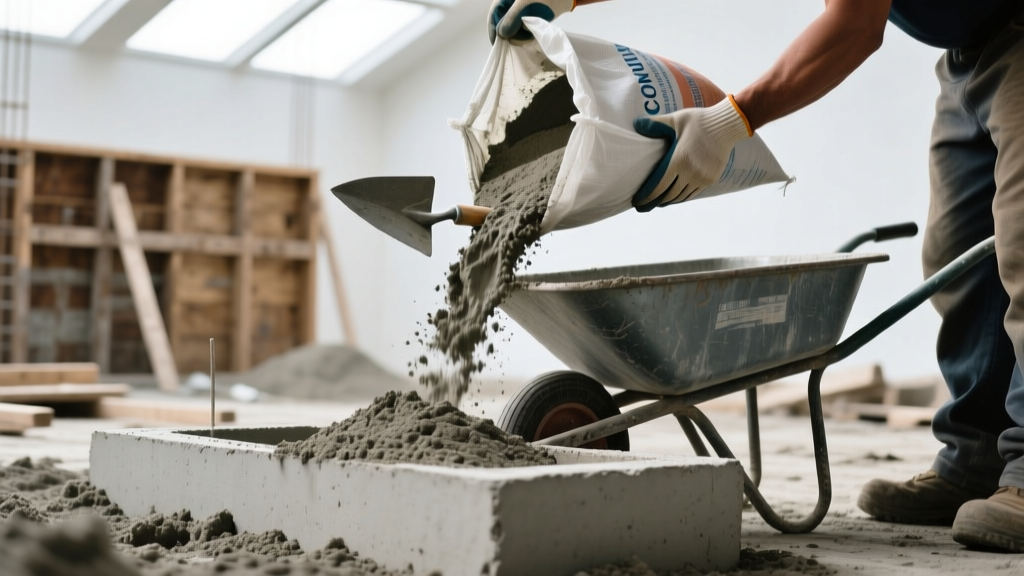
Selecting the Right Concrete Bag for Structural Loads
Not all bagged concrete is engineered for structural applications. When pouring footings for decks, pergolas, or structural retaining walls, the compressive strength and aggregate gradation of the mix are non-negotiable. Standard 'sand mix' or 'fencing post concrete' lacks the coarse aggregate required to achieve the 3,000 to 5,000 PSI compressive strength necessary for load-bearing footings.
For structural footings, specify a high-strength concrete mix conforming to ASTM C150 (Portland Cement) and ASTM C33 (Concrete Aggregates). Leading products in this category include:
- Quikrete 5000 Concrete Mix: Engineered for 5,000 PSI at 28 days. Features a proprietary blend of high-early-strength cement and optimized aggregate sizing. Ideal for footings requiring rapid load-bearing capacity.
- Sakrete High Strength Concrete Mix: Achieves 4,000 PSI at 28 days. A reliable, widely available alternative with a slightly more forgiving water-demand profile for DIYers.
- Rapid Set Cement All: Reaches 3,000 PSI in just one hour. Best reserved for emergency structural repairs or cold-weather footing pours where standard hydration timelines are compromised by freezing temperatures.
Volume Yield and Hydration Ratios
Miscalculating yield leads to cold joints, while miscalculating water destroys the water-cement (w/c) ratio, directly compromising structural integrity. According to the National Ready Mixed Concrete Association (NRMCA), every 1% increase in water content beyond the design ratio can reduce compressive strength by up to 5%.
| Bag Size | Yield (Cubic Feet) | Water Requirement | Target Slump |
|---|---|---|---|
| 40 lb Bag | 0.30 cu ft | 1.8 - 2.0 Quarts | 3 - 4 inches |
| 60 lb Bag | 0.45 cu ft | 2.5 - 3.0 Quarts | 4 - 5 inches |
| 80 lb Bag | 0.60 cu ft | 3.0 - 3.5 Quarts | 4 - 5 inches |
| 90 lb Bag | 0.67 cu ft | 3.5 - 4.0 Quarts | 4 - 5 inches |
The Mixing Protocol: Avoiding Segregation and Entrainment
Mixing bagged concrete requires more than just spinning a paddle until the powder turns gray. Improper mixing introduces excess entrained air (lowering density) or causes aggregate segregation (weakening the matrix).
Step 1: Equipment Selection
Use a dedicated mud-mixer paddle (designed with a cage to prevent splashing and excessive air whipping) attached to a 1/2-inch heavy-duty drill. Do not use a drywall paddle or a paint mixer. Limit the drill speed to a maximum of 450 RPM. Higher speeds whip microscopic air bubbles into the slurry, artificially increasing volume while drastically reducing final PSI.
Step 2: The Water-First Method
Always add 80% of the required water to the mixing vessel (wheelbarrow or 5-gallon bucket) before introducing the dry concrete bag. This prevents dry pockets of cement from clumping at the bottom of the vessel. Cut the bag cleanly and pour the mix steadily into the water.
Step 3: Mixing and Slaking
Mix for 3 to 4 minutes until the aggregate is uniformly coated and the mix resembles thick oatmeal. Stop mixing and let the batch 'slake' (rest) for 3 to 5 minutes. This resting period is critical: it allows the Portland cement to begin its initial hydration reaction and gives any superplasticizers in the mix time to fully activate and disperse.
Step 4: Slump Adjustment
After slaking, remix for 1 minute. Check the consistency. For structural footings, you want a 4 to 5-inch slump. If the mix is too stiff, add water in increments of no more than 1/2 cup at a time. If it is too soupy, you must discard it or add a proportional amount of dry mix; you cannot 'dry out' a batch by simply adding more powder to an over-watered slurry without ruining the aggregate-to-cement ratio.
Pouring and Consolidation: Eliminating Honeycombs
Pouring concrete into a deep footing form or sonotube introduces the risk of 'honeycombing'—voids left in the matrix where mortar failed to fill the spaces between coarse aggregates. Honeycombing exposes the internal rebar to moisture, accelerating corrosion and structural failure.
- Drop Height Limitation: Do not drop concrete more than 4 feet into a form. Free-falling concrete causes the heavier coarse aggregate to separate from the cement paste. For deep sonotubes, use a tremie pipe or a makeshift PVC chute to guide the mix to the bottom.
- Layering (Lifts): Pour the footing in 12-inch to 18-inch lifts (layers). Do not fill a 4-foot deep form in a single pass.
- Mechanical Consolidation: After each lift, consolidate the mix. For DIY or small prosumer jobs, use a 1/2-inch steel rebar rod to 'puddle' the mix. Thrust the rebar rapidly up and down every 6 inches across the form to release trapped air bubbles. For professional applications, use an internal pencil vibrator (1-inch diameter, 10,000 VPM) inserted vertically and withdrawn slowly.
Curing Mechanics: The Most Skipped Step
Concrete does not 'dry'; it cures through a chemical reaction called hydration. If moisture escapes the footing too quickly, the hydration process halts, resulting in a weak, dusty surface and internal micro-cracking.
The 28-Day Hydration Timeline
- 0-24 Hours (Initial/Final Set): The concrete transitions from a plastic state to a rigid solid. Keep forms in place and protect from rain, wind, and freezing temperatures.
- 1-7 Days (Rapid Strength Gain): The concrete achieves roughly 65% to 70% of its design strength. This is the most critical window for moisture retention.
- 7-28 Days (Maturation): Strength gain slows but continues. The concrete reaches its specified design strength (e.g., 5,000 PSI) at day 28.
Field Curing Methods for Footings
Once the concrete has achieved final set (usually 4-8 hours depending on ambient temperature), implement a curing strategy:
- Polyethylene Sheeting: Cover the exposed top of the footing with 6-mil black or clear poly sheeting, sealed at the edges. This traps the internal bleed water, creating a self-curing environment.
- Liquid Curing Compounds: Spray a ASTM C309-compliant membrane-forming curing compound over the exposed surface. This is ideal for complex formwork where sheeting is difficult to secure.
Troubleshooting Common Bagged Concrete Failures
Even with precise measurements, field conditions can alter the outcome of your pour. Use this diagnostic matrix to identify and correct common footing failures.
| Symptom | Root Cause | Corrective Action / Prevention |
|---|---|---|
| Surface Dusting / Chalking | Over-troweling while bleed water is present, or troweling dry cement powder onto the surface to absorb water. | Stop finishing when bleed water appears. Allow it to evaporate naturally. If surface is ruined, grind and apply a chemical densifier (sodium silicate). |
| Plastic Shrinkage Cracks | Surface evaporation rate exceeds the bleeding rate due to high wind, low humidity, or high heat. | Apply an evaporation retardant (e.g., Confilm) immediately after screeding. Erect windbreaks and mist the surrounding air (not the concrete). |
| Honeycombing (Exposed Rock) | Insufficient consolidation; mix was too stiff (low slump); formwork leaked mortar. | Patch with a polymer-modified structural repair mortar (e.g., SikaTop Patch). Ensure 4-inch minimum slump and proper rodding on future pours. |
| Delayed Setting (No strength at 24h) | Excess water added during mixing; ambient temperatures dropped below 40°F (4°C). | Insulate forms with rigid foam or thermal blankets. Use accelerating admixtures or hot water (max 140°F) for mixing in cold weather. |
Mastering the application of bagged concrete requires treating it with the same respect as ready-mix truck deliveries. By strictly controlling the water-cement ratio, mechanically consolidating the lifts, and enforcing a rigorous curing protocol, a standard concrete bag will yield structural footings capable of supporting massive loads for decades.