How to Remove Dried Concrete Glue: Cleaning Playbook
Master the removal of dried concrete glue from floors, walls, and tools with this step-by-step chemical and mechanical cleaning playbook.
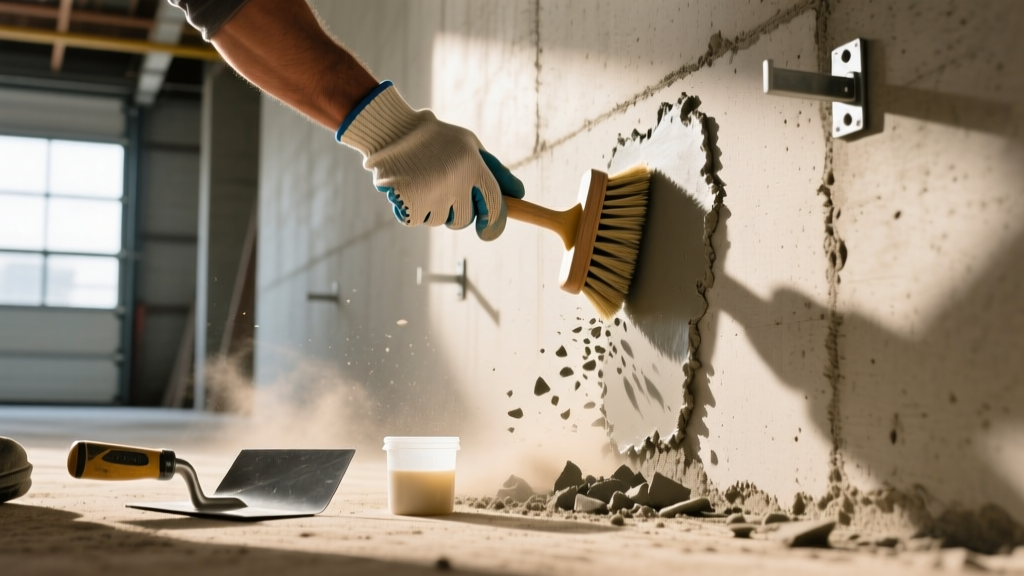
The Chemistry of Cured Masonry Adhesives
Removing dried concrete glue requires an understanding of its chemical composition. Modern masonry adhesives generally fall into three categories, each presenting unique removal challenges:
- Polyurethane-Based (e.g., Loctite PL Premium 3X): These cure via a moisture reaction, forming a highly cross-linked, water-insoluble elastomer. They are incredibly tenacious and expand slightly as they cure, locking into concrete pores.
- Epoxy-Based: Forming a rigid thermoset plastic, epoxies are virtually immune to standard solvents once fully cured. They require extreme heat or specialized chemical softeners to break down.
- Acrylic Latex: Often used for lighter masonry bonding, these remain slightly thermoplastic but are highly resistant to the alkaline environment of bare concrete.
Because these adhesives are engineered to withstand freeze-thaw cycles, UV exposure, and hydrostatic pressure, standard household cleaners will not dissolve them. A successful removal strategy must combine mechanical reduction with targeted chemical softening.
Method Selection Matrix: Mechanical vs. Chemical vs. Thermal
Before applying any treatment, evaluate the substrate condition and the volume of adhesive. Use the following matrix to select your primary removal method.
| Method | Best Application | Estimated Cost | Pros & Cons |
|---|---|---|---|
| Mechanical (Carbide scrapers, diamond cup wheels) | Large floor areas, thick adhesive beads, unsealed concrete. | $15 - $150 (tools/blades) | Pros: Fast, no chemical dwell time. Cons: High risk of gouging delicate substrates; creates silica/adhesive dust. |
| Chemical (Soy-gel, benzyl alcohol strippers) | Vertical walls, polished/stained concrete, delicate surfaces. | $20 - $45 per gallon | Pros: Preserves substrate integrity; low VOC. Cons: Requires 4-12 hour dwell times; messy cleanup. |
| Thermal (Heat guns, infrared softeners) | Acrylic latex glues, localized thick blobs. | $40 - $120 (equipment) | Pros: Immediate softening of acrylics. Cons: Toxic fumes if used on polyurethane; fire hazard near combustibles. |
Historically, methylene chloride was the primary active ingredient in heavy-duty adhesive removers. However, due to severe neurotoxic and fatal inhalation risks, OSHA has heavily restricted its use. In 2026, professional playbooks rely on benzyl alcohol, soy ester, or N-methylpyrrolidone (NMP) formulations. While safer, these modern alternatives require longer dwell times and strict adherence to application protocols. Always consult the NIOSH guidelines on solvent exposure and wear a NIOSH-approved organic vapor respirator when working indoors.
The 4-Phase Concrete Glue Removal Playbook
For the most common scenario—removing cured polyurethane or acrylic concrete glue from a concrete slab or masonry wall—follow this sequential playbook.
Phase 1: Bulk Mechanical Reduction
Chemical strippers are ineffective on thick masses of adhesive; they only penetrate the outer 1/16th of an inch. You must reduce the bulk first.
- Equip a 4-inch to 6-inch tungsten carbide floor scraper.
- Hold the handle at a 15- to 20-degree angle to the floor. Angles steeper than 30 degrees will cause the blade to chatter and gouge the concrete.
- Apply firm, downward pressure and push in short, controlled strokes. For vertical walls, use a 1-inch rigid putty knife and a rubber mallet to gently chip away the outer layers.
- Vacuum the debris using a HEPA-filtered shop vac to prevent adhesive dust from settling into adjacent pores.
Phase 2: Chemical Softening and Dissolution
Once the adhesive is reduced to a thin film (less than 1mm thick), apply a methylene chloride-free stripper. Products like SoyGel or Dumond Smart Strip (typically $25–$40 per quart) utilize soy esters and benzyl alcohol to break the polymer chains.
- Apply the gel at a thickness of 1/8 inch using a disposable chip brush. Do not brush it out thin; the gel needs mass to sustain the chemical reaction.
- Critical Step: Immediately cover the applied gel with 2-mil polyethylene sheeting or plastic wrap. This traps the volatile organic compounds (VOCs), prevents the gel from drying out, and forces the active ingredients downward into the concrete pores.
- Allow a dwell time of 4 to 12 hours. Unlike fast-acting toxic strippers, soy-based gels work slowly. For heavily cross-linked polyurethanes, a 24-hour dwell may be necessary.
Phase 3: Agitation and Extraction
- Remove the plastic sheeting. The adhesive should now have the consistency of wet putty or sludge.
- Use a stiff-bristle nylon brush or a plastic scraper to lift the sludge. Never use a wire brush on finished or polished concrete, as it will leave permanent micro-scratches and rust stains.
- Wipe the area with heavy-duty shop towels, discarding them into a sealed metal waste can to prevent spontaneous combustion or lingering VOC odors.
Phase 4: Substrate Neutralization
Soy and benzyl alcohol strippers leave behind an oily residue that will ruin any subsequent coatings, sealers, or paints applied to the concrete.
- Dampen a clean rag with denatured alcohol or acetone.
- Wipe the entire treated area to dissolve and extract the oily film.
- Allow the concrete to off-gas and dry completely for a minimum of 48 hours before applying any new treatments.
Substrate-Specific Considerations
The playbook above must be modified based on the specific finish of your concrete:
- Polished or Stained Concrete: Skip Phase 1 entirely. Aggressive scraping will destroy the polish. Rely solely on chemical dwell times and use plastic putty knives for extraction. Look for products certified by the EPA Safer Choice program to ensure the stripper won't bleach or etch the stain.
- Stamped or Textured Concrete: Scrapers cannot reach the deep valleys of stamped patterns. Apply chemical gel generously, and use a 3000 PSI pressure washer with a 15-degree (yellow) turbo nozzle to blast the softened sludge out of the crevices.
- Painted Concrete: Be aware that any chemical stripper strong enough to dissolve concrete glue will also strip the underlying masonry paint. Plan for a full repaint of the affected zone.
Tool Rehabilitation: Salvaging Trowels and Mixing Paddles
Cured concrete glue on steel finishing trowels and mortar mixing paddles can ruin the tool's balance and finish. Do not attempt to burn polyurethane glue off with a torch; it will release highly toxic hydrogen cyanide and isocyanate gases.
For Steel Trowels: Clamp the trowel in a bench vise. Use a cold chisel and a ball-peen hammer to mechanically sheer the adhesive off the steel. Follow up with a 120-grit flap disc on an angle grinder to restore the smooth finish.
For Mixing Paddles: If the glue is acrylic latex, submerge the paddle in a bucket of hot white vinegar (heated to 140°F) for two hours. The mild acetic acid will soften the acrylic enough to be scraped off with a wooden stick, preserving the paddle's steel coating.
Preventative Protocols for Future Applications
The most effective cleaning playbook is one that prevents the mess entirely. When working with concrete glue in 2026, implement these site-prep standards:
- Tool Coating: Before use, spray mixing paddles and trowels with a silicone-based dry PTFE release agent (e.g., CRC Dry PTFE). This creates a micro-thin barrier that prevents polyurethane and epoxy from bonding to the steel.
- Masking: When gluing masonry veneers or sill plates, apply 2-inch wide heavy-duty painter's tape (like FrogTape Delicate or 3M Scotchblue) to adjacent surfaces. Concrete glue does not adhere well to the crepe paper backing, allowing for instant, clean removal.
- Immediate Wipe-Downs: Keep a rag soaked in mineral spirits on your belt. Polyurethane adhesives remain soluble in mineral spirits for approximately 15 to 20 minutes after extrusion. Wiping a stray bead immediately saves hours of chemical stripping later.
Frequently Asked Questions
Can I use a heat gun to remove concrete glue?
Heat guns (operating around 700°F to 1000°F) are effective for softening acrylic latex masonry adhesives, allowing you to scrape them away while warm. However, applying high heat to polyurethane or epoxy concrete glues will not melt them; instead, it will scorch the polymer, releasing toxic fumes and permanently baking the residue into the concrete pores. Reserve thermal methods strictly for verified acrylic products.
Will acetone dissolve dried concrete glue?
Acetone is an excellent solvent for Do not use harsh solvents like acetone or paint thinner on your skin, as they cause severe dermatitis and increase chemical absorption. Instead, use a waterless pumice-based hand cleaner (like Fast Orange or Goop) combined with warm water and a stiff nail brush. For stubborn polyurethane stains, rubbing the skin with baby oil or mineral oil will slowly break down the elastomer over a few days as the skin naturally exfoliates.How do I remove concrete glue from my skin?