Concrete Slab vs Pavers: Troubleshooting & Repair Guide
Compare concrete slab vs pavers for troubleshooting and repair. Discover failure modes, step-by-step fixes, polyjacking costs, and paver re-sanding tips.

Failure Mode Analysis: Why Hardscapes Break
When evaluating a damaged patio, driveway, or walkway, the repair methodology depends entirely on the structural mechanics of the installed material. A poured concrete slab acts as a monolithic, rigid plane that transfers loads across its entire surface. Interlocking concrete pavers function as a flexible, segmented mat that distributes loads through joint friction and base interlock. Consequently, their failure modes and repair protocols are fundamentally different.
| Material Type | Primary Failure Mode | Secondary Failure Mode | Root Cause |
|---|---|---|---|
| Poured Concrete Slab | Structural Cracking | Spalling / Scaling | Subgrade settlement, freeze-thaw cycling, tensile overload |
| Concrete Pavers | Differential Settlement | Joint Washout / Weeds | Base compaction failure, edge restraint loss, sand erosion |
Troubleshooting Poured Concrete Slabs
Concrete is exceptionally strong in compression but weak in tension. When the subgrade shifts or the slab cures unevenly, tensile stresses exceed the material's capacity, resulting in fractures. The repair approach depends on the crack width and whether the slab has experienced vertical displacement.
Diagnosing Structural vs. Surface Cracks
According to the National Precast Concrete Association, not all cracks indicate structural failure. Identifying the crack profile dictates the repair material:
- Hairline Shrinkage Cracks (<1/8 inch): Occur during the initial curing process due to rapid moisture loss. These are cosmetic and do not compromise load-bearing capacity.
- Structural Settlement Cracks (>1/4 inch): Accompanied by vertical displacement (one side higher than the other). Indicates subgrade washout, clay soil expansion, or tree root intrusion.
- Map Cracking (Craze Cracking): A network of fine, shallow cracks caused by surface shrinkage or over-troweling during installation. Requires surface resurfacing rather than deep injection.
Step-by-Step Slab Repair Protocols
1. Sealing Non-Structural Cracks: For cracks between 1/8 and 1/2 inch with no vertical displacement, clean the fissure with a wire brush and compressed air. Apply a self-leveling polyurethane sealant, such as Sikaflex Self-Leveling Sealant. Polyurethane remains flexible, accommodating future thermal expansion and contraction without tearing, unlike rigid epoxy fillers.
2. Correcting Sunken Slabs (Polyjacking vs. Mudjacking): If a slab section has dropped more than 1/2 inch, surface patching is a temporary band-aid. You must lift the slab. The Concrete Network outlines two primary methods:
- Mudjacking: Pumping a slurry of cement, soil, and water through 1.5-inch drilled holes. It is heavy (approx. 100 lbs per cubic foot) and can cause further subgrade settling over time.
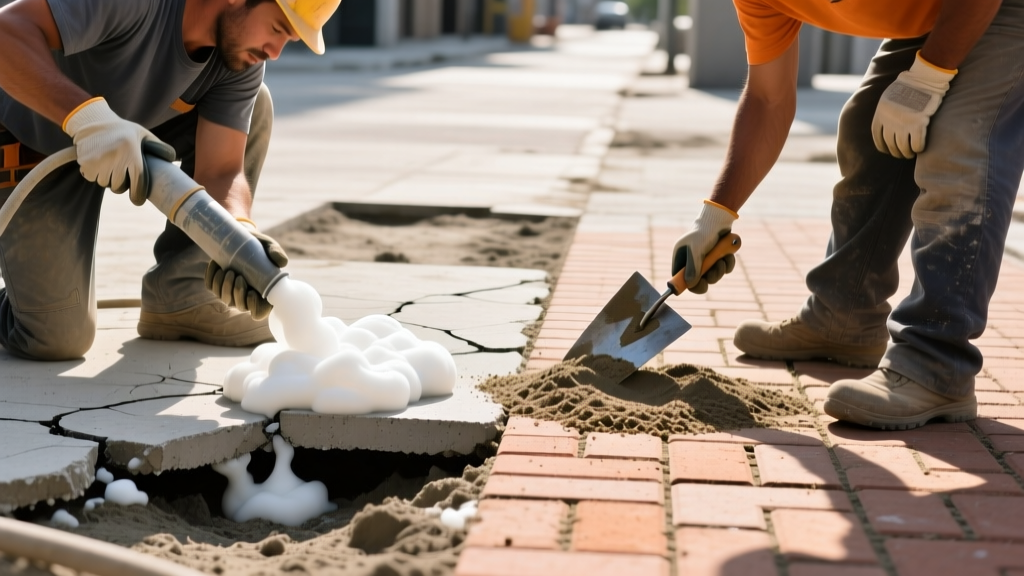
- Polyjacking (Foam Jacking): Injecting high-density polyurethane foam through 5/8-inch holes. The foam expands 20-30 times its liquid volume, lifting the slab with precision. It cures in 15 minutes, weighs only 2-4 lbs per cubic foot, and is impervious to water washout. Polyjacking is the modern standard for 2026 slab remediation.
If a slab is heaving or cracking within 10 feet of a mature tree, polyjacking will fail long-term. The roots will continue to grow and shatter the newly lifted slab. In these scenarios, you must install a root barrier (such as DeepRoot UB 24-2) during the repair, or transition the damaged section to a flexible material like pavers.
Troubleshooting Interlocking Concrete Pavers
Pavers rarely crack under normal loads because the joints absorb kinetic energy and thermal expansion. When paver installations fail, the issue almost always lies in the base preparation, edge restraints, or jointing sand.
Diagnosing Settlement, Heaving, and Weed Intrusion
- Localized Settlement (Potholing): Caused by inadequate base compaction or water pooling beneath the bedding sand. The National Concrete Masonry Association (NCMA) mandates a minimum 95% Standard Proctor density for the aggregate base to prevent this.
- Edge Creep (Spreading): Pavers near the perimeter shift outward, opening joints and allowing weeds. This indicates a failure of the edge restraint system (e.g., plastic edging stakes pulled out of the soil, or concrete curbing cracked).
- Joint Washout: Traditional silica sand erodes during heavy rain or power washing, removing the friction that locks the pavers together and leading to surface undulation.
Paver Restoration and Re-sanding Procedures
Repairing a paver surface is highly modular. Unlike concrete, you can remove and replace individual units without demolition.
- Extract and Inspect: Use two flathead screwdrivers or specialized paver pullers to lift the sunken or heaved pavers. Inspect the bedding sand layer (should be exactly 1 inch thick, uncompacted).
- Base Remediation: If the underlying Class II road base is depressed, remove the wet bedding sand. Add fresh 3/4-inch minus crushed gravel, and compact it using a vibratory plate compactor until flush with the surrounding base.
- Re-lay and Compact: Replace the bedding sand, screed it flat using a 2x4, and re-lay the pavers in their original interlocking pattern. Run the plate compactor over the surface with a polyurethane pad attached to prevent scratching.
- Apply Polymeric Sand: Sweep a high-performance polymeric sand (e.g., Alliance Gator Dust or Techniseal Polymeric Sand) into the joints until they are 1/8 inch below the paver surface. Mist the surface with a fine spray of water to activate the polymer binders. This creates a flexible, water-resistant joint that blocks weeds and ants while allowing slight structural movement.
Cost & Effort Comparison: Slab vs. Paver Repairs
When deciding between repairing an existing hardscape or tearing it out, consider the 2026 market rates for specialized repair services versus full replacement.
| Repair Scenario | Material | Average Cost (per sq. ft.) | DIY Feasibility | Expected Lifespan Post-Repair |
|---|---|---|---|---|
| Crack Sealing | Concrete Slab | $1.50 - $3.00 | High | 3 - 5 Years |
| Polyjacking (Foam Lifting) | Concrete Slab | $8.00 - $15.00 | None (Pro Only) | 10 - 15+ Years |
| Surface Resurfacing (Overlay) | Concrete Slab | $4.00 - $9.00 | Medium | 7 - 10 Years |
| Base Repair & Re-laying | Pavers | $3.00 - $6.00 | High | 20+ Years (Matches original) |
| Polymeric Sand Re-application | Pavers | $1.00 - $2.50 | High | 5 - 8 Years |
| Edge Restraint Replacement | Pavers | $5.00 - $10.00 (linear ft) | Medium | 15+ Years |
The Verdict: Which is Easier to Maintain Long-Term?
From a strict troubleshooting and repair perspective, interlocking concrete pavers offer a distinct advantage in long-term maintainability. Because pavers are a flexible, modular system, localized failures (like a sunken patch from a burst water line or tree root heave) can be fixed by unzipping the surface, repairing the subgrade, and reinstalling the exact same materials. The repair is virtually invisible.
Conversely, a poured concrete slab is a rigid, permanent structure. While minor cracks are easily sealed, significant structural settlement requires invasive polyjacking or complete demolition and repouring. Furthermore, any patch or overlay on a concrete slab will always be visually distinct from the original weathered surface, making seamless aesthetic repairs nearly impossible. If your primary concern is minimizing lifetime repair visibility and accommodating shifting soils, pavers are the superior engineering choice.
Frequently Asked Questions
Can I use polymeric sand on a concrete slab to fill expansion joints?
No. Polymeric sand is designed for rigid interlocking joints between pavers (typically 1/8 to 1/2 inch wide). Concrete expansion joints are much wider (3/4 to 1 inch) and require significant elasticity to handle thermal movement. Use a closed-cell backer rod topped with a self-leveling polyurethane sealant (like Sikaflex) for concrete slab expansion joints.
Why are my pavers turning white, and how do I fix it?
The white powdery substance is efflorescence, caused by water-soluble calcium hydroxide migrating to the surface and reacting with carbon dioxide. It is a natural byproduct of cement hydration. Do not scrub it with water, which drives it back into the pores. Allow it to dry completely and brush it off with a stiff bristle brush, or apply a specialized efflorescence cleaner containing mild phosphoric acid, followed by a breathable penetrating sealer.
Is it cheaper to mudjack a sinking driveway or replace it with pavers?
Mudjacking is cheaper upfront. Mudjacking a 400 sq. ft. driveway section costs roughly $1,200 to $3,200. Replacing that same 400 sq. ft. area with premium concrete pavers, including excavation, base installation, and materials, will cost between $6,000 and $10,000. However, if the subgrade is highly unstable, mudjacking may fail again in 3-5 years, making the higher initial investment in a flexible paver system more cost-effective over a 20-year horizon.
Written by
David NakamuraDavid Nakamura is a licensed architect (AIA) and construction technology writer focused on sustainable building methods, mass timber engineering, and high-performance building envelopes. He holds a Master of Architecture from the University of Washington and is a certified Passive House Consultant (CPHC). David spent eight years at the Seattle firm Mithun, where he led the design of three LEED Platinum projects, before founding his own practice specializing in net-zero residential design. He serves on the editorial advisory board of GreenBuilder Magazine and has authored peer-reviewed papers on cross-laminated timber (CLT) connections for the Journal of Structural Engineering. In his spare time, David teaches woodworking at Pratt Fine Arts Center and kayaks the Puget Sound.
More from David Nakamura
View all
Construction Cost
Labor Cost to Build a Deck Per Sq Ft: 2026 Installation Guide
Discover the exact labor cost to build a deck per sq ft in 2026. This installation guide breaks down contractor rates, complexity factors, and hidden fees.
Aug 4, 2026

Construction Cost
How Much Does It Cost to Build a 3 Bedroom House? Financing Guide
Learn exactly how much it costs to build a 3 bedroom house and explore 2026 financing options, construction loan types, and budget frameworks for your build.
Aug 4, 2026

Construction Cost
Cost to Build a Tennis Court: 2026 Guide
How much does it cost to build a tennis court in 2026? Breakdowns for asphalt, concrete, and synthetic surfaces plus fencing and lighting.
Jul 30, 2026