Expert Guide: How to Apply Roof Cement for Flashing and Leak Repairs
Learn the exact procedures for applying roof cement to seal flashing, patch leaks, and waterproof seams. Includes surface prep, tools, and curing times.
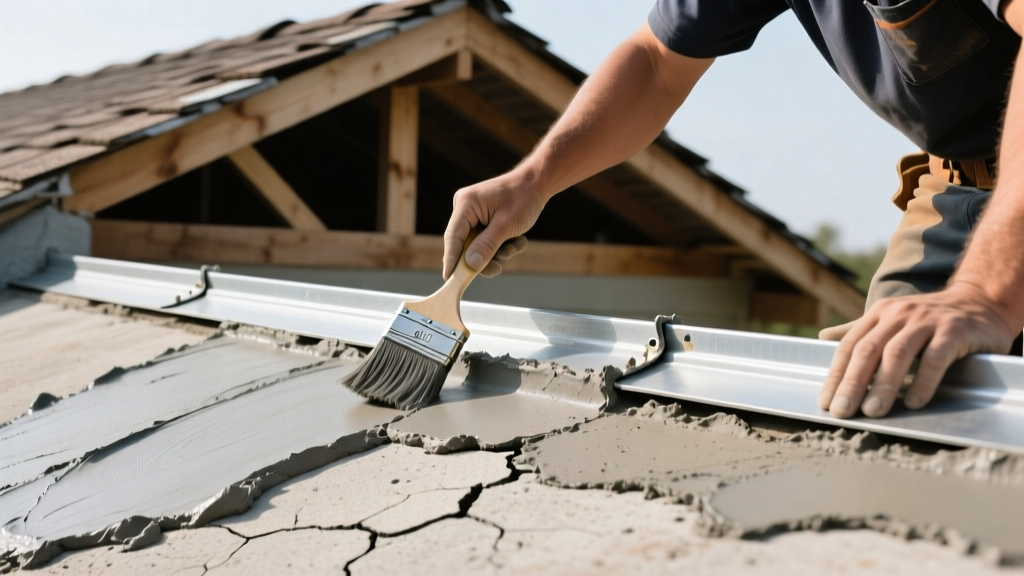
The Material Reality: What Roof Cement Actually Is
Despite the name, roof cement contains zero Portland cement or concrete. It is a petroleum-based, asphalt-bitumen mastic designed to remain permanently pliable. Unlike concrete, which cures into a rigid stone, roof cement relies on solvent evaporation to set into a thick, waterproof, rubberized membrane. Understanding this distinction is critical for installation; because it never fully hardens like concrete, it must be applied in controlled thicknesses and reinforced with fabric to prevent sagging on vertical surfaces or sloped valleys.
According to the Asphalt Roofing Manufacturers Association (ARMA), asphalt-based mastics are the industry standard for sealing penetrations, repairing localized flashing failures, and waterproofing complex transitions on built-up and asphalt shingle roofs. However, improper application is the leading cause of premature patch failure.
Material Selection: Fibered vs. Non-Fibered vs. Wet/Dry
Selecting the correct formulation dictates the longevity of your repair. Modern roof cements are categorized by their internal reinforcement and solvent bases.
| Type | Composition | Best Application | Limitations |
|---|---|---|---|
| Fibered | Asphalt base with fiberglass/cellulose fibers | Vertical flashing, pipe boots, bridging gaps up to 1/4 inch | Too thick for embedding reinforcing mesh; difficult to trowel smooth |
| Non-Fibered | Smooth asphalt base, high solvent content | Embedding polyester mesh, final top-coats, horizontal seams | Will sag on vertical pitches if applied thicker than 1/8 inch |
| Wet/Dry (Rubberized) | Asphalt, rubber polymers, and water-displacing solvents | Emergency active-leak repairs, application in rain or snow | Higher VOC content; longer full-cure time due to trapped moisture |
⚠️ CRITICAL COMPATIBILITY WARNING
Never apply standard asphalt roof cement to EPDM, TPO, or PVC single-ply membranes. The petroleum solvents in the mastic will chemically break down the synthetic rubber and plastics, causing catastrophic membrane failure. For single-ply roofs, you must use manufacturer-specific lap sealants (e.g., EPDM splice adhesive or TPO primer and tape).
Required Tool Kit
Professional application requires specific tools to ensure proper adhesion and thickness control. Do not rely on disposable plastic putty knives.
- Stiff-Blade Roofing Trowel: A 4-inch to 6-inch carbon steel trowel with a stiff spine for forcing mastic into joints.
- Wire Brush & Scraper: For removing oxidized metal, loose granules, and failing previous patches.
- Solvent & Rags: Mineral spirits or specialized asphalt cleaner for final surface degreasing.
- Polyester Reinforcing Mesh: A 4-inch or 6-inch roll of non-woven polyester fabric (e.g., Henry 181 or Karnak 99). Fiberglass mesh is not recommended as it can snap under thermal expansion.
- Heavy-Duty Caulking Gun: Only if using cartridge-based mastic for minor hairline cracks (though trowel-grade is superior for structural sealing).
Surface Preparation: The Determinant of Adhesion
The National Roofing Contractors Association (NRCA) emphasizes that 90% of mastic failures stem from inadequate surface preparation. Roof cement will not adhere to dust, moisture, silicone, or oxidized metal.
- Mechanical Removal: Use a wire brush and scraper to remove all loose roofing granules, rust scale, and peeling old mastic. If repairing a previous failed patch, cut away the blistered edges until you reach firmly adhered material.
- Solvent Wiping: Wipe the entire repair area and a 3-inch perimeter with mineral spirits. This removes invisible oils, tree sap, and asphalt bleed-out. Allow the solvent to flash off completely (usually 5 to 10 minutes).
- Priming (Porous Surfaces Only):strong> If applying to aged, dry concrete or porous masonry parapet walls, brush on a coat of asphalt primer and let it dry to the touch before applying the mastic. Metal and asphalt shingles do not require primer.
Step-by-Step Application Procedure
For a permanent flashing or seam repair, utilize the three-coat embedding method. This creates a composite membrane that moves with the roof's thermal expansion without tearing.
Step 1: The Base Coat
Using your steel trowel, apply a uniform base coat of non-fibered roof cement over the prepared area. The target thickness is exactly 1/8 inch. Extend the base coat at least 2 inches beyond the edges of the crack, seam, or flashing joint you are repairing. Do not over-apply; a base coat thicker than 1/8 inch will trap solvents, leading to prolonged curing and eventual blistering.
Step 2: Mesh Embedment
Immediately lay your 4-inch polyester reinforcing mesh over the wet base coat. Using the flat edge of your trowel, press the mesh firmly into the mastic. You should see the black cement bleed through the weave of the fabric. Ensure there are no wrinkles, fishmouths, or air pockets trapped beneath the mesh. The mesh must be fully encapsulated, not just sitting on top of the cement.
Step 3: The Top Coat and Feathering
Apply a second 1/8-inch layer of roof cement directly over the embedded mesh. Trowel it smooth, ensuring the total combined thickness (base + mesh + top) does not exceed 1/4 inch. Crucially, you must feather the edges. Taper the outer 1 inch of the patch down to zero thickness. A hard, abrupt edge will catch wind and water, leading to peeling. A feathered edge sheds water seamlessly.
Pro Tip: Vertical Flashing Corners
When sealing inside corners (where a parapet wall meets the roof deck), do not just fill the 90-degree angle with a massive glob of cement. This will crack as the building shifts. Instead, use the mesh to create a 2-inch cove (a curved transition) bridging the corner, embedding it in the base coat and covering it with the top coat.
Environmental Constraints and Curing Timelines
Roof cement is highly sensitive to ambient conditions during the application and initial curing phases.
- Temperature: Standard formulations require ambient and surface temperatures above 40°F (4°C). Below this threshold, the mastic becomes too stiff to trowel properly and adhesion is compromised. If you must work in cold weather, keep the buckets in a heated space until immediately before use.
- Moisture: Standard roof cement cannot be applied to wet surfaces. If an active leak requires immediate intervention during a storm, you must use a specialized Wet/Dry rubberized formulation (such as Henry 208 Rubberized Wet Patch), which contains hydrophobic solvents that actively displace water molecules to bond to the substrate.
- Curing Time: Surface skinning occurs in 2 to 4 hours. However, full solvent evaporation and complete cure through a 1/4-inch thickness can take 7 to 14 days, depending on humidity and sunlight exposure. Do not apply reflective aluminum roof coatings over the patch until it has fully cured, or you will trap solvents and cause the coating to blister.
Troubleshooting Common Failure Modes
Even experienced contractors encounter issues if environmental variables shift. Here is how to diagnose and correct the most common roof cement failures.
Alligatoring (Checking)
Symptom: The surface of the cement develops a pattern of small, interconnected cracks resembling alligator skin within a few months of application.
Cause: The mastic was applied too thickly in a single pass without reinforcing mesh, or a fibered mastic was used where a non-fibered embedment coat was required. The surface skins over while the underlying solvents remain trapped, shrinking and cracking the surface as they finally escape.
Fix: Scrape away the alligatored layer down to sound material. Re-apply using the 1/8-inch base, mesh, and 1/8-inch top coat methodology.
Adhesion Loss and Peeling
Symptom: The patch lifts at the edges or detaches entirely from the metal flashing or shingle.
Cause: Failure to degrease the surface with mineral spirits prior to application, or applying over oxidized, chalky metal without a wire-brush prep.
Fix: Remove the failed patch. Aggressively wire-brush the substrate, solvent-wipe, and reapply. For highly oxidized metals, apply an asphalt-compatible metal primer before the base coat.
Sagging on Vertical Pitches
Symptom: The mastic drips or slumps down vertical pipe boots or wall flashing on hot days.
Cause: Using a non-fibered or wet/dry mastic on a vertical plane in high heat. These formulations have lower viscosity when heated by the sun.
Fix: For vertical applications, always use a fibered mastic (e.g., Karnak 19 Ultra). The internal cellulose/fiberglass fibers provide structural body that resists gravity and thermal slumping.
Properly applied roof cement is a highly effective, cost-efficient solution for localized roof maintenance. By respecting the material's chemical properties, enforcing rigorous surface preparation, and utilizing polyester mesh reinforcement, you can execute repairs that withstand decades of thermal cycling and weather exposure. For comprehensive guidelines on asphalt roofing maintenance, consult the Henry Company Product Specifications and manufacturer technical data sheets for your specific mastic formulation.